
Your cart is currently empty!
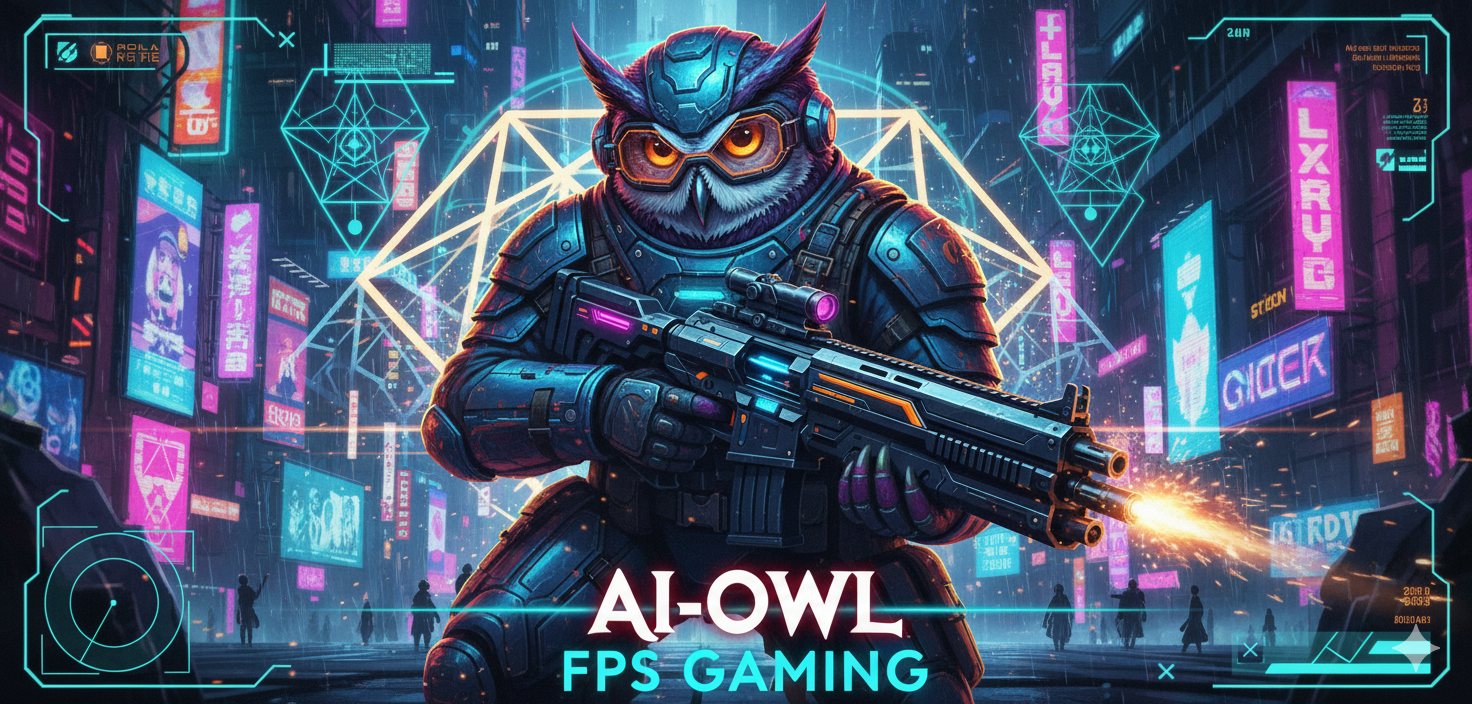
Abyssus: Ultimate Strategy Guide to Builds, Bosses & Weapons 🏆
Introduction: Heed the Call of the Brine 🌊
Abyssus: The air in your sub is… thick. 🤢 It’s all recycled oxygen, hot metal, and that weird, salty smell of brine. Outside the porthole? Nothin’ but crushing, absolute blackness. 😱 You’re a Brinehunter 🦾, a new kind of explorer—part-scavenger, part-soldier. You’re here, at the bottom of the ocean, for one thing: brine, a super rare and powerful substance 💧.
But plot twist! 💥 The mission briefing kinda… forgot to mention the sleepless, corrupted guardians 🦑 wandering these sunken ruins.
Welcome to Abyssus. This isn’t a chill dive. 🚫 It’s a frantic, desperate fight for survival against total abyssal horrors. You’ll fight 💥, you’ll fall 💀, and the depths will claim you. But with every failure, you’ll come back stronger, smarter, and better-equipped. 🦾 That’s the unforgiving, yet super rewarding, loop of a true roguelite adventure. 🔄
This guide is your lifeline. 💡 But it’s not a simple checklist. Lots of guides just tell you what to do. “Use this gun,” “take this perk.” 🙄 This guide is different. We’re here to teach you why. We’ll break down the strategy behind every weapon mod 🔧, every divine blessing 🙏, and every combat move 🏃. We’ll turn you from a simple trigger-puller into a thinking Brinehunter—a tactician 🧠 who can read the battlefield, adapt on the fly, and craft amazing builds that’ll make the old gods themselves go “whoa.” 😮
Abyssus is a unique mix: a 1-to-4 player co-op FPS 🤝 set in a “brinepunk” world, all built on a roguelite foundation. You won’t find complex crafting or clan stuff here. The game’s amazing depth comes from its fast-paced combat 💥, endless build possibilities 🛠️, and the smart choices you make during and between runs. This guide is your map to all of it. So take a deep breath 😮💨, check your gear, and get ready to dive. The abyss awaits. 🦑
Chapter 1: Principles of the Deep – Mastering the Fundamentals 📚
Before you can conquer the abyss, you gotta respect it. 😤 The sunken kingdom plays by brutal rules. Understanding them is step one. This chapter is your basic training on being a Brinehunter, from the core loop 🔄 that defines your journey to the essential combat skills 🏃♂️ that’ll keep you alive.
The Brinehunter’s Creed: Understanding the Loop 🔄
At its heart, Abyssus is a game about cycles. Each trip into the depths is an “Expedition,” a run through a bunch of procedurally sequenced, hand-crafted rooms 🗺️ full of enemies. The core loop is simple, but it’s got layers: Dive, Fight, Upgrade, Die, and Repeat.
- Dive 🤿: You start in your sub hub. You pick your starting weapon 🔫, ability 🦾, and any permanent upgrades you’ve unlocked.
- Fight 💥: You battle through rooms, facing down 36 different enemy types 👾 and four tough bosses. 👹 Combat is fast, chaotic, and you’ve gotta stay aware.
- Upgrade ⬆️: Between fights, you’ll find Altars with divine blessings 🙏, chests with powerful Charms 💎, and merchants 💰. These upgrades are temporary and lost when you die, so you have to build a new strategy every time.
- Die (or Succeed) 💀/🏆: Sooner or later, your run ends. Whether you get overwhelmed or you actually beat the final boss, you’ll head back to the hub.
- Repeat 🔁: Back home, you spend the Soul Fragments 🪙 you collected on permanent upgrades at the Soul Wheel, making you stronger for your next dive.
This loop is how you progress. Every failure is a lesson 🧑🏫, and every lesson makes you tougher. The key is to embrace the roguelite mindset. Don’t fear death! 🚫💀 See it as a chance to invest in your future. Each run is a chance to experiment. 🧪 Try a new weapon! A new blessing combo! The knowledge you gain is just as valuable as the Soul Fragments you collect.
The Art of Movement: The Unspoken Survival Skill 🏃♂️
In the tight, barnacle-covered halls of Abyssus, standing still is a death sentence. ☠️ The single most important skill you’ll learn isn’t how to aim—it’s how to move. The arenas are often small, and enemies will swarm you relentlessly. 🏃♀️💨 Constant, smooth movement is your main defense.
The philosophy is simple: a moving target is harder to hit. You’ve got a powerful dash 💨 and a double jump 👟👟 for a reason—they’re your lifeblood. Mastering them lets you control the fight. The best way to fight is almost always moving backward, or “kiting,” 🏃♀️… 💥 creating distance while you unload your weapon. This stops melee enemies from getting in your face and gives you more time to dodge projectiles.
You also must learn to use the environment. 🏞️ The arenas have multiple levels. Cycling between high and low ground is a critical tactic. High ground gives you a great view 🔭, but you can get cornered. Low ground gives you more room to move 🤸, but you might not be able to see everyone. A master Brinehunter is never static. They’re always flowing, dashing across gaps, double-jumping to dodge attacks 💥 (like the Stone Golem’s shockwave 🗿), and using verticality to stay one step ahead.
One last, crucial note: there is fall damage in Abyssus! 🤕 A long drop will usually cost you about 10 HP, which can easily be the difference between life and death. 💀 Always be mindful of your footing. If a ledge looks sketchy, it probably is. ⚠️
The Solo Hunter’s Handbook: Thriving in Isolation 👤
While Abyssus is built for co-op 🤝, you can totally conquer it as a lone wolf. 🐺 But, going it alone needs a big shift in your thinking. The game’s difficulty scales with the number of players. When you’re solo, you’ll face fewer enemies, and they’ll have less health. 👍 This creates its own set of challenges.
Without teammates to draw aggro or revive you 😇, your margin for error is razor-thin. 😬 One mistake can end a great run. So, the solo Brinehunter’s strategy has to be built on self-sufficiency. You can’t rely on a “tank” or a “healer.” 🚫 You are the tank, the damage dealer, and the support all in one. 🏋️♀️
For your first few solo runs, prioritize survivability above all else. ❤️🩹 When spending your first Soul Fragments, focus on upgrades that help you stay alive. Unlocking extra healing syringes 🧪 (“Bountiful Bottles”) and more max health ❤️ (“Abyssal Stamina”) gives you the buffer you need to learn enemy attacks without being punished for every little slip-up.
During a run, look for Aspects that boost your defenses. The Defense Aspect 🛡️, which builds a shield as you deal damage, is a solo player’s best friend. The Frost Aspect ❄️ is also amazing, slowing or freezing enemies to give you precious breathing room.
Once you’re more confident, you can switch to more aggressive, high-damage builds. 💥 Since you’re the only target, just melting threats before they can even attack is a great defense. The key is to remember that as a solo player, you have to do it all. Your build must reflect that.
Chapter 2: Forging a Legacy – The Soul Wheel & Meta-Progression 📈
The time between dives is just as important as the dives themselves. 🧘 Back in your sub ⚓, you can turn those hard-won lessons from failed runs into permanent, real power. This is meta-progression, and its heart is the Soul Wheel 💫—a map of your potential. Knowing how to use it is the key to turning frustrating defeats into awesome victories. 🏆
The Submarine Hub: Your Base of Operations ⚓
Your sub is more than just transport; it’s your sanctuary and workshop. 🛠️
- To the left: the Wardrobe 👕, where you can change your look.
- Straight ahead: the weapon modification table 🔫, where you equip your unlocked weapon mods.
- To the right: the Deep Water Tank 🌊, your gateway to endgame challenges.
- And in the center: the Soul Wheel 💫, the engine of your long-term growth.
The Soul Wheel: Blueprint for a Legend 💫
The Soul Wheel is the main meta-progression system in Abyssus. During your runs, you’ll collect Soul Fragments 🪙 from bosses, objectives, and treasures. Back at the hub, you invest these fragments 🪙 into the Soul Wheel to unlock permanent upgrades that stick with you forever. 📈
The Soul Wheel’s purpose is twofold:
- Direct Power 💪: Upgrades like “Enhanced Weapons” 💥 and “Abyssal Stamina” ❤️ give you flat % boosts to your damage and health. These are your bread and butter, making every run a little bit easier.
- Consistency & Options 🎲: This is the real power. Many of the best upgrades don’t just give you stats. Instead, they help you manage the randomness of the roguelite. “Picky Worship” 🔄 lets you reroll your Aspect choices at an Altar. “Starting Funds” 💰 gives you a key 🔑 and some gold 🪙 at the start of every run. Upgrades like “Ancient Forge” 🛠️ and “Ascended Blessings” ✨ make powerful upgrade stations show up in your runs.
A successful Brinehunter knows that real power isn’t just about big numbers; it’s about consistently being able to build a powerful loadout from the random stuff the abyss throws at you. The Soul Wheel 💫 is your tool for bending that randomness to your will. 🧘
Strategic Progression Paths: Your First Soul Fragments 🪙
With limited Soul Fragments early on, where you spend them matters. A lot. This path is designed to give you the best bang for your buck, building a solid survival base before getting into the more specialized stuff.
- Priority 1: Foundational Survival ❤️🩹Your very first Soul Fragment should go into Bountiful Bottles 🧪. This gives you one extra healing syringe. The logic is solid: more healing = more mistakes allowed. More mistakes = you survive longer. Surviving longer = you learn faster and get more Soul Fragments. 🪙 It’s the most efficient first upgrade. After that, put a few points into Abyssal Stamina ❤️ to boost your health.
- Priority 2: Core Combat Effectiveness 💥Once you’re not dying quite as much, it’s time to hit harder. Invest in Enhanced Weapons. This is a simple but effective 12% damage boost per level. This raw damage helps you clear rooms faster, meaning you take less damage overall.
- Priority 3: Consistency and Options 🎲With a good base of health and damage, you can now invest in upgrades that make your runs better. Picky Worship 🔄 is a top-tier choice. Being able to reroll bad Aspect choices can single-handedly save a run. After that, get Starting Funds 💰. The guaranteed key 🔑 and 100 gold 🪙 make it way more likely you’ll find a powerful item early on.
- Priority 4: Unlocking Endgame Potential ✨Your long-term goal is unlocking upgrades that add new features. Ancient Forge 🛠️ and Ascended Blessings ✨ are expensive, but they’re essential for higher difficulties. Upgrading your weapon mods and Blessings mid-run is how you get those truly game-breaking builds. Also, unlocking the Temple’s Rest nodes 🏥 will make guaranteed Healing Shrines appear, which is a lifesaver.
By following this path, you build a smart progression: 1) You survive 🩹. 2) You fight good 💪. 3) You get good builds more often 🎲. 4) You unlock your build’s ultimate potential ✨.
Table 2.1: Soul Wheel Upgrade Priority Guide 📈
This table breaks down all the major Soul Wheel upgrades, their costs, and their strategic value.
| Tier | Upgrade Name | Effect | Max Levels | Strategic Priority | Strategic Philosophy |
| 1 | Bountiful Bottles | Increase starting Syringes by +1. | 1 | Essential | The most important first upgrade. More healing 🧪 = longer runs, faster learning, & more Soul Fragments 🪙. |
| 1 | Abyssal Stamina | Increase max Health. | 5 | Essential | A direct and crucial boost to survivability. A bigger health pool ❤️ gives you a bigger margin for error. |
| 1 | Enhanced Weapons | Increase all damage dealt by 12% per level. | 5 | Essential | The most efficient early damage source 💥. Helps you meet damage checks and shorten fights. |
| 1 | Picky Worship | Gain the ability to reroll Aspect choices at Altars. | 3 | High | A powerful consistency tool 🎲. Prevents runs from being doomed by bad RNG at the first Altar. |
| 1 | Keen Vision | Increase weakspot damage. | 5 | High | Crucial for boss fights 🎯 and melting elite enemies. Works great with precision weapons. |
| 2 | Starting Funds | Start each expedition with 100 gold and 1 key. | 1 | High | Guarantees early access to merchants 💰 or locked chests 🔑, boosting your chance of finding a run-defining item. |
| 2 | Ability Abundance | Increase starting Ability ammunition by +1. | 1 | High | More ability uses 🦾 right from the start means more damage, utility, or crowd control. |
| 2 | Ancient Forge | Allows the Ancient Forge 🛠️ to spawn randomly in rooms. | 1 | High | A key to unlocking a build’s full potential by allowing mid-run weapon mod upgrades. Essential for endgame. |
| 2 | Temple’s Rest | A Healing Shrine 🏥 can now be found in the Abandoned Temple. | 1 | Situational | A nice source of extra healing, but less critical than raw power or consistency upgrades early on. |
| 3 | Ascended Blessings | Allows Upgrade Altars ✨ to spawn randomly in rooms. | 1 | High | The ultimate build-enhancer. Upgrading Blessings is how you reach truly god-tier power levels. 🏆 |
Chapter 3: An Ocean of Customization – The Brinehunter’s Arsenal 🔫
In the crushing depths of Abyssus, your weapon is your voice 📣, your shield 🛡️, and your will. The game has an arsenal of eight distinct, brine-powered armaments 🦾. Each one feels different, has a different job, and has a ton of mods that can totally change how it works. Mastering this arsenal isn’t about finding the one “best” gun; it’s about understanding what each one is good (and bad) at and knowing how to customize it for the job ahead. This chapter is your full armory manual. 📖
The Brinepunk Armory: An Overview 🛠️
You’ll start with the reliable Engine Rifle 🔫, but as you explore, you’ll find seven others: the close-quarters Shotgun 💥, the precise Brine Revolver 🎯, the area-denial Disc Launcher 🌀, the explosive Plasma Gun 💣, the tactical Combat Bow 🏹, the chain-lightning Tesla Gun ⚡, and the wonderfully weird Fish Deity 🐟.
Each of these has a primary (LMB) and secondary (RMB) fire mode, and you can unlock a bunch of alternate mods for each slot—45 different weapon mods in total! 🤯 You unlock these mods by completing specific challenges with each weapon. The weapon modification table 🔧 in your sub is where you’ll equip ’em before a dive.
Weapon Deep Dives 🕵️
Here’s a detailed look at every weapon in the Abyssus arsenal.
The Engine Rifle 🔫
- Strategic Role & Feel: This is your starting weapon and a true jack-of-all-trades. It’s your classic assault rifle/machine gun. It’s got a high fire rate 🔥 and a big magazine, making it great for sustained damage and dealing with groups of weaker enemies. It’s super reliable and easy to use.
- How to Unlock: You start with it! 🎉
- Complete Mod Analysis:
- Primary Fire – Gatling: This mod is the core of a high-speed, damage-ramping build. Your fire rate increases the longer you hold the trigger. 📈 This melts big targets or dense groups. It works incredibly well with any on-hit Blessings (like Lightning ⚡ or Spirit 👻) and the Barrier Aspect 🛡️, since the sheer number of bullets will charge your shield almost instantly.
- Secondary Fire – Split Shot: This turns your secondary fire into a wide shotgun-like blast. 💥 It’s not great for single targets, but it’s an amazing tool for applying status effects (like Frost ❄️) to an entire room.
The Shotgun 💥
- Strategic Role & Feel: The undisputed king of close-quarters combat. 👑 It demands you get right up in an enemy’s face, rewarding you with devastating burst damage that can delete most enemies in one shot. Its weakness? Limited range and a tiny magazine.
- How to Unlock: You can find the Shotgun in the room right after the first biome’s mini-boss. After you beat it, search the sides of the next chamber to find it.
- Complete Mod Analysis:
- Primary Fire – Full Automatic: This mod turns the Shotgun into a fully automatic room-sweeper. 💨 This drastically increases its damage-per-second (DPS) against big targets, but it burns through its tiny ammo reserve even faster. ⚠️
- Secondary Fire – Pressure Shot: This mod adds a powerful stun 😵 to your secondary fire. This is a phenomenal utility tool. In a solo run, stunning a dangerous elite can give you the opening you need to reload or reposition.
The Brine Revolver 🎯
- Strategic Role & Feel: This is a weapon for the sharpshooter. 🧐 It’s high-skill, high-reward, and deals immense precision damage, especially to weak spots. Its primary fire is a rapid, unscoped shot for self-defense, while its secondary fire gives you a scope for devastating long-range critical hits.
- How to Unlock: One of the easiest to find! It’s in the very first room of the Abandoned Temple, hidden behind some breakable junk. 📦
- Complete Mod Analysis:
- Primary Fire – Large Caliber: This mod increases the base damage of your unscoped shots, especially against weak spots. 💪 This makes the revolver way better in panic situations up close.
- Secondary Fire – Quick Scope: A game-changing mod for skilled players. ✨ It gives you a huge damage boost to shots fired right after scoping in. Mastering the rhythm of quick-scoping ⚡ can turn this into one of the highest single-shot damage weapons in the game.
The Disc Launcher 🌀
- Strategic Role & Feel: A unique area-denial and crowd-control weapon that fires ricocheting discs. 🥏 It’s awesome at clearing rooms full of enemies by just filling the air with bouncing, damaging projectiles.
- How to Unlock: You’ve gotta defeat the final boss of the Abandoned Temple. 🗿
- Complete Mod Analysis:
- Primary Fire – Fan Fire: This mod makes you fire a horizontal spread of discs. ↔️ This is a key part of some of the most powerful builds in the game.
- Secondary Fire – Search and Destroy: This mod turns your secondary fire into a seeking projectile 🔍 that homes in on the nearest enemy. When you combine this with Fan Fire and the “Fan” charm, you can create a near-infinite, auto-aiming storm of discs. 🌪️
The Plasma Gun 💣
- Strategic Role & Feel: Your go-to for explosive, area-of-effect (AoE) damage. 💥 It launches slow-moving orbs of plasma that detonate on impact, making it ideal for clearing out packed groups and damaging big, slow bosses.
- How to Unlock: To get the Plasma Gun, you have to beat the third main boss (in the Sanctuary) in under one minute. ⏱️ This will unlock a sealed door in the final hub area before the last two bosses.
- Complete Mod Analysis:
- Primary Fire – Rapid Fire: This mod significantly increases the fire rate, turning it into a plasma machine gun. 🔥 This is great for builds that stack on-hit effects, like Blood 🩸 or Spirit 👻.
- Secondary Fire – Pulse/Void Hole: The secondary fire options are awesome for crowd control, creating lingering damage fields or even black holes ⚫ that pull enemies in.
The Combat Bow 🏹
- Strategic Role &Feel: A versatile precision weapon that rewards a more tactical, methodical playstyle. 🧠 You can charge it for high-damage single shots, making it effective for both long-range sniping and mid-range fights.
- How to Unlock: You must defeat the elite guardian of the Sanctuary (the boss with two big, glowing hands 🖐️) in under 30-40 seconds. A fast kill will open a secret door in the next room, where you can grab the bow.
- Complete Mod Analysis:
- Primary Fire – Return Arrow: This mod makes your arrows return to you ↩️ after hitting their target, potentially hitting other enemies on the way back. This effectively doubles your damage! ✌️
- Secondary Fire – Explosion Secondary: This mod makes your secondary fire arrows explode on impact 💥, adding much-needed AoE damage to your kit.
The Tesla Gun ⚡
- Strategic Role & Feel: A unique elemental weapon that specializes in sustained damage and chain-lightning effects. 🌩️ It doesn’t require precise aim, making it a forgiving choice if you struggle with tracking fast-moving targets.
- How to Unlock: The Tesla Gun is found next to the exit portal after you defeat the mini-boss of the second biome, the Gardens. 🌳
- Complete Mod Analysis:
- Primary Fire – Charge Beam: This mod increases the damage the beam deals to weak spots 🎯, making the Tesla Gun much better against bosses.
- Secondary Fire – Magnetic Storm: This is a charged shot that releases a wide storm of lightning 🌩️ across the battlefield. It’s one of the best ways to apply status effects to a ton of enemies at once.
The Fish Deity 🐟
- Strategic Role & Feel: This is the game’s “meme weapon” 😂… that’s secretly one of its most powerful. It’s a melee weapon that launches arcing projectiles of “magical vomit” 🤢, working like a grenade launcher. It’s great at lobbing AoE damage over cover.
- How to Unlock: This is the most complex one. 😵💫 You have to beat three specific “Herald” mini-bosses that spawn randomly in the final biome. This will probably take at least three successful runs. 🔁🔁🔁 Once they’re all defeated, find a secret waterfall in your sub hub ⚓. Behind it is a button that activates a fountain, which will then give you the Fish Deity. ⛲
- Complete Mod Analysis:
- Primary Fire – Squishy Goo: This mod “softens” enemies, making them take more damage from your next hits. This is a powerful debuff!
- Secondary Fire – Glob Shot: This is the weapon’s main damage dealer. Many players find that spamming the secondary fire, often with the Gold Blessing 💰, is incredibly effective.
Table 3.1: Weapon & Mod Master List 📋
Here’s a quick-reference guide to the whole arsenal.
| Weapon Name | Strategic Role | How to Unlock Weapon | Key Mod (Slot) | Mod Effect | How to Unlock Mod |
| Engine Rifle 🔫 | All-Rounder / Sustained DPS | Default Weapon | Gatling (Primary) | Increases fire rate 🔥 the longer you fire. | Kill 15 enemies without reloading. |
| Shotgun 💥 | Close-Quarters Burst Damage | Found after the Abandoned Temple mini-boss. | Pressure Shot (Secondary) | Stuns 😵 enemies with your secondary fire. | Travel 1,000 meters with Buckshot’s knockback. |
| Brine Revolver 🎯 | Precision / Weakspot Damage | Hidden in the first room of the Abandoned Temple. | Quick Scope (Secondary) | Deal ⚡ increased damage if you fire quickly after scoping. | Kill 3 bosses with a weakspot hit while scoped. |
| Disc Launcher 🌀 | Area Denial / Crowd Control | Defeat the final boss of the Abandoned Temple. | Search and Destroy (Secondary) | Secondary fire homes in 🔍 on the nearest enemy. | N/A |
| Plasma Gun 💣 | AoE / Explosive Damage | Defeat the Sanctuary boss in under 1 minute. | N/A | N/A | N/A |
| Combat Bow 🏹 | Tactical / Precision Damage | Defeat the Sanctuary elite in under 40 seconds. | Return Arrow (Primary) | Arrows return ↩️ to you, hitting enemies again. | N/A |
| Tesla Gun ⚡ | Sustained Damage / Chain Effects | Found after the Gardens mini-boss. | Magnetic Storm (Secondary) | Releases a wide storm of lightning 🌩️. | Deal damage to 7 enemies at the same time. |
| Fish Deity 🐟 | AoE / Lobbed Projectiles | Defeat 3 Royal Abyss Heralds & solve the hub puzzle. | Squishy Goo (Primary) | Softens 🤢 enemies, making them take more damage. | N/A |
Chapter 4: Channeling the Abyss – Aspects, Blessings, and Charms ✨
If your weapon is your body 🦾, then the powers you get during a run are your soul. 💖 Abyssus has a deep and flexible in-run upgrade system centered around Altars of Power 🙏. Here, you’ll get Blessings from ten different Aspects—elemental and mystical forces you can channel through your gear. Understanding how to synergize these Blessings with your weapon and the passive Charms 💎 you find is the true art of build-crafting. 🧑🎨
The Altars of Power: The Art of the In-Run Build ⚖️
From time to time, you’ll find an Altar that gives you a choice.
- First, you pick one of two random Aspect categories (like Fire 🔥 or Frost ❄️).
- Once you pick an Aspect, you’re offered two specific Blessings from that category.
- You then choose which of your three attack slots to put that Blessing into: your Primary Fire, your Secondary Fire, or your Ability.
This decision is super important. 🧠 A Blessing’s effectiveness is often tied to the attack that triggers it. For example, a Blessing that builds a defensive barrier 🛡️ on hit is way more effective on a rapid-fire weapon like the Engine Rifle 🔫, since all those bullets will charge the barrier almost instantly. ⚡ Conversely, a Blessing that creates a massive explosion 💥 might be better on a powerful, single-shot secondary fire.
The core of strategic build-crafting is this 3-part equation: Weapon Fire Mode + Aspect Choice + Blessing Slot. You’ve gotta constantly think about how these three things interact.
The Ten Aspects of the Abyss: A Thematic Breakdown 🎨
There are ten distinct Aspects in Abyssus, each with its own theme. Mastering them all is key.
- Fire 🔥: Focused on pure, aggressive damage over time (DoT). Its Blessings ignite enemies, making them burn. 🔥 Great for “fire-and-forget.”
- Lightning ⚡: Excels at AoE and multi-target damage. Its core mechanic is chain lightning 🌩️, which arcs to nearby enemies. One of the best for clearing rooms.
- Frost ❄️: The #1 choice for crowd control. Its Blessings slow and eventually freeze 🥶 enemies solid, leaving them helpless. Invaluable for creating breathing room.
- Defense 🛡️: All about survivability. Its main mechanic is building a personal barrier/shield that’s like an extra health bar.
- Blood 🩸: A high-risk, high-reward playstyle. Its Blessings let you deal damage based on your own max health, often at the cost of sacrificing some health. 😬 Can lead to some of the highest damage in the game!
- Fortune 💰: The game’s economic engine. 📈 Its Blessings increase the gold 🪙 you find and, more importantly, let you scale your damage based on how much gold you’re carrying. 🤑 A rich Brinehunter is a powerful Brinehunter!
- Spirit 👻: A summoner’s dream. Its Blessings create allied spirits that automatically attack your enemies. 👻 They provide a ton of passive damage.
- Ocean 🐙: Similar to Spirit, this Aspect summons allies, but in the form of powerful tentacles that erupt from the ground. They can even provide buffs!
- Night 🌙: The master of debuffs. Its Blessings apply Shadows to enemies, a status that weakens them, making them take increased damage from all sources.
- Wind 💨: Focuses on creating bursts of AoE damage around your attacks or your targets. Great for adding splash damage to single-target weapons. 💥
A Lexicon of Blessings: Unlocking Godlike Power 🌟
The true potential of an Aspect is unlocked when you commit to it. Every 3rd and 6th time you pick a Blessing from the same Aspect in a run, you’ll get a powerful Minor and then a Major Blessing. ✨
These are game-changing upgrades that should be your main goal. 🎯 For example, the Fire Aspect’s Major Blessing, “Linked Flames,” 🔥🔥 makes fire spread between enemies when they die, creating a chain reaction that can clear a whole room. The Lightning Aspect’s “Static Repetition” ⚡⚡ lets your chain lightning bounce multiple times. Planning your run around hitting these powerful capstone Blessings is the mark of an advanced player. 🧐
Charms of the Deep: The Run-Breakers 💎
Charms are rare, passive artifacts 💎 that give you a powerful bonus for the rest of your run. You find ’em in chests 🎁 or buy ’em from merchants 💰. Their effects can be simple (more stats) or reality-bending. A few Legendary Charms 🌟 are so powerful they can define your entire build.
Identifying and prioritizing these “run-breaker” Charms is critical.
- Fan 🚀: This Legendary Charm makes any weapon fire two additional projectiles diagonally. For a single-shot weapon like the Brine Revolver or Disc Launcher, this is a staggering 200% multiplicative damage increase. 🤯 It’s easily one of the most powerful items in the game.
- Mr. Boom 💥💥: This Legendary Charm makes all of your explosions trigger a second time. This is a 100% damage increase for any build using the Plasma Gun 💣, explosive mods, or explosive Blessings.
- Freebie 🔄: This Legendary Charm gives you a 50% chance to not consume a charge when using your ability. This enables “infinite” ability spam builds, especially with abilities like the Anchor ⚓ or Turrets 🤖, allowing for near-permanent invincibility or overwhelming firepower.
You can’t control when these Charms will show up, but you must understand their value. If you ever get the chance to grab one, it should almost always be your #1 priority.
Table 4.1: Aspects & Blessings Compendium 🙏
This table gives a strategic overview of each Aspect.
| Aspect | Strategic Focus | Best Weapon Slot | Key Minor/Major Blessing(s) | Blessing Effect |
| Night 🌙 | Debuff / Status Duration | Ability | Weakening Shadows | Enemies afflicted with Shadow take increased damage. |
| Blood 🩸 | Health-Based Damage | Ability | Blood Offering | Sacrifice health to deal massive damage. 💥 |
| Defense 🛡️ | Survivability / Shielding | Primary Fire | Retaliating Barrier | Your barrier explodes when broken, damaging nearby enemies. |
| Fire 🔥 | Damage Over Time | Primary / Secondary | Linked Flames | Fire spreads from a killed enemy to a nearby one. 🔥➡️🔥 |
| Fortune 💰 | Gold Scaling | Ability | Exponential Gold | Deal more damage based on the amount of gold 🪙 you carry. |
| Frost ❄️ | Crowd Control / Slow | Primary Fire | Quick Freeze | Increases the rate at which enemies are frozen. 🥶 |
| Lightning ⚡ | AoE / Chain Damage | Primary / Secondary | Static Repetition | Chain lightning 🌩️ can bounce to additional targets. |
| Ocean 🐙 | Summons / Ally Buffs | Ability | Explosives | Your summoned tentacles explode 💥 on death. |
| Spirit 👻 | Summons / Passive Damage | Any | Plentiful Spirits | Increases the number of spirits 👻 you can summon at once. |
| Wind 💨 | AoE Burst Damage | Ability | Whirling Winds | Creates damaging windbursts 🌪️ around you when you use your ability. |
Table 4.2: Complete Charm Index 💎
This table lists some of the most notable Charms in Abyssus.
| Charm Name | Rarity | Effect | Strategic Value & Synergies |
| Fan | Legendary 🌟 | You shoot two additional projectiles diagonally left and right. 🚀 | S-Tier. A massive multiplicative damage boost for any projectile weapon. Build-defining. |
| Mr. Boom | Legendary 🌟 | Your explosions trigger twice. 💥💥 | S-Tier. Doubles the damage of any explosive weapon, mod, or Blessing. Build-defining. |
| Freebie | Legendary 🌟 | Using your ability has a 50% chance to not trigger the cooldown. 🔄 | S-Tier. Enables infinite ability spam, leading to permanent invincibility 🛡️ or damage uptime. |
| Thief’s Eye | Legendary 🌟 | Doubles the contents of chests 🎁🎁 for you. | A-Tier. The best economic charm. Accelerates your acquisition of gold 💰, health ❤️, and Blessings. |
| Violent Commitment | Rare ✨ | Increases all damage by 3% for every Depth completed. | A-Tier. A powerful scaling damage source 📈, especially valuable in Infinite mode. |
| Blessed | Rare ✨ | Deal 10% more damage for every Minor and Major Blessing you have. | A-Tier. Rewards committing to specific Aspect trees 🙏, providing a significant late-run damage boost. |
| Hawkeye | Common ⚪ | Deal up to 30% more damage the farther away you are. 🔭 | B-Tier. Excellent for sniper playstyles with the Brine Revolver 🎯 or Combat Bow 🏹. |
| Gun Meets Face | Common ⚪ | Deal more damage to enemies within 10 meters. 👊 | B-Tier. A must-have for aggressive Shotgun 💥 and melee-focused builds. |
Chapter 5: Combat Doctrine – Advanced Tactics and Enemy Engagement 🧠
Knowing your gear is only half the battle. 💥 The other half is knowing how to use it under pressure. The combat in Abyssus is designed to test your smarts 🧠, your awareness 👀, and your teamwork 🤝. This chapter goes beyond individual builds to talk about the big-picture strategies that separate novice divers from legendary Brinehunters. 🏆
The Flow of Battle: Mastering the Arena 🗺️
Every combat room in Abyssus is a puzzle to be solved with speed and violence. 🏃♂️💥 Here are the rules to live by:
Doctrine 1: Objectives Over Enemies 🎯
Many rooms have a specific objective: destroy pylons 🗼, stand on plates 🔘, etc. In these rooms, the objective is your #1 priority. Why? Because in most of these rooms, weaker enemies will spawn endlessly 🔄 until the objective is done. Wasting ammo and health trying to clear these infinite grunts is a fatal error. 💀 Neutralize the objective first. That’ll stop the spawns. Then you can clean up the rest.
Doctrine 2: Bosses Over Grunts 👹
In rooms with a mini-boss or elite 👾 alongside a swarm of grunts 🧟, the strategy is flipped. With very few exceptions, killing the main “boss” of the room will make all the remaining grunts instantly die or despawn. 💀 So, it’s almost always better to focus all your firepower on the biggest threat. Don’t get distracted by the ankle-biters unless they’re literally blocking your shot.
Doctrine 3: The Economy of Healing ❤️🩹
Health is your most precious resource. 💖 Your healing syringes 🧪 are your lifeline. Using them smartly is a skill. After a tough fight, it’s tempting to immediately use a syringe to top off. Resist this urge. 🛑 Before using your own limited supply, always do a quick sweep of the room. Bosses, elites, and even breakable pots 🏺 can sometimes drop healing items. Taking a few extra seconds to check for free heals can save you a syringe you’ll desperately need later.
Threat Prioritization: A Brinehunter’s Bestiary 👾
You’ve gotta learn to assess threats. Not all enemies are created equal. In any fight, your survival depends on instantly identifying the most dangerous foe and eliminating it first. 🎯
You can categorize enemies into threat levels:
- Tier 1 Threats (Eliminate on Sight!) 🚨: This is any enemy that can create more enemies (Summoners 🐣) or deal massive damage from far away (Snipers 🔭). An enemy “mother nest” that keeps spawning fast-moving flying enemies can overwhelm you fast. These must be your first target.
- Tier 2 Threats (Control and Contain) ⚠️: This includes elites ✨ with dangerous modifiers (like regenerating shields 🛡️ or death explosions 💥) and enemies with big AoE attacks. Your goal is to either burst them down fast or use crowd control (like Frost ❄️) to neutralize them.
- Tier 3 Threats (Manage and Mop Up) 🧟: This is your standard melee and ranged grunts. They’re dangerous in large numbers, but they’re predictable. You can kite 🏃♀️ them around while you focus on the bigger problems.
Learning to scan a room and mentally assign these priority levels in a split second is a skill that comes with experience. 🧠
Co-op Synergy: Stronger Together 🤝
Diving in with a fireteam of up to four Brinehunters 👨👩👧👦 is the intended Abyssus experience, but it also comes with a big difficulty spike. 📈 The game scales enemy health and numbers up with each additional player. A poorly coordinated team will struggle more than a skilled solo player. 😬
Success in co-op isn’t about having 4x the firepower. It’s about using that firepower smartly with synergy and role specialization.
Instead of four players all running high-damage builds, a really effective team will diversify:
- The Controller ❄️: One player should focus on crowd control. A Frost Aspect build can lock down entire sections of the battlefield, letting the team focus fire.
- The Debuffer/Support 🌙: Another player can specialize in weakening high-value targets. A Night Aspect build can apply the Shadow debuff, making bosses melt faster. An Ocean Aspect build 🐙 can summon tentacles for extra damage and buffs.
- The Boss Killer 🎯: This role is all about single-target burst damage. A player with a precision Brine Revolver build, stacked with weak spot bonuses, can delete boss health bars.
- The Room Clearer 💥: This player focuses on AoE damage to manage the swarms. A build using the Lightning Aspect ⚡, the Disc Launcher 🌀, or the Plasma Gun 💣 is perfect for this.
Communication is key! 🗣️ Call out high-priority targets. Coordinate your abilities. A Controller who freezes a boss 🥶 just as the Boss Killer activates their damage buffs 💥 is way more effective than two players doing their own thing.
And, of course, don’t forget to take a moment between the chaos to join together in a rousing sea shanty! 🎶 (Yes, it’s a real feature!)
Chapter 6: The Apex Brinehunter – Ultimate Weapon Build Guides 🏆
This is the heart of the guide. ❤️ We’re moving from theory to practice. Here are some of the most powerful and synergistic builds discovered by the Abyssus community. Use these as templates for your own success 🛠️, and as inspiration for your own unique creations! 💡
The “Infinite Storm” Disc Launcher 🌪️🌀
- Build Philosophy: This build turns the humble Disc Launcher 🌀 into an auto-aiming, room-clearing force of nature. It uses a specific combo of mods and charms to create a self-sustaining storm of seeking projectiles 🥏 that needs minimal aiming and outputs staggering damage. It’s arguably one of the most powerful builds in the game.
- Optimal Loadout:
- Primary Fire: Fan Fire ↔️ (Non-negotiable. This is the foundation.)
- Secondary Fire: Search and Destroy 🔍 (This makes your shots home in on enemies.)
- Synergistic Blessings:
- Primary (Lightning ⚡): Slotting Lightning into your primary fire is perfect. Each disc in your Fan Fire spread can trigger chain lightning 🌩️, turning your AoE into an even bigger AoE.
- Secondary (Frost ❄️): Putting Frost on your seeking secondary fire is a fantastic way to automatically slow 🥶 and freeze enemies all over the room.
- Ability (Shadow 🌙): Use an ability like the Anchor ⚓ and slot Shadow into it. This lets you apply the damage-amplifying debuff to bosses right before your disc storm melts them.
- Essential Charms:
- Fan (Legendary 🌟): This is the absolute cornerstone of the build. It adds two extra projectiles, effectively tripling your base damage 💥💥💥 and the number ofBlessing procs.
- Mr. Boom (Legendary 💥💥): If you can find this, it’ll take the build to another level, especially with explosive Blessings.
- Gameplay Guide: The execution is simple. You want to press your primary fire (LMB) and secondary fire (RMB) at almost the same time. 🖱️ This will launch your seeking discs, which will be instantly multiplied by the Fan charm. The sheer number of projectiles will constantly proc your Blessings, clearing rooms with almost no effort. At the Forge 🛠️, prioritize the “Halting Disc” (discs stick to targets) and “Automatic Detonation” (secondary auto-triggers on weak spots) upgrades.
The “Deadeye” Brine Revolver 🎯👀
- Build Philosophy: This build is for the purist, the marksman 🧐 who loves precision. It focuses on maximizing the Brine Revolver’s immense single-shot damage, turning it into a cannon that can eliminate elites with one well-placed weak spot shot.
- Optimal Loadout:
- Primary Fire: Large Caliber 💪 (Boosts your weak spot damage, which is the whole point.)
- Secondary Fire: Quick Scope ⚡ (Rewards fast, precise aiming with a massive damage bonus. This is your boss-killing tool.)
- Synergistic Blessings:
- Secondary (Shadow 🌙): Slotting Shadow into your scoped secondary fire is the best choice. It applies the vulnerability debuff with your opening shot, making all following shots hit even harder.
- Primary (Lightning ⚡): Lightning on your primary fire gives you much-needed crowd control. A single chain lightning proc can clear out the grunts that would otherwise distract you.
- Ability (Frost ❄️): Equip the Anchor ⚓ and slot Frost into it. If enemies get too close, one swing can freeze 🥶 them, giving you the space to retreat and re-engage from long range.
- Essential Charms:
- Hawkeye 🔭: This charm increases your damage the farther you are from your target. A perfect, multiplicative damage boost for a sniper!
- Giant Slayer 👹: This charm grants a simple, powerful damage bonus against bosses and elites—your primary targets.
- Gameplay Guide: Your positioning is key. Stay at max range to get the Hawkeye bonus. Your combat rhythm should be: identify a high-value target 🎯, quick-scope its weak spot for huge damage 💥, and then use your primary fire (with Lightning ⚡) to clean up any small fry left. Use your Frost Anchor ❄️⚓ defensively to create space.
The “Invincible Brawler” Anchor 🛡️⚓
- Build Philosophy: This is a melee-focused build that uses a specific combo of a Charm, a Blessing, and an ability mod to achieve near-permanent invincibility 🛡️ while dealing great damage. It’s an extremely powerful and safe build for tackling the highest difficulties, especially solo.
- Optimal Loadout:
- Weapon: Any weapon works, since the focus is on your ability. A Shotgun 💥 with “Pressure Shot” (stun) 😵 is a good thematic fit.
- Ability: Anchor ⚓
- Synergistic Blessings:
- Ability (Blood 🩸): This is the core of the build’s damage. Stack as many Blood Blessings as you can on your Anchor to scale its damage with your health pool.
- Primary/Secondary (Barrier 🛡️): Slotting the Barrier Aspect into your weapon gives you an extra layer of defense for the brief moments you aren’t invincible.
- Essential Charms & Mods:
- Freebie (Legendary Charm 🔄): This is the absolute key. The 50% chance to not consume an Anchor charge is what enables the infinite loop.
- Bulwark (Anchor Mod 🛡️): This mod grants you a brief period of invincibility during your Anchor swing. When spammed, this invincibility becomes nearly permanent.
- Brine (Anchor Mod 💧): This mod is a game-changer, adding a significant damage component to your swings.
- Gameplay Guide: Once you have the Freebie charm 🔄 and the Bulwark mod 🛡️, the strategy is simple: spam your Anchor ability. 🖱️🖱️🖱️ The combination of Freebie’s refund and Bulwark’s invincibility frames means you can swing nonstop, protected from almost all damage. Focus on stacking Blood Blessings 🩸 to make sure your damage keeps up with scaling enemy health.
Chapter 7: Know Thy Foe – A Complete Bestiary and Boss Guide 👹
To defeat your enemy, you must know your enemy. 🧠 The sunken kingdom is teeming with 36 varieties of corrupted creatures 👾 and automaton guardians 🤖, each with its own behaviors and weaknesses. At the end of each biome, you’ll face one of four powerful bosses 👹, multi-phase fights that will test your build, your reflexes, and your smarts. This chapter is your field guide. 📖
Denizens of the Deep: A Strategic Bestiary 👾
We can sort the enemies of Abyssus into strategic archetypes. Learning to spot these on sight will let you instantly assess the threat level of any room.
- Golems (Grunts) 🧟: Your basic melee and ranged enemies. They’re slow, predictable, and usually have a glowing weak spot. Low-priority… unless they swarm you.
- Flying Shark-like Creatures (Skirmishers) 🦈: These fast-moving pests dart around, attacking from weird angles. They’re hard to hit with slow projectiles and should be prioritized.
- Summoners (High-Priority!) 🐣: These enemies, often static “nests,” have one purpose: to flood the arena with more enemies. 🔄 They are always your #1 target. 🎯 Ignoring a summoner is a recipe for being overwhelmed.
- Shielded Constructs (Tanks) 🛡️: Some enemies have a regenerating shield. You have to hit them with high burst damage 💥 to break the shield and damage their health before it recharges. Shotguns 💥 and charged Revolver 🎯 shots are great for this.
- Elite Variants ✨: Any standard enemy can spawn as an “Elite” version. They’re faster, tougher, and often have new attacks (like shockwaves 💥). Treat them as mini-bosses and prioritize them.
Conquering the Guardians: Boss Guides 👹
Each of the four main bosses in Abyssus is a major hurdle. Here’s how to beat them.
Abandoned Temple Boss: The Stone Golem 🗿
This giant stone automaton is your first big test. It’s a three-phase fight that teaches you about mobility and prioritizing targets.
- Phase One: The Golem has three main attacks: a Flying Leap (dodge to the side! 🏃), slow Projectile Orbs (strafe ’em 👟), and a Shock Wave on the ground (jump over it! 👟👟). Your goal is to constantly shoot the glowing weak spot on its chest. 🎯
- Phase Transition: At 2/3 health, the Golem becomes immune 🛡️ and a big Crystal 💎 rises up. You must destroy this crystal. Ignore everything else and focus fire on the crystal!
- Phase Two: Same moves, but now he summons grunts 🧟 and sends out two shockwaves in a row. Keep focusing on the boss’s weak spot.
- Phase Three: Now he adds a dangerous Spin Charge 🌪️ (he slides across the floor) and makes floor panels glow and deal damage 🔥. The shockwave attack might even come in threes! 💥💥💥 Stay mobile, avoid the glowing floors, and keep hitting that weak spot.
The Gardens Boss: The Tidal Guardian 🌊
This second boss is a battle of attrition and awareness, fought in a tight arena.
- Phase One: The boss mainly uses two attacks: a large Tidal Wave 🌊 that sweeps across the arena (strafe in the same direction as the wave to outrun it 🏃♂️) and Ripples 💢 (pulsing waves on the ground – jump over them 👟 or get off the glowing floor).
- Phase Transition: The boss will become immune 🛡️ for a bit. Use this time to reload or heal. ❤️🩹
- Phase Two: The attacks get more intense. Now he’ll send two tidal waves at once 🌊🌊, and the ripples pulse faster. He’ll also summon grunts 🧟 and start using an Orb Attack.
- Phase Three: The final phase is a frantic endurance test. 🥵 Tidal Waves are almost constant. Your strategy is the same: always be moving, strafe with the waves, and focus all your fire on the glowing weak spot in its chest. 🎯 The Brine Revolver 🎯 is very good here if you can land your shots.
Sanctuary Boss: The Laser Guardian 🔥
Often called “Mr. Weak Hands” 🖐️ by the community, this boss is a pure accuracy check that punishes low-damage builds.
- Core Mechanic: The boss is immune 🛡️ at first. Its only weak points are its two big, animated hands 🖐️🖐️. You must destroy both hands to expose its real weak point: its head/core. 🎯
- Key Attacks: The most dangerous attack is a pair of revolving vertical lasers 🔥. To dodge this, you need a well-timed double jump 👟👟. (Pro-tip: a stationary double jump gives you more height than a moving one!)
- Strategy: This is a DPS race against moving targets. Burst down the hands as fast as you can. Precision weapons (Bow 🏹, Revolver 🎯) are great. Frost damage ❄️ is also very effective, as it can slow the hands down and gives a big damage bonus. Once the hands are gone, unload everything into the exposed core.
The Final Boss: The Abyssal Monarch 👑
The ultimate challenge. This is a multi-phase spectacle that ends in a brutal DPS check. ⏰ Coming into this fight with a weak build will almost certainly mean failure. 💀
- Phase One & Two: The early phases test your mobility and ability to handle multiple threats. The boss has a dangerous suction attack 🌪️ and summons lots of hazards. Stay mobile and learn the telegraphs.
- Final Phase (The DPS Check!) ⏰: At ~25% health, the final phase begins. The boss will start a “wipe mechanic”—a visible timer or charging effect. If you do not kill it before this timer finishes, your run instantly ends. 💀💀💀 It doesn’t matter how much health you have.
- Strategy: You must have a build capable of huge burst damage. 💥 High-damage Bow builds 🏹, infinite turret builds 🤖, and Blood Anchor builds 🩸⚓ are all confirmed to work. During this phase, the arena is bombarded with “tentacle meteors” ☄️, making movement chaotic. Your best bet is to stay airborne 👟👟 as much as possible while unloading everything you have. Good luck. You’ll need it. 🤞
Chapter 8: Into the Bottomless Chasm – The Endgame 🔁
For a true Brinehunter, beating the final boss isn’t the end. 🚫 It’s just the beginning. The real endgame of Abyssus is in the Deep Water Tank 🌊, a system that lets you customize the difficulty of your runs, pushing your skills and builds to their absolute limits.
The Deep Water Tank: Crafting Your Own Challenge ⚙️
After your first successful run 🏆, you’ll get access to the Deep Water Tank 🌊 in your sub. Here, you can spend Brine Canisters (earned from completing runs) to activate a variety of difficulty modifiers. 🌶️ These modifiers fundamentally change the game.
The strategic shift here is profound. 🧠 Your goal is no longer just “make a powerful build.” Your goal is “make the best build to counter the specific negative modifiers you turned on.”
- For example, the “Sturdy” modifier 🛡️ gives enemies a powerful, regenerating shield. A build that relies on damage-over-time (like Fire 🔥) will struggle, as the shield will just regen between ticks. To counter “Sturdy,” you need a high burst damage build, like a Quick Scope Revolver 🎯 or a Shotgun 💥, to punch through the shield and kill the enemy before it can recover.
- Another example: the “Explosive” modifier 💥 causes enemies to detonate when they die. A melee-focused build 👊, while strong normally, becomes a huge liability. To succeed, you have to pivot to a ranged build 🏹 to stay safe.
Endgame mastery in Abyssus isn’t about having one “meta” build. It’s about having a deep understanding of multiple builds and the wisdom to deploy the right one for the job. 🧐
Infinite & Random Modes: The Ultimate Test 🤯
Post-launch updates added two new game modes for the most dedicated Brinehunters:
- Infinite Mode 🔄: This mode lets you “loop” your expeditions, continuing your run through the biomes again and again 🔁 with stacking difficulty, instead of ending after the final boss. This completely changes the value of certain Charms. Scaling Charms like “Violent Commitment” (+3% damage per Depth) 📈 and “Healthy Commitment” (+3% max Health per Depth) ❤️ become incredibly powerful. This mode is the ultimate test of a build’s scaling potential.
- Random Order Mode 🔀: This mode shuffles the order of the biomes. You might end up in the tough Sanctuary biomewith a brand-new, undeveloped build, forcing you to adapt on the fly.
These endgame modes provide near-endless replayability, ensuring the abyss always has a new, tougher challenge waiting for you. 💪
Chapter 9: The Brinehunter’s Style – Customization & DLC Overview 👕
While survival and mastery are the main goals, there’s no reason you can’t look good doing it. 😉 Abyssus has a cosmetic customization system 🎨 and purely cosmetic DLC packs 💰 for players who want to support the game’s developers.
Forging Your Identity 🧑🎨
At the Wardrobe station 🧥 in your sub, you can change your character’s look. You can change your helmet 🧢, your body suit, and the color scheme 🎨 of your suit and weapons. You can also pick your character’s voice and equip different emotes 💃 to use in co-op. Most of these cosmetics are unlocked by completing in-game achievements 🏆, giving you a way to visually show off your accomplishments.
Supporter Packs: The DLC 💰
It’s important to know the developer’s philosophy here: All content that affects gameplay (new weapons 🔫, new abilities 🦾, new modes 🔄) will always be released as FREE updates for everyone. 🙏
The paid DLCs are exclusively “supporter packs.” 💖 They offer unique cosmetic items for players who want to show extra support. They give you zero gameplay advantage. 🚫
As of now, there are two cosmetic DLC packs available:
- Abyssus – Brinehunter Pack 🦜: Gives you a rugged, veteran look.
- Helmet: Sea-weathered Birdcage 🐦 (covered in barnacles)
- Dance: The Brineston 💃
- Frame: Sea-weathered Frame 🖼️
- Abyssus – Brineguard Pack 🛡️: Provides a more heavily armored, militaristic look.
- Helmet: Juggernaut
- Suit: Juggernaut 🏋️
- Emote: Company Loyalty 🚩
- Frame: Brineguard ☸️
These packs, and the game’s official soundtrack 🎶, are optional purchases that let dedicated fans contribute to the game’s future while getting some stylish flair. ✨
Conclusion: The Abyss Awaits 🏁
You’ve reached the end of this guide, but your journey as a Brinehunter is just beginning. 🚀 We’ve dived into the basics of movement and survival, mapped the paths of the Soul Wheel 💫, and cataloged the huge arsenal 🔫 at your disposal. We’ve dissected the divine Blessings 🙏 and unmasked the game-breaking power of Legendary Charms 🌟. We’ve studied the tactics of the abyssal horde 👾 and unraveled the mechanics of their powerful guardians. 👹
But knowledge alone isn’t mastery. 🧠
The real purpose of this guide wasn’t to give you a rigid set of rules, but to give you a framework for strategic thinking. The abyss is always changing. No two runs are ever the same. 🔀 The “perfect” build doesn’t exist. 🚫 The true apex Brinehunter isn’t the one who masters a single weapon. It’s the one who understands the principles behind them all—the one who can look at a random set of Blessings and instantly see the seeds of a god-tier synergy 🌱➡️🌳, the one who can adapt their strategy on the fly to counter the toughest endgame modifiers. 💡
Take what you’ve learned here and experiment. 🧪 Try the “Infinite Storm” Disc Launcher 🌪️, but then ask yourself how you could apply its principles to the Tesla Gun ⚡. Master the “Deadeye” Brine Revolver 🎯, and then challenge yourself to do the same with the Combat Bow 🏹.
Fail, learn, and dive again. 🔄
Each descent will make you stronger. Each failure is a lesson paid for in brine and resolve. The untold secrets of the sunken kingdom are waiting.
The abyss is calling. 📞 Go answer. 💪
Disclaimer: This is an unofficial fan work, all trademarks and copyrights for Abyssus belong to the developer DoubleMoose Games & publisher The Arcade Crew.
Find the game here! https://store.steampowered.com/app/1721110/Abyssus/
