
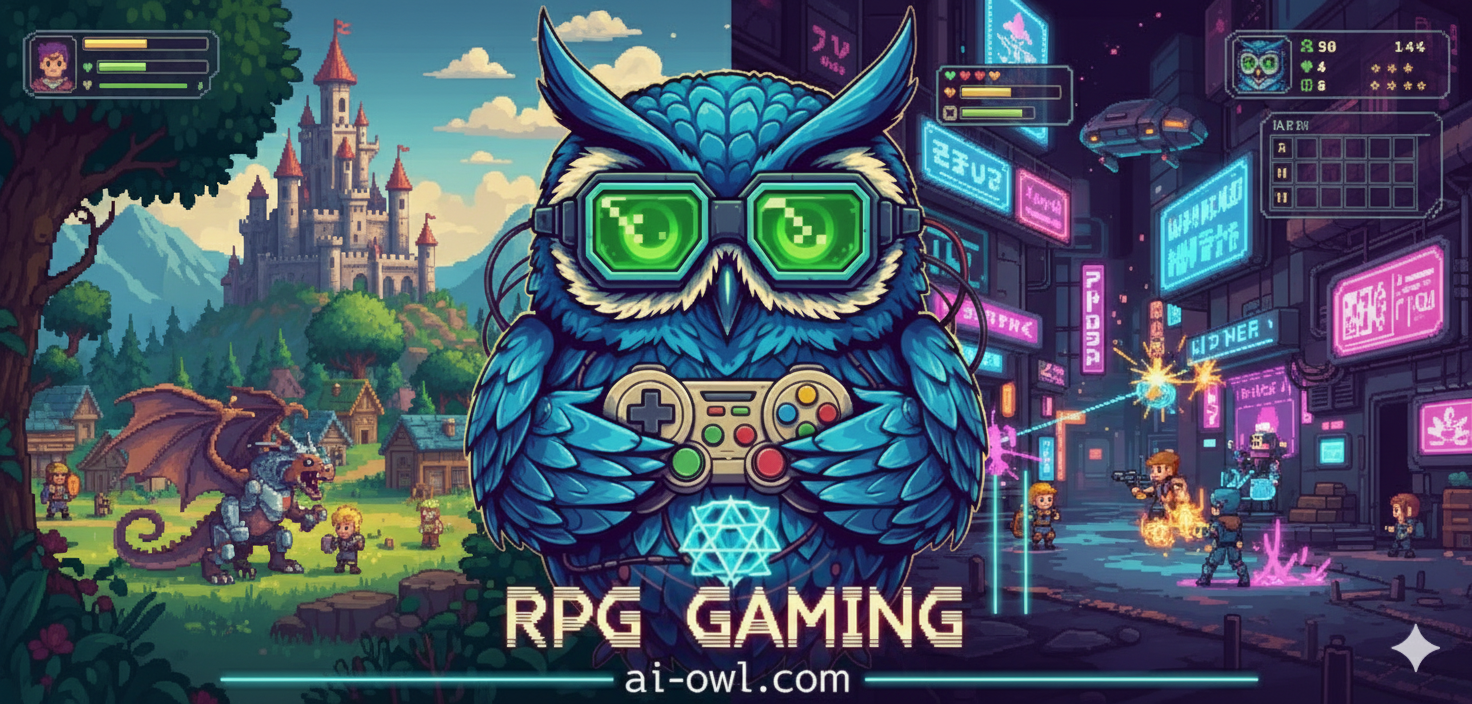
Introduction: Welcome to the Opera 🎭
Overture
Hey, adventurer! 👋 Welcome to what’s not just a video game, but a grand, sprawling opera of rebellion, loss, and hope, all rendered in glorious 16-bit sprites. Final Fantasy VI Pixel Remaster, originally released in North America as Final Fantasy III, isn’t just another Japanese Role-Playing Game (JRPG); it’s a landmark achievement in interactive storytelling, a masterclass in character-driven narrative, and the undisputed pinnacle of its era. From its iconic opening march through the snows of Narshe to its world-shattering climax, this game is a journey that has captivated players for decades.
This guide is your libretto 📜 for that opera. It’s a companion, a strategist, and a secret-keeper, designed to illuminate the darkest corners of the World of Balance and navigate the shattered landscape of the World of Ruin. Whether this is your first time witnessing Celes’s aria or you’re a veteran who can input Sabin’s Blitz commands in your sleep, this tome is for you. We’re about to embark on a master’s course in the art of Final Fantasy VI Pixel Remaster.
The Philosophy of this Guide
Most guides tell you what to do. They’ll give you a map and point you from A to B. This isn’t most guides. 😉 Our mission is to explore the why. Why is magic so fundamentally broken that it can make gods of mortals? Why is the most effective way to build the party’s muscle-bound monk to pump his Magic stat? Why is an entire character stat a total farce, a lie printed on your screen for years?
This is a deep dive into the strategic soul of the game. We’ll deconstruct the battle system, expose its hidden mechanics, and exploit its every quirk and bug. We’ll treat the Esper system not as a simple spell-learning tool, but as a sculptor’s chisel, allowing you to forge your characters into any form you desire. This guide is about appreciating the game’s narrative genius while simultaneously learning how to break its systems so completely that the final boss will weep in nihilistic despair. 😭 We’ll be funny, but we’ll be thorough. We’ll be irreverent, but we’ll be exhaustive.
Navigating Your Journey
This guide is structured to serve you at every stage of your quest.
- Chapter 1: The Art of War ⚔️ lays the foundational bedrock of the game’s combat engine. Master these principles, and you’ll master every battle.
- Chapter 2: The Esper Revolution ✨ is the key to unlocking true power. Here, you’ll learn how to customize your party on a fundamental level, turning thieves into mages and kings into dragoons.
- Chapter 3: A Roster of Rebels 👥 provides exhaustive dossiers on every one of the fourteen playable characters. These aren’t simple bios; they’re complete strategic breakdowns, offering optimal build paths and endgame equipment setups.
- Chapter 4: The Grand Tour 🗺️ is a full narrative walkthrough, guiding you through the story while ensuring you miss no characters, no treasures, and no crucial secrets.
- The Appendices: The Narshe Archives 📚 serve as your quick-reference encyclopedia, containing comprehensive databases of every Esper, Relic, piece of equipment, and enemy in the game.
So, take a deep breath. 😮💨 The first notes of the overture are playing. It’s time to begin the ultimate journey.
Chapter 1: The Art of War ⚔️ – Deconstructing the Battle System
Before you can suplex a train 🚂 or summon a god, you’ve gotta understand the engine that drives every conflict in Final Fantasy VI Pixel Remaster. The battle system is a beautiful, intricate, and sometimes bafflingly broken machine. Understanding its every gear and piston is the first step toward total battlefield dominance.
The Ticking Clock ⏰: Mastering the Nuances of the Active Time Battle (ATB) System
The combat in Final Fantasy VI Pixel Remaster is built upon the Active Time Battle (ATB) system, a revolutionary concept first introduced in Final Fantasy IV. This system blends traditional turn-based menu commands with a real-time element, creating a constant sense of urgency and tactical pressure.
ATB 101
At its core, the system is simple. Every participant in a battle, both your party members and the enemies, has an ATB gauge. This gauge fills up over time at a rate determined by that character’s Speed stat. 🏃♀️ Your party’s gauges are visible at the bottom of the screen; the enemies’ are hidden, a small cruelty to keep you on your toes. When a character’s gauge is full, they can select an action from the command menu, such as Fight, Magic, or Item. After the action is completed, the gauge empties and begins to fill again. This cycle continues until one side of the battlefield is entirely “flagged as dead,” which typically means all their HP has been reduced to zero.
Active vs. Wait: A Philosophical Choice 🤔
In the configuration menu, you’ll find a critical choice: Battle Mode, which can be set to “Active” or “Wait”. This is more than a simple difficulty slider; it’s a fundamental choice about how you wish to engage with the game’s combat.
- Wait Mode: In this mode, whenever you enter a submenu (like the Magic or Item list), the ATB gauges for all other characters and enemies will freeze. ⏸️ This effectively pauses the battle, giving you unlimited time to ponder your next move. Should you cast Fire or Blizzard? Is a Potion enough, or do you need a Hi-Potion? Wait mode turns each decision point into a calm, calculated, chess-like move. For new players, this mode is highly recommended. It lets you learn your spell list and inventory without the threat of being pummeled into oblivion while you read.
- Active Mode: This mode is for those who like a little chaos. 🔥 In Active mode, the battle never stops. While you’re scrolling through Terra’s spell list, the enemy’s ATB gauge can fill, and they can launch an attack. This transforms the game into a frantic race against time, punishing indecision and rewarding swift menu navigation. It adds a layer of thrilling tension but can be overwhelming for the unprepared.
The Hidden ‘Charge Time’ ⏳
An invisible mechanic that significantly affects the flow of battle is “charge time.” After you select a command for a character, there’s a slight, non-displayed delay before the action is actually executed. This is the character’s “ready pose” time. This delay varies depending on the action. A simple Fight command or using an Item has almost no charge time. However, casting powerful magic spells 💥 involves a longer delay as the character “charges” the spell. This is why you might select Ultima for Terra, but an enemy with a faster action gets to attack before her spell goes off. Some abilities, like Sabin’s Pummel or the Jump command, have virtually no charge time, making them feel incredibly responsive.
The Animation Bottleneck 🚦
Here lies one of the most crucial and counter-intuitive quirks of Final Fantasy VI Pixel Remaster‘s combat engine. In many other ATB games, when a character performs an action, the ATB gauges for all other combatants pause during the attack animation. That’s not the case in Final Fantasy VI Pixel Remaster. Time continues to flow during every spell effect, every sword slash, and every summon animation.
This creates a command queue backlog. 😥 Imagine your entire party’s ATB gauges are full. You issue a command to Terra. While her spell animation is playing out, your other characters—and the enemies—are still waiting. No other action can begin until Terra’s animation is complete. This means that even if Sabin’s gauge filled up a full second ago, he’s stuck in a waiting line behind Terra’s spell. This system quirk has a profound impact on the game’s rhythm, often making battles feel sluggish and, most importantly, it dramatically devalues the Speed stat. A character’s true “speed” isn’t just how fast their bar fills, but a combination of that and the animation length of the abilities they use. This gives a hidden advantage to commands with swift animations, like Edgar’s Tools or the Dragoon’s Jump, as they clear the action queue more quickly, allowing your party to perform more actions over a given period.
Stats for Strategists 🧠: What Matters, What Doesn’t, and Why Evade is a Farce
Understanding your characters’ statistics is fundamental to any RPG. In Final Fantasy VI Pixel Remaster, this is doubly true, as one of the most important stats is completely broken. 👎
The Core Stats
- Vigor: This stat, in conjunction with your weapon’s Battle Power and your character’s Level, determines the damage of your physical attacks. More Vigor means your Fight command hits harder.
- Speed: As discussed, this stat determines how quickly a character’s ATB gauge fills. A higher Speed means more turns over time, though its practical value is diminished by the animation bottleneck.
- Stamina: This is one of the more esoteric stats. Its primary function is to increase your resistance to instant-death attacks. It also has a secondary effect on status ailments: it increases the amount of HP recovered per tick from the Regen spell, but it also increases the amount of HP lost per tick from Poison and Sap. Because of this double-edged nature, it’s generally a poor stat to invest in.
- Magic Power: This is arguably the most important stat in the game. 🪄 It dictates the damage of your offensive magic and the amount of HP restored by your healing spells. Given the overwhelming power of magic in the late game, this stat is paramount.
The Great Evade Bug 🐞: A Statistical Betrayal
Get ready for one of the most infamous bugs in JRPG history. 🤯 The stat listed on your character’s status screen as Evade % does absolutely nothing. It’s a dead stat, a numerical ghost that has no function in the game’s code for dodging attacks.
Instead, the game mistakenly uses the MBlock % (Magic Evasion) stat to determine a character’s chance to dodge both physical and magical attacks that aren’t flagged as unblockable. This single bug completely upends conventional RPG wisdom. Light armor that typically grants high Evade is rendered far less useful, while shields 🛡️—the primary source of MBlock %—become the single most important piece of defensive equipment in the game.
This knowledge redefines the concept of a “dodge tank.” It isn’t a speedy character in light gear; it’s any character equipped with a high MBlock % shield (like the Aegis Shield or Paladin Shield) and a Relic like the White Cape. This makes MBlock % one of the most valuable defensive stats to seek out on equipment, often trumping raw Defense. Any piece of gear that boosts Evade % is effectively a “noob trap,” offering a placebo effect and nothing more.
Positioning & Formations 🧍♂️🧍♀️: The Unsung Art of the Back Row
Where your characters stand on the battlefield has a significant impact on their survival and damage output.
Row Dynamics
Your party is arranged in two rows: Front and Back.
- Front Row: Characters in the front deal full damage with physical attacks and also receive full damage from enemy physical attacks.
- Back Row: Characters in the back deal only half damage with standard physical attacks, but they also receive only half damage from enemy physical attacks.
This defensive benefit is enormous. The key, then, is to mitigate the offensive penalty. Fortunately, there are numerous ways to do so. The half-damage penalty only applies to the standard Fight command with short-range weapons. It does not apply to:
- Magic spells. 🧙
- Most special abilities (Sabin’s Blitzes, Edgar’s Tools, Strago’s Lores, etc.).
- Ranged weapons (Locke’s Boomerangs, Setzer’s Cards and Dice).
- Certain special weapons like the Atma Weapon and Valiant Knife.
- The Jump command.
This means that for any character who isn’t a dedicated front-line fighter using a sword or claw, the Back Row is the default, optimal position. It provides a massive defensive advantage with little to no offensive trade-off. 👍
Battle Formations
Most battles begin in a standard formation, but occasionally you’ll be caught in a special arrangement:
- Pincer Attack: Your party is surrounded on both sides. There’s no Back Row in this formation; all characters are treated as being in the Front Row. Physical attacks that hit a target from behind will deal increased damage.
- Back Attack: The enemy attacks your party from behind. Your party’s rows are reversed (front-row characters are now in the back, and vice-versa), and you must use a turn with the Row command to switch them back.
- Side Attack: Your party gets the advantage, surrounding the enemy. This functions like a Pincer Attack, but in your favor.
- Pre-emptive Strike: Your party gets a free turn at the start of battle, with all ATB gauges full and the enemies’ empty.
Chapter 2: The Esper Revolution ✨ – Forging Your Pantheon
If the ATB system is the engine of Final Fantasy VI Pixel Remaster, the Esper system is its heart and soul. ❤️ This is the single most important mechanic for character growth and customization. It’s the system that allows you to shatter character archetypes and transform a ragtag group of rebels into a pantheon of demigods. Mastering the art of Espers is the true path to power.
The Magicite Manifesto 📜: Learning Spells and Summoning Gods
Espers are powerful magical beings who, upon death, leave behind their essence crystallized into an object called Magicite. By equipping this Magicite, your characters gain two primary abilities.
Learning Spells
First and foremost, equipping an Esper allows a character to learn magic spells. After each battle, you earn Ability Points (AP) in addition to Experience Points (EXP). These AP are applied to the spells associated with your equipped Esper. Each spell has a learn rate, displayed as a multiplier (e.g., Fire x10, Cure x20). This means that for every 1 AP you earn in battle, you gain 10 points toward learning Fire or 20 points toward learning Cure. Once a spell’s progress reaches 100, that character has learned it permanently and can cast it at any time, even without the Esper equipped. This is the primary method by which your non-magical characters, like Locke or Edgar, can become powerful mages. 🧙
The Power of Summons 👹
The second function of an equipped Esper is the ability to summon it in battle. Each Esper can be summoned once per battle for a specific MP cost, unleashing a powerful, often screen-filling attack or a crucial party-wide buff. Early on, summons like Ramuh (Judgment Bolt) and Shiva (Diamond Dust) provide excellent multi-target elemental damage. Later, strategic summons become indispensable. Golem’s Earthen Wall 🧱 can completely nullify a set amount of incoming physical damage for the entire party, trivializing many boss attacks. Carbuncle’s Ruby Light 💎 casts Reflect on the entire party, turning an enemy mage’s deadliest spells back upon them. Phoenix’s Flames of Rebirth 🔥 revives all KO’d party members, pulling you back from the brink of defeat.
The Philosophy of Power 📈: Strategic Leveling and Stat-Maxing
Learning spells and summoning are powerful tools, but they’re merely the surface layer of the Esper system. The true, game-breaking power 💥 of Magicite lies in a third, more subtle function: stat growth bonuses.
Many Espers, when equipped, will grant a permanent bonus to one of your character’s base stats every time that character gains a level. For example, equipping the Esper Ifrit provides a Strength +1 bonus. If Locke levels up while holding Ifrit’s Magicite, his Strength stat will permanently increase by an extra point. Equipping Bismarck provides Strength +2, and Zoneseeker provides Magic +2.
This mechanic is the absolute key to unlocking the ultimate strategic depth of Final Fantasy VI Pixel Remaster. It means that every level-up is an opportunity to permanently sculpt your characters’ abilities. It allows you to move beyond their natural inclinations and build them into any role you can imagine. This isn’t just character progression; it’s character creation.
This system fundamentally changes the nature of grinding. Leveling up without a stat-boosting Esper equipped is a wasted opportunity. 😭 This gives rise to an advanced strategy often employed by veterans: the “low-level paradigm.” The goal is to progress as far as possible through the first half of the game (the World of Balance) while gaining as few levels as possible. This maximizes the number of levels you can gain later, once you have acquired a powerful collection of stat-boosting Espers like Bismarck, Zoneseek, and Bahamut (HP +50%). By carefully managing your EXP gain, you can ensure that nearly every level from 20 to 99 comes with a hand-picked stat bonus, leading to characters with absurdly high, maximized stats by the end of the game.
This freedom to mold your characters is the central thesis of this guide. Don’t think of Sabin as just a monk; with Zoneseek equipped for twenty levels, he becomes a magical terror whose Phantom Rush will far outpace his physical attacks. Don’t see Terra as only a mage; give her Bismarck for a few dozen levels, and her physical attacks with swords like the Lightbringer will become just as devastating as her spells. The Esper system is your toolkit for breaking archetypes and forging the most powerful party imaginable.
Esper Tiers 📊 and Optimal Character Pairings
Not all Esper bonuses are created equal. A Stamina +1 bonus from Ramuh is functionally useless, while a Magic +2 bonus from Zoneseek is game-changing. Below is a tiered ranking of Espers based on the strategic value of their level-up bonuses, followed by a table of recommended pairings to guide your character development.
Esper Bonus Tiers
- S-Tier (Game-Changing) 🌟: These Espers provide the best stat boosts available and should be equipped on your chosen characters for as many level-ups as possible.
- Bismarck: Strength +2
- Raiden: Strength +2
- Zoneseeker: Magic +2
- Valigarmanda (Tritoch): Magic +2
- Bahamut: HP +50%
- Cactuar (Remake versions only): Speed +2
- A-Tier (Excellent) 👍: These provide strong, valuable bonuses that are excellent choices before S-Tier Espers become available.
- Ifrit: Strength +1
- Maduin: Magic +1
- Cait Sith: Magic +1
- Odin: Speed +1
- Midgardsormr (Terrato): HP +30%
- Crusader: MP +50%
- B-Tier (Situational) 🤷: Useful for specific builds or for rounding out a character.
- Golem: Stamina +2
- Lakshmi (Starlet): Stamina +2
- Siren: HP +10%
- Catoblepas (Shoat): HP +10%
- Phantom: MP +10%
- Fenrir: MP +30%
- C-Tier (Largely Useless) 👎: The bonuses provided are for the least impactful stat.
- Ramuh: Stamina +1
- F-Tier (No Bonus) ❌: These Espers provide no stat bonus on level-up and should only be equipped to learn their spells.
- Kirin, Shiva, Unicorn, Carbuncle, Seraph, Quetzalli (Palidor), Alexander, Phoenix, Ragnarok.
Recommended Esper Growth Paths
The following table provides a general roadmap for which stats and Espers to prioritize for each character to maximize their potential. Remember, this is a guide, not a rulebook. The beauty of the system is its flexibility.
| Character | Recommended Stats to Level | Rationale | Priority Espers |
| Terra 👩🎤 | Magic, MP | Terra excels as a mage, and her unique Trance ability doubles her magic damage. Maximizing her Magic Power is the primary goal. | Zoneseeker, Valigarmanda, Maduin, Cait Sith |
| Celes ⚔️ | Magic, Strength | Celes is a fantastic hybrid. She can be built as a pure mage like Terra, but her access to powerful swords makes a Strength build viable. | Zoneseeker, Bismarck, Raiden, Ifrit |
| Locke 💎 | Strength, Speed | Locke’s unique weapons in the late game, like the Valiant Knife, scale with Strength. Speed complements his role as a swift treasure hunter. | Bismarck, Raiden, Ifrit, Odin |
| Edgar 👑 | Strength, HP | In the World of Ruin, Edgar shines as a Dragoon using the Jump command. This build relies entirely on Strength and survivability. | Bismarck, Raiden, Ifrit, Bahamut |
| Sabin 🔥 | Magic, Strength | Sabin is the “secret mage.” Most of his powerful Blitz attacks are magic-based. Prioritize Magic Power for powerful Phantom Rushes! | Zoneseeker, Valigarmanda, Maduin, Bismarck |
| Cyan 🌸 | Strength, Stamina | Cyan is a pure physical attacker. His Bushido techniques scale with Strength. Stamina is a secondary consideration for his survivability. | Bismarck, Raiden, Ifrit, Golem |
| Shadow 🤫 | Speed, Strength | As the game’s fastest natural character, enhancing his Speed further is key. Strength boosts his physical attacks and Throw damage. | Odin, Cactuar, Bismarck, Raiden |
| Relm 🎨 | Magic, MP | Relm has the highest natural Magic Power in the game. She’s a glass cannon who should focus exclusively on her magical devastation. | Zoneseeker, Valigarmanda, Maduin, Cait Sith |
| Gau 🐺 | Strength, Speed, HP | Gau is a physical powerhouse. His best Rages, like Stray Cat, are physical. Boosting Strength and Speed makes him a monster. | Bismarck, Raiden, Odin, Bahamut |
| Mog 💖 | Magic, MP | Despite his potential as a Dragoon, Mog’s best role is a versatile mage, thanks to his solid defensive stats and good magic. | Zoneseeker, Valigarmanda, Maduin, Cait Sith |
| Strago 🔵 | Magic, HP | Strago is a dedicated Blue Mage. Boosting his Magic is essential, and HP is crucial to help him survive hits to learn new Lores. | Zoneseeker, Valigarmanda, Bahamut, Midgardsormr |
| Umaro 🌨️ | N/A | Umaro can’t equip Espers and thus can’t benefit from stat growth bonuses. | N/A |
| Gogo 🎭 | N/A | Gogo can’t equip Espers and thus can’t benefit from stat growth bonuses. | N/A |
Chapter 3: A Roster of Rebels 👥 – The Ultimate Character Dossiers
Final Fantasy VI Pixel Remaster is defined by its cast. With fourteen playable characters, it boasts one of the largest and most diverse rosters in the series. Each character brings a unique story, personality, and combat style to the table. This chapter provides an exhaustive dossier on every member of the Returners, analyzing their abilities, outlining their strategic build paths, and recommending their ultimate endgame setups.
Terra Branford – The Magitek Elite 👩🎤
- Profile: “A mysterious young woman, born with the gift of magic, and enslaved by the Empire. Terra is the heart of the game’s opening act, a reluctant hero on a journey to understand her own identity and the immense power she wields.” Terra’s story is one of self-discovery, grappling with her half-human, half-Esper heritage and learning what it means to love.
- Ability Deep Dive: Trance
- Mechanics: After a key plot event, Terra gains the Trance command. When used, she transforms, doubling all damage she deals (both physical and magical) and halving all magic damage she receives for a limited time. The Trance gauge fills as Terra defeats enemies. In the World of Ruin, the duration of Trance doubles, making it a powerful tool for burning down bosses.
- Natural Magic: As one of the few innate magic users, Terra learns a suite of spells naturally as she levels up, including key Fire and Cure spells, culminating in Ultima at level 99.
- Strategic Build Paths
- Primary Path – The Ultimate Sorceress 🧙♀️: This is Terra’s intended and most powerful role. Her high natural Magic Power, combined with access to the best magic-boosting equipment, makes her an unparalleled magical damage dealer. Every level-up should be dedicated to boosting her Magic Power via Espers like Zoneseek and Valigarmanda.
- Secondary Path – The Holy Knight: While less common, it’s entirely possible to build Terra as a physical powerhouse. By equipping Strength-boosting Espers like Bismarck, her damage with swords can become immense, especially when amplified by Trance.
- Endgame Setup (Sorceress Build)
- Weapon 🗡️: Apocalypse or Lightbringer (for their stat boosts and special properties).
- Shield 🛡️: Paladin Shield or Aegis Shield (for MBlock% and elemental/status protection).
- Head 👒: Mystery Veil or Cat-Ear Hood (for the significant Magic Power boosts).
- Body 👚: Minerva Bustier (her ultimate, female-exclusive armor).
- Relics 💍: Soul of Thamasa (for Dualcast), Celestriad (to make all spells cost 1 MP), or two Earrings (for a 50% magic damage boost).
Locke Cole – The Treasure Hunter 💎
- Profile: “He prefers the term ‘Treasure Hunter’ to ‘Thief.’ 💰 Locke is a charming rogue with a tragic past, driven by a promise to protect the women he cares for. His journey is one of atonement, seeking to overcome the grief of losing his love, Rachel, by saving Terra and Celes.”
- Ability Deep Dive: Steal & Mug
- Mechanics: Locke’s unique command is Steal, which gives him a chance to pilfer an item from an enemy. The success rate is based on Locke’s level versus the enemy’s level. Equipping the Brigand’s Glove relic changes this command to Mug, which performs a physical attack and a Steal attempt simultaneously. While stealing is rarely profitable from common enemies, it’s the only way to acquire some of the best equipment in the game from certain bosses and rare monsters.
- Strategic Build Paths
- Primary Path – The Valiant Knight: This is Locke’s most famous and powerful build. It revolves around the Valiant Knife, a unique weapon whose damage increases the more HP Locke is missing. It also ignores defense. Combined with the Master’s Scroll (which allows four attacks per turn at reduced damage) and the Genji Glove (for dual-wielding), Locke can deal astronomical damage, especially when his HP is low. This build prioritizes Strength and Speed. A clever trick involves equipping HP-boosting gear like the Red Cap after Locke is fully healed, creating a difference between his current and max HP to power up the Valiant Knife without taking any damage.
- Secondary Path – The Phoenix Mage: While he lacks the natural magic stats of Terra or Celes, Locke can be built into a competent mage. His ultimate weapon from the GBA/Pixel Remaster versions, the Zwill Crossblade, offers a significant Magic Power boost.
- Endgame Setup (Valiant Knight Build)
- Weapons 🗡️: Valiant Knife and Ultima Weapon (or Lightbringer).
- Shield 🛡️: None (due to Genji Glove).
- Head 🧢: Red Cap (for the HP and Strength boost).
- Body 👕: Genji Armor or Force Armor.
- Relics 💍: Genji Glove and Master’s Scroll. This combination is the core of the build, allowing four attacks per turn with two powerful weapons.
Edgar Roni Figaro – The Machinist King 👑
- Profile: “The young, charming king of Figaro, Edgar plays the part of an Imperial ally while secretly aiding the Returners. He’s a master machinist, a brilliant strategist, and a devoted brother, whose cleverness and powerful inventions are indispensable to the party’s cause.”
- Ability Deep Dive: Tools 🔧
- Mechanics: Edgar’s Tools command allows him to use a variety of machines that produce powerful effects without costing MP. These effects range from multi-target damage (Auto Crossbow) to inflicting status ailments (Noiseblaster for Confuse, Flash for Blind) to powerful single-target attacks (Drill, Chainsaw).
- Strategic Value: In the World of Balance, Edgar’s Tools are arguably the most overpowered ability in the game. 💪 The Auto Crossbow hits all enemies and ignores defense, clearing random encounters with ease. The Drill provides consistent, high single-target damage against bosses. The Chainsaw offers similar damage with a 25% chance of instant death. Because they cost no resources, Edgar is a sustainable engine of destruction.
- Strategic Build Paths
- World of Balance – The Tool Master: Early on, Edgar needs no special build. His power comes directly from his Tools. Simply acquire new Tools as they become available (the Chainsaw from Zozo is a massive power spike) and let him carry the party’s offense.
- World of Ruin – The Holy Dragoon: As the game progresses into the World of Ruin, the fixed damage of Tools begins to fall off. Edgar’s best endgame role is to transition into a Dragoon. By equipping the Dragoon Boots (changes Fight to Jump) and the Dragon Horn (causes Jump to hit multiple times), combined with a powerful spear, Edgar’s damage output becomes immense again. This build requires maximizing his Strength stat.
- Endgame Setup (Dragoon Build)
- Weapon 🗡️: Radiant Lance or Gungnir.
- Shield 🛡️: Aegis Shield or Paladin Shield.
- Head 🧢: Genji Helm or Red Cap.
- Body 👕: Genji Armor or Force Armor.
- Relics 💍: Dragoon Boots and Dragon Horn. This relic combination is non-negotiable for this build.
Sabin Rene Figaro – The Monk Who Dreamt of Fireballs 🔥
- Profile: “Edgar’s twin brother, who gave up his claim to the throne to pursue a life of freedom and martial arts training. Sabin is a man of immense physical strength and unwavering loyalty, capable of performing incredible feats of power, including famously suplexing a ghost train. 🚂”
- Ability Deep Dive: Blitz 👊
- Mechanics: Sabin’s Blitz command requires a directional input, much like a fighting game command, followed a confirmation press. Successfully performing the input unleashes a powerful special technique.
- The Physical vs. Magical Divide: This is the most crucial strategic insight for Sabin. While his first Blitz, Pummel, and the situational Suplex are physical attacks, the vast majority of his best Blitzes are magical. Aura Cannon, Fire Dance, Razor Gale, and his ultimate technique, Phantom Rush, all calculate their damage based on Sabin’s Magic Power stat, not his Vigor. This makes Sabin a “secret mage” 🤫 disguised as a muscle-bound monk.
- Strategic Build Paths
- World of Balance – The Brawler: In the first half of the game, Sabin is a powerhouse. The base damage of Aura Cannon (Holy-elemental) and Fire Dance (Fire-elemental) is so high that they’ll one-shot most enemy groups.
- World of Ruin – The Phantom Rushing God: Once you acquire Magic Power-boosting Espers, Sabin’s true potential is unlocked. Every level-up should be dedicated to pumping his Magic Power stat. His ultimate Blitz, Phantom Rush, is a devastating, defense-ignoring, non-elemental magical attack that will become his primary source of single-target damage, capable of easily hitting the 9,999 damage cap.
- Endgame Setup (Mage Build)
- Weapon 🗡️: Magus Rod or any weapon that boosts Magic Power. His weapon’s Attack stat is irrelevant for this build.
- Shield 🛡️: A shield with high MBlock% like the Aegis Shield.
- Head 👒: Circlet or Red Cap.
- Body 👕: Magus Robe or any light armor.
- Relics 💍: Two Earrings (for a 50% magic damage boost) is the standard. A Hero’s Ring is also excellent. For versatility, the Soul of Thamasa allows him to Dualcast spells like Ultima when he isn’t using Blitz.
Celes Chere – The Runic Knight ⚔️
- Profile: “A Magitek Knight and former general of the Gestahlian Empire, Celes was infused with magic from infancy. She’s introduced as a traitor to the Empire, imprisoned and awaiting execution before being rescued by Locke. Her story is one of finding trust and love amidst betrayal, culminating in her becoming the de facto leader of the party and the beacon of hope in the ruined world.”
- Ability Deep Dive: Runic
- Mechanics: Celes’s unique Runic command puts her in a special stance. While in this stance, the next magic spell cast on the battlefield—by either an enemy or an ally—will be nullified. Celes absorbs the spell and recovers MP equal to the spell’s cost. This makes her an incredible anti-mage, capable of completely shutting down magic-heavy bosses 🛑 like the Tunnel Armor.
- Limitations: Runic doesn’t absorb all spells. Certain abilities, like Meteor, Quake, and Ultima, can’t be absorbed. Furthermore, once she absorbs a spell, the Runic stance ends, and she must use the command again to reactivate it.
- Strategic Build Paths
- Primary Path – The Magic General 👩⚖️: Like Terra, Celes has high natural Magic Power and learns several spells by leveling up, primarily Ice-based magic. Building her as a primary spellcaster is her most effective role. Her access to some of the best swords and heavy armor in the game gives her better survivability than Terra.
- Secondary Path – The Mystic Fighter: Celes can also be built as a formidable physical fighter. Her excellent equipment selection, including female-exclusive gear like the Minerva Bustier, allows her to achieve high defensive stats. By focusing on Strength-boosting Espers, her damage with weapons like the Lightbringer can be exceptional.
- Endgame Setup (Mage Build)
- Weapon 🗡️: Lightbringer or Apocalypse.
- Shield 🛡️: Paladin Shield or Aegis Shield.
- Head 👒: Mystery Veil or Genji Helm.
- Body 👚: Minerva Bustier.
- Relics 💍: Soul of Thamasa (for Dualcast) is her best option. Alternatively, two Earrings or a Hero’s Ring can be used to maximize damage.
Shadow – The Silent Assassin 🤫
- Profile: “A cold, professional assassin who sells his services to the highest bidder, accompanied only by his faithful dog, Interceptor. 🐕 Shadow’s past is shrouded in mystery, revealed only through a series of cryptic dreams. He’s a man running from his history 🏃♂️ as a thief named Clyde and his abandoned family, which includes his daughter, Relm.”
- Ability Deep Dive: Throw & Interceptor
- Mechanics: Shadow’s Throw command allows him to hurl items from the inventory at enemies. This includes specialized, purchasable throwing weapons like the Shuriken and Fuma Shuriken, as well as nearly any normal weapon. Thrown weapons deal double their normal damage, ignore the target’s defense and row, and are unblockable, making Throw an incredibly reliable source of high damage.
- Interceptor: Shadow’s dog, Interceptor, has a 50% chance to block any single-target physical attack aimed at Shadow. Furthermore, after blocking, Interceptor has a 50% chance to retaliate with a powerful, defense-ignoring counterattack. This passive ability makes Shadow surprisingly durable against physical damage.
- Strategic Build Paths
- Primary Path – The Ninja: This build focuses on Shadow’s natural strengths: Speed and damage. The main strategy is to keep him in the back row for safety and use the Throw command exclusively for offense. Throwing Fuma Shurikens or obsolete weapons provides excellent, reliable damage. Prioritizing Speed with Odin and Strength with Bismarck will maximize his effectiveness.
- Secondary Path – The Magic Assassin: Shadow also has a respectable Magic Power stat. He can be built into a surprisingly effective mage. His access to unique ninja swords that boost his speed and magic evasion, combined with a focus on Magic Power Espers, can turn him into a fast spell-slinger.
- Endgame Setup (Ninja Build)
- Weapon 🗡️: Kagenui or Oborokigetsu (for their stat boosts).
- Shield 🛡️: Aegis Shield or Genji Shield.
- Head 🧢: Genji Helm or Green Beret.
- Body 👕: Genji Armor or Black Garb.
- Relics 💍: Hermes Sandals or Miracle Shoes to further boost his already high speed. A Hero’s Ring can be used to amplify his Throw damage. The Memento Ring provides crucial immunities to instant death.
Cyan Garamonde – The Stoic Samurai 🌸
- Profile: “A noble and loyal retainer to the king of Doma, Cyan is a master of the sword who speaks in an old-fashioned, formal dialect. He’s a man defined by tragedy, having lost his king, his country, and his entire family to Kefka’s poison. 😥 His journey is one of processing immense grief and learning to live and fight for a new future.”
- Ability Deep Dive: Bushido (SwdTech)
- Mechanics: Cyan’s Bushido command has a charge gauge that fills from 1 to 8. The player can stop the charge at any level to unleash a corresponding technique. Higher-level techniques are more powerful but require a longer charge time. ⏳ In the original SNES version, this charge time was a significant drawback. In later versions like the Pixel Remaster, Cyan charges in the background, making the ability far more viable.
- Techniques: His techniques range from a simple single-target attack (Fang) and a counter-attack stance (Sky) to powerful multi-hit attacks (Flurry, Tempest) and an instant-death attack (Oblivion).
- Strategic Build Paths
- Primary Path – The Unwavering Blade: Cyan is a pure physical warrior. His primary stats are Strength and Stamina, and his build should reflect this. The goal is to maximize the damage of his Bushido techniques and his standard Fight command. Focusing on Strength-boosting Espers is the only path for him.
- Endgame Optimization: His 4th Bushido, Flurry (Quadra Slam), is often his most efficient damage-per-second ability, as it’s a quick 4-hit combo.
- Endgame Setup
- Weapon 🗡️: Murakumo or Mutsunokami (his ultimate katanas).
- Shield 🛡️: Genji Shield or Aegis Shield.
- Head 🧢: Genji Helm.
- Body 👕: Genji Armor.
- Relics 💍: A Hero’s Ring or Atlas Armlet to boost his physical damage. The Master’s Scroll can be paired with his powerful katanas to turn him into a reliable multi-hit attacker when not using Bushido.
Gau – The Wild Child 🐺
- Profile: “A wild child raised by monsters on the vast plains known as the Veldt. Gau speaks in broken sentences and possesses the unique ability to mimic the creatures he has encountered. He’s a character of pure instinct, whose quest is a simple one: to find his place in a world that abandoned him.”
- Ability Deep Dive: Rage & Leap
- Mechanics: Gau’s gameplay loop is unique. On the Veldt, he can use the Leap command to leave the party. He’ll randomly return after a subsequent battle, having learned the Rage of all monsters present in both the battle he leaped from and the one he returned in.
- Rage: In any battle, Gau can use the Rage command, selecting one of the monsters he has learned. For the remainder of the battle, Gau becomes uncontrollable. Each turn, he’ll use either a standard physical attack or a special ability unique to that monster’s Rage. Crucially, Gau also inherits the elemental properties (weaknesses, absorptions) and status immunities of the Raged monster. This makes him the most versatile character in the game.
- Strategic Build Paths
- The Unstoppable Force (Stray Cat 🐈): The most famous and powerful offensive Rage is Stray Cat. This Rage gives Gau a 50% chance to use the Catscratch ability, a physical attack that deals quadruple damage. By boosting Gau’s Strength, Catscratch can easily reach the damage cap, making him one of the highest single-target damage dealers.
- The Invincible Wall (Magic Urn 🏺): The true depth of Rage lies in its defensive capabilities. The Magic Urn Rage grants Gau immunity or absorption to almost every element and makes him immune to nearly every status ailment. This makes him functionally immortal, perfect for surviving superboss attacks.
- The Utility Belt: Gau has a Rage for every situation. Need party-wide Protect and Shell? Use the Land Ray Rage for Mighty Guard. Need a powerful multi-target Wind attack? Use the Sprinter Rage for Aero. His vast library of Rages makes him a Swiss Army knife of abilities.
- Endgame Setup (Stray Cat Build)
- Weapon 🗡️: Impartisan or any strong claw.
- Shield 🛡️: Genji Shield or Aegis Shield.
- Head 🧢: Red Cap or Genji Helm.
- Body 👕: Snow Scarf (his best armor, granting massive defense).
- Relics 💍: A Hero’s Ring to boost damage is a reliable choice.
Setzer Gabbiani – The Gambler 🎲
- Profile: “The owner of the world’s only airship, the Blackjack, Setzer is a thrill-seeking gambler who lives for the rush of a high-stakes game. 🎰 He joins the party after losing a coin toss to Celes, but his carefree exterior hides a deep sorrow over the loss of his friend, Darill. His journey is about finding a new purpose worth betting his life on.”
- Ability Deep Dive: Slot & Gil Toss
- Mechanics: Setzer’s Slot command brings up a slot machine. The resulting combination determines the effect, ranging from a weak healing spell (Mysidian Rabbit 🐇) to powerful attacks (Prismatic Flash, Dive Bomb) to an instant-win (Joker’s Doom ☠️) that kills all enemies. The results are random, but can be manipulated in some versions.
- Gil Toss: Equipping the Heiji’s Jitte relic changes Slot to Gil Toss, which damages all enemies by spending the party’s gil. 💸 It’s a reliable but expensive way to deal damage.
- Strategic Build Paths
- The Dice Master: This is Setzer’s most iconic and powerful build. It revolves around two unique weapons: the Dice and the Fixed Dice. The damage from these weapons isn’t based on stats, but on a dice roll formula. The Fixed Dice, in particular, can deal huge, defense-ignoring damage. When paired with the Master’s Scroll, Setzer attacks four times, with each hit being a separate roll of the Fixed Dice. This allows him to consistently deal tens of thousands of damage per turn, making him a top-tier physical attacker with zero stat investment required.
- The Support Mage: Since his best build requires no stat investment, Setzer is a prime candidate to be built as a support mage. You can use Espers to boost his Magic Power, turning him into a capable healer and buffer.
- Endgame Setup (Dice Master Build)
- Weapon 🗡️: Fixed Dice.
- Shield 🛡️: Any high MBlock% shield.
- Head 🧢: Any.
- Body 👕: Any.
- Relics 💍: Master’s Scroll is mandatory. The second slot is flexible; a Ribbon for status protection or Hermes Sandals for Haste are good choices.
Mog – The Moogle Geomancer 💖
- Profile: “A talking Moogle from the caves of Narshe, taught to speak by the Esper Ramuh. Kupo! 🐿️ Mog is a surprisingly worldly and capable warrior, skilled with both spear and dance. He is fiercely loyal to his friends and provides much-needed levity on the grim journey.”
- Ability Deep Dive: Dance
- Mechanics: Mog’s Dance command is determined by the terrain the battle is taking place in (forest 🌲, desert 🏜️, cave 🦇, etc.). Each dance has four different abilities, which are chosen randomly each turn. If Mog uses a dance that doesn’t match the terrain, he has a 50% chance of stumbling. Once a dance starts, Mog becomes uncontrollable. To learn a new dance, Mog simply has to win a battle in the corresponding terrain type.
- Strategic Value: Dances offer a wide variety of useful effects, from powerful elemental attacks (Wind Rhapsody’s Wind Slash) to party-wide healing (Water Harmony’s Raccoon). The Water Harmony dance 🌊 is particularly powerful in the early game.
- Strategic Build Paths
- The Dragoon: This is Mog’s most powerful and popular build. He can equip spears, which get a damage bonus from the Jump command. His ultimate weapon, the Gungnir, is one of the strongest spears. By equipping the Dragoon Boots and Dragon Horn, Mog becomes a high-flying engine of destruction, consistently dealing huge damage from the safety of the back row. This build requires focusing on his Strength stat.
- The Dancing Mage: Mog has surprisingly good defensive stats and solid Magic Power. He can be built as a durable mage, using his high MBlock% from shields and his innate defenses to stay alive while casting spells.
- Endgame Setup (Dragoon Build)
- Weapon 🗡️: Gungnir or Radiant Lance.
- Shield 🛡️: Aegis Shield or Paladin Shield.
- Head 🧢: Genji Helm.
- Body 👕: Snow Scarf (if you choose not to give it to Gau) or Genji Armor.
- Relics 💍: Dragoon Boots and Dragon Horn.
Strago Magus – The Blue Mage 🔵
- Profile: “An elderly Blue Mage from the mysterious village of Thamasa and Relm’s grandfather. Strago is a keeper of ancient magical traditions, dedicated to learning the monster-specific magic known as Lore. He’s both a wise elder and a comically flirty old man.”
- Ability Deep Dive: Lore
- Mechanics: Lore is Blue Magic. To learn a Lore, Strago must see it being cast by an enemy (and survive the battle). Lores are a diverse set of spells, many of which have unique effects not found in standard Black or White magic.
- Key Lores: Some of the most powerful Lores include Mighty Guard (casts Protect and Shell on the party), White Wind (heals the party for an amount equal to Strago’s current HP), Grand Delta (a powerful, defense-ignoring attack), and Level 5 Death (instantly kills any enemy whose level is a multiple of 5).
- Strategic Build Paths
- The Dedicated Sage: Strago’s only viable role is that of a dedicated mage. His physical stats are abysmal, but his Magic Power is high. The goal is to teach him as many Lores as possible. Because he often needs to take a hit to learn a new Lore, boosting his HP with Espers like Bahamut is just as important as boosting his Magic Power.
- Endgame Setup
- Weapon 🗡️: Magus Rod.
- Shield 🛡️: Aegis Shield or Paladin Shield.
- Head 👒: Circlet or Red Cap.
- Body 👕: Behemoth Suit or Magus Robe.
- Relics 💍: Soul of Thamasa is an excellent choice, allowing him to Dualcast his powerful Lores. A Celestriad is also top-tier to eliminate the high MP cost of spells like Grand Delta.
Relm Arrowny – The Pictomancer 🎨
- Profile: “Strago’s precocious and prodigiously talented granddaughter. Relm is a young artist with the magical ability to make her drawings come to life. She’s blunt, sassy, and possesses a latent magical power that rivals even Terra’s. It’s heavily implied and later confirmed that she’s the abandoned daughter of Shadow.”
- Ability Deep Dive: Sketch & Control
- Mechanics: Relm’s default command is Sketch. It has a chance to make the targeted enemy perform one of its own attacks. However, Sketch is notoriously unreliable and buggy in early versions.
- Control: By equipping the Fake Mustache 🥸 relic, Sketch is transformed into the far more useful Control command. Control allows you to take direct command of an enemy, choosing from a list of their abilities to use against their allies. This is invaluable for forcing an enemy to cast a specific Lore for Strago to learn.
- Strategic Build Paths
- The Ultimate Black Mage: Relm has the highest natural Magic Power stat of any character in the game. Her path is clear: she was born to be the party’s premier magical damage dealer. Every level-up should be dedicated to her Magic Power. With the right setup, her spells will deal the most damage possible.
- Endgame Setup
- Weapon 🗡️: Magus Rod.
- Shield 🛡️: Aegis Shield or Paladin Shield.
- Head 👒: Cat-Ear Hood (her best-in-slot headgear, providing huge stat boosts).
- Body 👚: Behemoth Suit or Minerva Bustier.
- Relics 💍: Soul of Thamasa is her ultimate Relic, allowing her to Dualcast spells like Ultima for unparalleled damage. Two Earrings are a suitable substitute until then.
Umaro – The Yeti 🌨️
- Profile: “A powerful but loyal Yeti found in the frozen caves of Narshe. Umaro adores Mog and joins the party on the Moogle’s command. He’s a being of pure, brute force who can’t speak, but communicates through action.”
- Ability Deep Dive: Uncontrollable Rage
- Mechanics: Umaro is the only character you can never control. He’s permanently in a Berserk-like state, attacking enemies automatically each turn. He can’t equip Espers, use magic, or use items. The only way to customize him is through his two Relic slots.
- Relic-Based Attacks: Equipping Umaro with specific relics adds new attacks to his repertoire.
- Berserker Ring (Rage Ring): Allows Umaro to use Character Toss, a powerful, defense-ignoring attack where he throws a party member at an enemy.
- Blizzard Orb: Allows Umaro to use Snowstorm (Storm), a multi-target Ice-elemental magic attack. 🥶
- Strategic Build Paths
- The Unthinking Weapon 💪: There’s only one build for Umaro: make him hit as hard as possible. His equipment is fixed (Bone Club, Snow Scarf), so all customization comes from his Relics. The Bone Wrist (from the GBA/Pixel Remaster Dragon’s Den) is his best relic. Pairing this with the Berserker Ring for Character Toss creates his optimal damage-dealing setup. While he lacks versatility, he’s a simple and effective source of physical damage.
- Endgame Setup
- Weapon 🗡️: Bone Club (fixed).
- Body 👕: Snow Scarf (fixed).
- Relics 💍: Bone Wrist and Berserker Ring. If the Bone Wrist is unavailable, a Gauntlet or Hero’s Ring are good substitutes.
Gogo – The Mime 🎭
- Profile: “A mysterious mime found in the belly of a giant sandworm called the Zone Eater. Gogo’s gender, origin, and even species are unknown. 🤷 Gogo is a master of mimicry, able to perfectly replicate the abilities of others.”
- Ability Deep Dive: Mimic & Customizable Commands
- Mechanics: Gogo’s innate command is Mimic, which repeats the last action taken by any party member for free. If the last action was Terra casting Ultima, Gogo will also cast Ultima.
- Command Slots: Gogo’s true power lies in customization. In the status menu, you can assign up to three additional commands from the skillsets of any other character you have recruited. Want a character who can use Blitz, Tools, and Lore? That’s Gogo. Want someone who can Steal, Throw, and cast Magic? That’s also Gogo.
- Limitations: Gogo can’t equip Espers and therefore can’t learn magic or gain stat boosts from leveling. Gogo’s stats are also generally mediocre. If Shadow wasn’t saved on the Floating Continent, the Throw command is permanently unavailable for Gogo to use.
- Strategic Build Paths
- The Ultimate Jack-of-All-Trades 🛠️: Gogo’s strength isn’t in raw power, but in unparalleled versatility. The optimal setup depends entirely on the needs of the party. A common and powerful setup is Blitz (for Phantom Rush), Lore (for Mighty Guard and White Wind), and Magic (for access to the party’s entire spellbook). Gogo is a blank slate, a strategic wild card that can fill any gap in your party composition.
- Endgame Setup (Versatile Mage)
- Commands: Mimic, Blitz, Lore, Magic.
- Weapon 🗡️: Magus Rod.
- Shield 🛡️: Aegis Shield.
- Head 🧢: Red Cap.
- Body 👕: Magus Robe.
- Relics 💍: A Celestriad is fantastic, as it makes all of Gogo’s mimicked and cast spells cost only 1 MP. Otherwise, defensive relics like a Ribbon or Miracle Shoes are best.
Chapter 4: The Grand Tour 🗺️ – A Complete Narrative Walkthrough
This chapter is your step-by-step guide through the epic tale of Final Fantasy VI Pixel Remaster. We’ll navigate every town, traverse every dungeon, and face every boss, all while pointing out the crucial secrets, missable items, and hidden character moments that make this journey so memorable.
Part I: The World of Balance – A Guided Symphony 🎼
The first half of the game is a relatively linear experience, introducing the core cast and the central conflict between the Gestahlian Empire and the Returners. Our path will follow the story’s flow, ensuring you’re prepared for every challenge.
Narshe & The Figaro Region ❄️
- Opening Mission: The game begins with Terra, Wedge, and Biggs in Magitek Armor. Follow the path north through the Narshe mines. The first boss, Whelk (Ymir), has a simple pattern: attack its head, but stop when it retreats into its shell to avoid a powerful counterattack. Its weakness is Fire. 🔥
- Locke’s Rescue: After Terra awakens, you’ll take control of Locke. Your goal is to escape Narshe. You’ll be aided by a group of Moogles, including Mog.
- MISSABLE CHARACTER ALERT ⚠️: This is your first chance to recruit Mog. To do so, you must ensure his Moogle party survives the battle against the Narshe guards. After the event, you can return to the Moogle cave to find him. However, a much easier method exists later. For now, simply take his Mythril Shield and Mythril Spear for Locke.
- Figaro Castle 🏰: Meet King Edgar. After a visit from Kefka, the castle will submerge into the sand and travel across the desert. Be sure to purchase Edgar’s Auto Crossbow, Noiseblaster, and Bioblaster tools from the engineer in the castle.
- South Figaro Cave & Mt. Kolts: Traverse the cave to reach the other side of the mountains. On Mt. Kolts, you’ll face Vargas, Sabin’s rival. After a few turns, Sabin will join the fight. You must use Sabin’s Pummel Blitz (Left, Right, Left) to defeat him.
- Returner’s Hideout: Meet Banon, the leader of the Returners.
- MISSABLE ITEM ALERT 🎁: When Banon asks you to join his cause, refuse him twice. A nearby Returner will then give you a Genji Glove. If you agree immediately, you’ll receive the less valuable Gauntlet.
The Three Scenarios
After escaping the Empire on the Lethe River (where you’ll fight Ultros 🐙 for the first time), the party is split. You must complete three scenarios in any order you choose.
- Locke’s Scenario (South Figaro) stealth 🤫: Locke must sneak through the Imperial-occupied town of South Figaro to rescue Celes. This scenario involves stealing clothes from merchants and soldiers to create disguises. In the secret passages beneath the rich man’s house, you’ll fight the Tunnel Armor. The key to this fight is to have Celes use Runic every turn to absorb its powerful magic attacks.
- MISSABLE ITEM ALERT 🎁: In a hidden passage in the basement, there’s a chest containing a Ribbon, one of the best accessories in the game. Don’t miss this.
- Sabin’s Scenario (The Serpent Trench) 🌊: This scenario follows Sabin after he’s swept away from the party.
- Imperial Camp: Sabin will join forces with the mysterious ninja, Shadow. You can also recruit the samurai, Cyan, after witnessing Kefka poison the castle of Doma. ☠️
- Phantom Forest & Train 👻: You’ll traverse a haunted forest and board the Phantom Train. To defeat the Ghost Train, you must use a Phoenix Down on it or cast a healing spell, as it’s undead.
- Baren Falls & The Veldt: After jumping from Baren Falls, you’ll wash up near a cabin where you’ll meet Gau. To recruit him, you must give him Dried Meat, which can be purchased in the nearby town of Mobliz.
- Terra’s Scenario (Narshe) 👩🎤: Terra, Edgar, and Banon make their way back to Narshe. This is a short scenario with no major events.
The Road to the Magitek Research Facility
- Narshe Battle: The party reunites to defend Narshe and the frozen Esper from Kefka’s assault. You’ll control three parties to hold back waves of soldiers. After defeating the soldiers, you’ll face Kefka himself. This is a simple fight; just unload your most powerful attacks.
- Figaro & Kohlingen: With the party reunited and the world now open, your next destination is Zozo. You can now travel between the two continents with Edgar’s Figaro Castle.
- Jidoor & Zozo: In the thieves’ town of Zozo, you must climb a tower to find Terra. Here you’ll acquire your first four Espers: Ramuh, Kirin, Siren, and Cait Sith. This is the point where the character customization truly begins. ✨
- The Opera House 🎭: This is one of the most famous sequences in RPG history. You must help Celes take the place of an opera singer to lure the gambler Setzer into a trap. Follow the script cues carefully and deliver the flowers 💐 to the correct balcony. Afterwards, you’ll fight Ultros 🐙 again on the stage.
- The Magitek Research Facility 🔬: After gaining Setzer and his airship, the Blackjack, you’ll fly to the Imperial continent and infiltrate the facility where Espers are being drained of their power. Here, you’ll fight Ifrit and Shiva (weak to Ice 🧊 and Fire 🔥, respectively) and Number 024. You’ll free several Espers, adding them to your collection, including Ifrit, Shiva, Unicorn, Maduin, Catoblepas, Phantom, Carbuncle, and Bismarck.
- Escape from Vector: After escaping the facility, you’ll fight Number 128 and the Cranes on your way out of the Imperial capital.
The Floating Continent ☁️
After a series of events involving a peace conference and a journey to the land of Espers, the villainous Kefka raises the Floating Continent, seeking the ultimate power of the Warring Triad.
- The Ascent: You’ll fly the Blackjack to the continent and fight your way across it. You’ll face Ultima Weapon and the recurring pest, Ultros 🐙, one last time.
- The Betrayal: After a confrontation with Emperor Gestahl and Kefka, the world is torn asunder. The party must escape the disintegrating continent.
- THE MOST IMPORTANT CHOICE IN THE GAME 🚨: During the escape, Shadow will hold back enemies to allow the party to reach the airship. You’ll be given a choice: jump to safety or wait for Shadow. You MUST wait. Do not jump. Stand at the edge of the cliff until the timer on screen counts down to 5 seconds. At that point, Shadow will appear and jump with you.
- Why? If you jump early, Shadow is permanently lost from the game. 😥 Saving Shadow is not just about keeping a powerful character. The Mime, Gogo, can be customized with other characters’ command sets. Shadow’s Throw command is unique. If Shadow dies, the Throw command is permanently removed from the game’s pool of available abilities. This means Gogo can never be assigned the Throw command, permanently reducing Gogo’s maximum versatility and locking you out of one of the game’s most powerful and versatile command options. Saving Shadow is about preserving the full potential of your entire roster.
Part II: The World of Ruin – An Open-World Requiem 💔
One year after the apocalypse, you awaken as Celes on a desolate island. The world is a shattered ruin, and Kefka rules from his tower as a mad god. The second half of the game is a non-linear quest to find your scattered friends and a glimmer of hope.
Recommended Order of Operations
The World of Ruin can be explored in almost any order. However, the following path is recommended for a smooth difficulty curve and for acquiring the most useful characters and items first.
- The Solitary Island & The Airship ✈️:
- Your first task is to leave the starting island. You can save Cid by feeding him the faster-moving fish 🐟 from the beach; the slow ones are poisonous. The outcome of this scene is purely narrative and doesn’t affect the rest of the game.
- Travel north to the town of Albrook, then east to Tzen. In Tzen, you’ll witness Kefka’s Light of Judgment 💥 strike the town. You can enter the collapsing house to save a child and get a valuable piece of Magicite, but it’s a timed event.
- Your primary goal is to reach Nikeah and take a ferry to South Figaro, then travel north to Kohlingen. Here you’ll meet Setzer and find the Falcon, a new airship hidden in Darill’s Tomb. With the Falcon, the entire world is open to you.
- Recruit the Core Team (Sabin, Edgar, Setzer, Celes):
- With the Falcon, your party consists of Celes and Setzer. Fly to Tzen and find Sabin holding up a collapsing house.
- Fly to Figaro Castle 🏰, which is stuck under the desert sand near Kohlingen. Go through the cave behind the castle to clear the engine room, allowing the castle to move again. Take it to Figaro, where you’ll find Edgar posing as a thief named Gerad. Follow him to the Dragon’s Neck Cabin and through a cave to re-recruit him.
- Priority Recruit: Mog & The Moogle Charm:
- With a party of four, fly to Narshe. Enter through the main gate and then go into the mines from the entrance on the western side of town. Navigate the mines to the place where the Moogles lived. Here you’ll find Mog.
- CRITICAL ITEM 💎: After Mog rejoins, examine the spot on the wall where he was staring. You’ll find the Molulu’s Charm. When equipped on Mog, this Relic prevents all random encounters. 🙌 This item is the single most useful exploration tool in the game, making treasure hunting and dungeon navigation a breeze.
- Recruit the Remaining Characters 🤝:
- Cyan: At the top of Mt. Zozo, north of the town of Zozo.
- Gau: Appears randomly after any battle on the Veldt. Keep an open slot in your party for him to join.
- Terra: In the town of Mobliz. You’ll have to defend the children from the monster Humbaba. After you defeat it once, leave and return later to fight it again to have Terra rejoin permanently. Humbaba is weak to Poison.
- Relm: In the town of Jidoor, at Owzer’s Mansion. You must navigate a haunted art gallery and defeat the boss Chadarnook.
- Strago: After recruiting Relm, put her in your party and fly to the Cultists’ Tower. Strago will be outside, attempting to enter. With Relm present, he’ll rejoin.
- Locke: In the Phoenix Cave, a complex, multi-party dungeon north of Tzen. This is an excellent place to use Mog with the Molulu’s Charm to handle one party’s exploration without any fights.
- Shadow: If you waited for him on the Floating Continent, he’ll be found wounded in the Cave on the Veldt. After rescuing him, you must go to the Coliseum and bet the Ichigeki (a weapon found in the cave) to fight him. Defeat him, and he’ll join permanently.
- Gogo: On Triangle Island in the northeast corner of the map. Allow your party to be sucked into a battle with the Zone Eater monster. This will transport you to the Zone Eater’s Belly, a secret dungeon where Gogo resides at the end.
- Umaro: In the deepest part of the Narshe caves. You must first defeat the frozen Esper Valigarmanda on the cliffs where the game began. This will open a path into a new section of the mines. At the end, you’ll fight Umaro. After defeating him, if Mog is in your party, he’ll command Umaro to join.
- Tackle the Endgame Side Quests ⭐:
- Cyan’s Dream: Rest with Cyan in your party at Doma Castle to enter his soul and help him overcome his grief.
- The Ancient Castle: Dive with Figaro Castle under the Figaro desert to discover a hidden castle with the Odin Magicite, which can be upgraded to the powerful Raiden Magicite.
- The Eight Legendary Dragons: Hunt down the eight powerful dragons 🐉 scattered across the world to earn the Crusader Magicite.
- The Fanatics’ Tower: A magic-only tower where you can find some of the best mage gear in the game, including Relm’s Fake Mustache and the Soul of Thamasa relic.
- Ebot’s Rock: A small cave system where you can help Hydro build a bridge to find more treasure.
- Final Assault: Kefka’s Tower 🗼:
- Once your party is reassembled and equipped, it’s time to take the fight to Kefka. His tower is a massive, final dungeon that requires you to use three separate parties to navigate.
- You’ll fight through a gauntlet of bosses, including the three statues of the Warring Triad, before facing Kefka himself in a multi-tiered final battle that is one of the most iconic and musically brilliant conclusions in the series.
Appendices: The Narshe Archives 📚
This section serves as your comprehensive, quick-reference database for all the critical systems and items in Final Fantasy VI Pixel Remaster. Use these archives to plan your character builds, hunt for specific equipment, and master every facet of the game.
A. The Esper Database 💎
The following table details every Esper in the game, their location, the spells they teach, and—most importantly—the stat bonus they provide upon level-up. Plan your character growth accordingly.
| Esper | Level Bonus | Spells Taught | Location |
| Ramuh 🌩️ | Stamina +1 | Thunder (x10), Thundara (x2), Poison (x5) | Zozo (Automatic) |
| Kirin 🦒 | None | Cure (x5), Cura (x1), Regen (x3), Poisona (x4), Libra (x5) | Zozo (Automatic) |
| Siren 🎶 | HP +10% | Sleep (x10), Silence (x8), Slow (x7), Fire (x6) | Zozo (Automatic) |
| Cait Sith 🐈 | Magic +1 | Confuse (x7), Imp (x5), Float (x2) | Zozo (Automatic) |
| Ifrit 🔥 | Strength +1 | Fire (x10), Fira (x5), Drain (x1) | Magitek Research Facility (Automatic) |
| Shiva 🧊 | None | Blizzard (x10), Blizzara (x5), Osmose (x4), Rasp (x4), Cure (x3) | Magitek Research Facility (Automatic) |
| Unicorn 🦄 | None | Cura (x4), Esuna (x3), Dispel (x2), Protect (x1), Shell (x1) | Magitek Research Facility (Automatic) |
| Maduin 👨👩👧 | Magic +1 | Fira (x3), Blizzara (x3), Thundara (x3) | Magitek Research Facility (Automatic) |
| Catoblepas 🐂 | HP +10% | Bio (x8), Break (x5), Death (x2) | Magitek Research Facility (Automatic) |
| Phantom 👻 | MP +10% | Berserk (x3), Vanish (x3), Gravity (x5) | Magitek Research Facility (Automatic) |
| Carbuncle 💎 | None | Reflect (x5), Haste (x3), Shell (x2), Protect (x2), Teleport (x2) | Magitek Research Facility (Automatic) |
| Bismarck 🐳 | Strength +2 | Fire (x20), Blizzard (x20), Thunder (x20), Raise (x2) | Magitek Research Facility (Automatic) |
| Golem 🧱 | Stamina +2 | Protect (x5), Stop (x5), Cura (x5) | Jidoor Auction House |
| Zoneseeker 👁️ | Magic +2 | Rasp (x20), Osmose (x15), Shell (x5) | Jidoor Auction House |
| Seraph 😇 | None | Raise (x5), Cure (x20), Cura (x8), Regen (x10), Esuna (x4) | Tzen (Purchase from man in trees) |
| Quetzalli 🦅 | Speed +1 | Haste (x20), Slow (x20), Hastega (x2), Slowga (x2), Float (x5) | Solitary Island (World of Ruin) |
| Fenrir 🐺 | MP +30% | Teleport (x30), Banish (x20), Stop (x3) | Mobliz (World of Ruin) |
| Valigarmanda ❄️ | Magic +2 | Firaga (x1), Blizzaga (x1), Thundaga (x1) | Narshe Cliffs (World of Ruin) |
| Midgardsormr 🐍 | HP +30% | Quake (x3), Graviga (x1), Tornado (x1) | Yeti’s Cave (World of Ruin) |
| Lakshmi 💖 | Stamina +2 | Cure (x25), Cura (x16), Curaga (x1), Regen (x20), Esuna (x20) | Owzer’s Mansion (World of Ruin) |
| Alexander 🤖 | None | Holy (x2), Protect (x10), Shell (x10), Dispel (x10), Esuna (x15) | Doma Castle (World of Ruin) |
| Phoenix 🐦 | None | Raise (x10), Arise (x2), Reraise (x1), Curaga (x5), Firaga (x3) | Phoenix Cave (World of Ruin) |
| Odin 🐎 | Speed +1 | Meteor (x1) | Ancient Castle (World of Ruin) |
| Raiden ⚡ | Strength +2 | Quick (x1) | Ancient Castle (Upgrade from Odin) |
| Bahamut 🐲 | HP +50% | Flare (x2) | Defeat Deathgaze on the World Map |
| Crusader ✨ | MP +50% | Meltdown (x1), Meteor (x10) | Defeat all 8 Legendary Dragons |
| Ragnarok ⚔️ | None | Ultima (x1) | Narshe Weapon Shop (Choose Esper) |
(Note: Espers exclusive to GBA/Mobile/Pixel Remaster versions like Leviathan, Gilgamesh, Cactuar 🌵, and Diabolos are also available in those versions, offering further stat growth options like Speed +2 from Cactuar).
B. The Relic Encyclopedia 💍
Relics are the cornerstone of character customization, granting new abilities, status immunities, and powerful passive effects. The following is a list of some of the most strategically important Relics in the game.
| Relic Name | Effect | Strategic Value & Notes |
| Genji Glove 🧤 | Allows the wearer to equip a weapon in each hand. | S-Tier. The foundation of all dual-wielding physical damage builds. Essential for characters like Locke. |
| Master’s Scroll 📜 | Allows the wearer to attack four times per turn, but each attack’s damage is halved. | S-Tier. Game-breaking when paired with weapons that have special damage properties that bypass the damage penalty, like the Valiant Knife and Fixed Dice. |
| Soul of Thamasa ✨ | Changes the Magic command to Dualcast, allowing the user to cast two spells in one turn. | S-Tier. The single best Relic for any dedicated mage. Doubles a character’s magical damage output. |
| Celestriad 💎 | Reduces the MP cost of all spells to 1. | S-Tier. Allows for infinite spamming of the most powerful spells like Ultima. Completely breaks the game’s resource management. |
| Ribbon 🎀 | Prevents all negative status ailments. | S-Tier. The ultimate defensive Relic. Makes the wearer immune to nearly every debilitating effect in the game. |
| Hero’s Ring 💪 | Increases both physical and magical damage by 25%. | A-Tier. A fantastic all-purpose damage-boosting Relic. Doesn’t stack with itself, but it does stack with one Earring. |
| Earring 💎 | Increases magical damage by 25%. Two can be equipped to stack the effect for a 50% boost. | A-Tier. Essential for maximizing the damage of your mages before you acquire the Soul of Thamasa. |
| Dragoon Boots 👢 | Changes the Fight command to Jump. | A-Tier (for Dragoons). The foundation of the Dragoon build. Turns characters like Edgar and Mog into top-tier damage dealers. |
| Dragon Horn 뿔 | Causes Jump to hit 2-4 times. | A-Tier (for Dragoons). The other essential piece of the Dragoon build. Must be paired with Dragoon Boots. |
| Molulu’s Charm 💖 | Prevents all random encounters when equipped on Mog. | A-Tier (Utility). An incredible quality-of-life item that makes exploring dungeons and finding secrets much easier. |
| Fake Mustache 🥸 | Changes Relm’s Sketch command to Control. | B-Tier. Transforms Relm’s worst ability into a strategically useful one, primarily for learning Strago’s Lores. |
| White Cape 🕊️ | Prevents Imp and Silence; boosts MBlock% by 10. | B-Tier. A solid defensive Relic. The MBlock% boost is particularly valuable due to the Evade bug. |
C. The Armory ⚔️
A complete database of every weapon, shield, and piece of armor is beyond the scope of this narrative guide, but can be found in many online wikis and FAQs. However, remember these key principles when equipping your party:
- Prioritize MBlock% on Shields: Due to the Evade bug, a shield’s MBlock% is its most important defensive stat. The Aegis Shield and Paladin Shield are the best in the game.
- Magic Power is King: For any character you intend to use magic with, prioritize equipment that boosts the Magic Power stat, such as the Magus Rod, Circlet, and Magus Robe.
- Female-Exclusive Gear is Super Strong 💪: The Minerva Bustier is arguably the best body armor in the game, providing incredible defensive stats and elemental resistances. It can only be worn by Terra, Celes, and Relm.
D. The Character Compendium of Commands 📖
This section provides a quick reference for the unique abilities of several key characters.
Sabin’s Blitzes 👊
| Blitz Name | Input Command | Damage Type | Effect |
| Pummel 👊 | Left, Right, Left | Physical | Single-target damage. |
| Aura Cannon 💥 | Down, Down-Left, Left | Magical (Holy) | Single-target damage. |
| Suplex 🏋️ | X, Y, Down, Up | Physical | Lifts and slams a single target. Fails on large enemies. |
| Fire Dance 🔥 | Left, Down-Left, Down, Down-Right, Right | Magical (Fire) | Multi-target damage. |
| Mantra 🧘 | R, L, R, L, X, Y | Healing | Heals party members (except Sabin) based on his current HP. |
| Air Blade 🌪️ | Up, Up-Right, Right, Down-Right, Down | Magical (Wind) | Multi-target damage. |
| Spiraler 🌀 | R, L, X, Y, Right, Left | Healing | Sacrifices Sabin to fully heal all other party members. |
| Phantom Rush 👻 | Left, Up-Left, Up, Up-Right, Right | Magical (Non-elemental) | Devastating, defense-ignoring single-target damage. |
Edgar’s Tools 🔧
| Tool Name | Effect | Target(s) | Acquisition |
| Auto Crossbow 🏹 | Defense-ignoring physical damage | All Enemies | Default |
| Noiseblaster 📣 | Inflicts Confuse | All Enemies | Figaro Castle Shop |
| Bioblaster ☣️ | Inflicts Poison and deals damage | All Enemies | Figaro Castle Shop |
| Flash 💡 | Inflicts Blind | All Enemies | Figaro Castle Shop (post-Narshe battle) |
| Drill 🔩 | High power, defense-ignoring physical damage | One Enemy | Figaro Castle Shop (post-Narshe battle) |
| Chainsaw 🪚 | High power physical damage, 25% chance of instant death | One Enemy | Zozo (Clock puzzle) |
| Debilitator 📉 | Inflicts a random elemental weakness | One Enemy | Figaro Castle Shop (World of Ruin) |
| Air Anchor ⚓ | Target dies the next time it takes an action | One Enemy | Fanatics’ Tower |
E. Gau’s Menagerie: The Complete Rage Guide 🐺
Gau’s Rage list is immense, with 253 possible entries in most versions of the game. A full table is impractical here, but understanding the philosophy of Rage is key. Don’t just look for the strongest attack. The true power of Rage lies in the defensive properties and status immunities it grants. Below are some of the most strategically valuable Rages.
| Monster Name | Key Ability | Key Defensive Properties | Strategic Use |
| Stray Cat 🐈 | Catscratch (4x physical damage) | None | The go-to Rage for pure physical damage. |
| Magic Urn 🏺 | Curaga (targets enemies) | Absorbs all 8 elements; immune to most statuses. | The ultimate defensive Rage. Makes Gau nearly invincible. |
| Io 🌟 | Flare Star | Absorbs Fire; immune to Water. | Powerful damage that scales with the enemy’s level. |
| Tyrannosaur 🦖 | Meteor | Absorbs Fire. | A powerful, non-elemental multi-target spell. |
| Land Ray 🛡️ | Mighty Guard | Absorbs Earth. | The only way to get party-wide Protect and Shell from a Rage. |
| Peeper 힐 | White Wind | Immune to Water. | Provides powerful party-wide healing based on Gau’s current HP. |
| Rafflesia 🌸 | Entice (Charm) | Absorbs Poison; immune to most statuses. | Can lock down powerful enemies with the Charm status. |
| Intangir 💤 | Transfusion | Absorbs all 8 elements; immune to most statuses. | Another “invincible” Rage, but its attack sacrifices Gau. Useful in emergencies. |
F. The Complete Bestiary & Boss Strategy Index 🐲
Here is the complete bestiary for Final Fantasy VI! 🎮
Entries marked with ❗ or 🚨 are permanently missable. Critical (🚨) indicates an enemy that is exceptionally easy to miss, often appearing in a single room, as part of a one-time sequence, or as a component of a boss that must be defeated separately.
🧭 World of Balance: Part 1 (Begin-Magitek Facility)
| Bestiary # | Monster Name | Best Location / Scenario | Missable? |
| 001 | Guard 🛡️ | Narshe (Prologue, WoB) | ❗ Yes |
| 002 | Silver Lobo 🐺 | Narshe (Prologue, WoB) | ❗ Yes |
| 003 | Megalodoth 🦣 | Narshe (Prologue, WoB) | ❗ Yes |
| 004 | Wererat 🐀 | Narshe Mines (WoB) | No (Veldt) |
| 005 | Spritzer 💧 | Narshe Mines (WoB) | No (Veldt) |
| 006 | Bandit 💰 | Narshe Mines (WoB) | No (Veldt) |
| 007 | Leaf Bunny 🐇 | World Map (Figaro Area, WoB) | No (Veldt) |
| 008 | Darkwind 🦇 | World Map (Figaro Area, WoB) | No (Veldt) |
| 009 | Sand Ray 🏜️ | World Map (Figaro Desert, WoB) | No (Veldt) |
| 010 | Alacran 🦂 | World Map (Figaro Desert, WoB) | No (Veldt) |
| 011 | Foper 👁️ | South Figaro Cave (WoB) | No (Veldt) |
| 012 | Hornet 🐝 | South Figaro Cave (WoB) | No (Veldt) |
| 013 | Urok 👹 | South Figaro Cave (WoB) | No (Veldt) |
| 014 | Belmodar 🐻 | World Map (South Figaro Area, WoB) | No (Veldt) |
| 015 | Unseelie 🧚 | World Map (South Figaro Area, WoB) | No (Veldt) |
| 016 | Mu 🐹 | World Map (South Figaro Area, WoB) | No (Veldt) |
| 017 | Zaghrem 🐗 | Mt. Kolts (WoB) | No (Veldt) |
| 018 | Trillium 🌸 | Mt. Kolts (WoB) | No (Veldt) |
| 019 | Gorgias 🦍 | Mt. Kolts (WoB) | No (Veldt) |
| 020 | Cirpius 🐦 | Mt. Kolts (WoB) | No (Veldt) |
| 021 | Lesser Lopros 🌊 | Lethe River (WoB) | No (Veldt) |
| 022 | Nautiloid 🦑 | Lethe River (WoB) | No (Veldt) |
| 023 | Exocite 🦟 | Lethe River (WoB) | No (Veldt) |
| 024 | Heavy Armor 🤖 | South Figaro (Locke’s Scenario, WoB) | ❗ Yes |
| 025 | Commander 🎖️ | South Figaro Secret Passage (WoB) | ❗ Yes |
| 026 | Vector Hound 🐕 | South Figaro Secret Passage (WoB) | ❗ Yes |
| 027 | Cartagra 🐌 | South Figaro Cave (Sabin’s Scenario, WoB) | No (Veldt) |
| 028 | Acrophies 🕷️ | South Figaro Cave (Sabin’s Scenario, WoB) | No (Veldt) |
| 029 | Gold Bear 🐻 | South Figaro Cave (Sabin’s Scenario, WoB) | No (Veldt) |
| 030 | Valeor 🦅 | Narshe Mines (Locke’s Scenario, WoB) | No (Veldt) |
| 031 | Wild Rat 🐀 | Narshe Mines (Locke’s Scenario, WoB) | No (Veldt) |
| 032 | Stray Cat 🐈 | World Map (Doma Area, WoB) | No (Veldt) |
| 033 | Aepyornis 🐦 | World Map (Doma Area, WoB) | No (Veldt) |
| 034 | Nettlehopper 🦗 | World Map (Doma Area, WoB) | No (Veldt) |
| 035 | Chippirabbit 🐇 | World Map (Doma Area, WoB) | No (Veldt) |
| 036 | Captain 🎖️ | Imperial Camp (Sabin’s Scenario, WoB) | 🚨 Yes (Critical) |
| 037 | Imperial Soldier 🛡️ | Imperial Camp (Sabin’s Scenario, WoB) | No (Veldt) |
| 038 | Templar 🛡️ | Imperial Camp (Sabin’s Scenario, WoB) | No (Veldt) |
| 039 | Satellite 🛰️ | Imperial Camp (Monster-in-a-Box, WoB) | 🚨 Yes (Critical) |
| 040 | Ghost 👻 | Phantom Forest (WoB) | No (Veldt) |
| 041 | Poplium 👻 | Phantom Forest (WoB) | No (Veldt) |
| 042 | Cloud ☁️ | Phantom Train (WoB) | ❗ Yes |
| 043 | Angel Whisper 👼 | Phantom Train (WoB) | ❗ Yes |
| 044 | Oversoul 👻 | Phantom Train (WoB) | ❗ Yes |
| 045 | Bomb 💣 | Phantom Train (WoB) | No (Veldt) |
| 046 | Living Dead 🧟 | Phantom Train (WoB) | ❗ Yes |
| 047 | Apparition 👻 | Phantom Train (Monster-in-a-Box, WoB) | ❗ Yes |
| 048 | Siegfried 🤺 | Phantom Train (Monster-in-a-Box, WoB) | ❗ Yes |
| 049 | Opinicus Fish 🐟 | Baren Falls (WoB) | ❗ Yes |
| 050 | Anguiform 🐍 | Serpent Trench (WoB) | No (Veldt) |
| 051 | Aspiran 🐍 | Serpent Trench (WoB) | No (Veldt) |
| 052 | Actinian 🐍 | Serpent Trench (WoB) | No (Veldt) |
| 053 | Fidor 🐕 | Narshe Battle (WoB) | ❗ Yes |
| 054 | Corporal 🛡️ | Narshe Battle (WoB) | ❗ Yes |
| 055 | Hunting Hound 🐕 | Narshe Battle (WoB) | ❗ Yes |
| 056 | Fossil Dragon 🐲 | World Map (Kohlingen Desert, WoB) | No (Veldt) |
| 057 | Vulture 🦅 | World Map (Kohlingen Area, WoB) | No (Veldt) |
| 058 | Iron Fist 👊 | World Map (Kohlingen Area, WoB) | No (Veldt) |
| 059 | Bloodfang 🐺 | World Map (Kohlingen Area, WoB) | No (Veldt) |
| 060 | Rock Wasp 🐝 | World Map (Kohlingen Area, WoB) | No (Veldt) |
| 061 | Paraladia 🦅 | World Map (Kohlingen Area, WoB) | No (Veldt) |
| 062 | Harvester 🤖 | Zozo (WoB) | No (Veldt) |
| 063 | Hill Gigas 💪 | Zozo (WoB) | No (Veldt) |
| 064 | Gobbledygook 💃 | Zozo (WoB) | No (Veldt) |
| 065 | Veil Dancer 💃 | Zozo (WoB) | No (Veldt) |
| 066 | Stunner 🎭 | Opera House Rafters (WoB) | 🚨 Yes (Critical) |
| 067 | Goetia 🎭 | Opera House Rafters (WoB) | 🚨 Yes (Critical) |
| 068 | Litwor Chicken 🐔 | World Map (Southern Continent, WoB) | No (Veldt) |
| 069 | Joker 🃏 | World Map (Southern Continent, WoB) | No (Veldt) |
| 070 | Don 👹 | World Map (Southern Continent, WoB) | No (Veldt) |
| 071 | Wyvern 🐲 | World Map (Southern Continent, WoB) | No (Veldt) |
| 072 | Grasswyrm 🐍 | World Map (Southern Continent, WoB) | No (Veldt) |
| 073 | Grenade 💣 | World Map (Forest West of Veldt, WoB) | ❗ Yes |
| 074 | Bug 🐞 | World Map (Southern Continent Desert, WoB) | No (Veldt) |
| 075 | Onion Knight 🧅 | Magitek Research Facility (WoB) | ❗ Yes |
| 076 | Sergeant 🎖️ | Magitek Research Facility (WoB) | ❗ Yes |
| 077 | Belzecue 😈 | Magitek Research Facility (WoB) | ❗ Yes |
| 078 | Proto Armor 🤖 | Magitek Research Facility (WoB) | ❗ Yes |
| 079 | Trapper 🪤 | Magitek Research Facility (WoB) | ❗ Yes |
| 080 | Flan 🍮 | Magitek Research Facility (WoB) | 🚨 Yes (Critical) |
| 081 | General 🎖️ | Magitek Research Facility (WoB) | ❗ Yes |
| 082 | Destroyer 🤖 | Magitek Research Facility (WoB) | ❗ Yes |
| 083 | Lenergia 🤖 | Magitek Research Facility (WoB) | ❗ Yes |
| 084 | Magna Roader (Purple) 🏎️ | Magitek Research Facility (WoB) | ❗ Yes |
| 085 | Magna Roader (Red) 🏎️ | Magitek Research Facility (WoB) | ❗ Yes |
| 086 | Chaser 🤖 | Magitek Facility (Minecart escape, WoB) | 🚨 Yes (Critical) |
| 087 | Pipsqueak 🤖 | Magitek Facility (Minecart escape, WoB) | 🚨 Yes (Critical) |
| 088 | Outcast 🐺 | Cave to the Sealed Gate (WoB) | ❗ Yes |
| 089 | Zombie Dragon 🧟 | Cave to the Sealed Gate (WoB) | ❗ Yes |
| 090 | Antares 🦂 | Cave to the Sealed Gate (WoB) | ❗ Yes |
| 091 | Lich 👻 | Cave to the Sealed Gate (WoB) | ❗ Yes |
| 092 | Imperial Elite 🛡️ | Vector Banquet (WoB) | 🚨 Yes (Critical) |
| 093 | Mega Armor 🤖 | Vector Banquet (WoB) | 🚨 Yes (Critical) |
| 094 | Briareus 🦅 | World Map (Thamasa Area, WoB) | No (Veldt) |
| 095 | Devourer 🐜 | World Map (Thamasa Area, WoB) | No (Veldt) |
| 096 | Chimera 🦁 | World Map (Thamasa Area, WoB) | No (Veldt) |
| 097 | Intangir 🌀 | World Map (Triangle Island, WoB) | No (Veldt) |
| 098 | Balloon 🎈 | Burning House (Thamasa, WoB) | 🚨 Yes (Critical) |
| 099 | Bonnacon 🐂 | Esper Mountain (WoB) | ❗ Yes |
| 100 | Land Grillon 🦗 | Esper Mountain (WoB) | ❗ Yes |
| 101 | Adamankary 🐢 | Esper Mountain (WoB) | ❗ Yes |
| 102 | Mandrake 🌿 | Esper Mountain (WoB) | ❗ Yes |
| 103 | Venobennu 🐍 | Esper Mountain (WoB) | ❗ Yes |
| 104 | Sky Armor ✈️ | Floating Continent (WoB) | ❗ Yes |
| 105 | Spitfire ✈️ | Floating Continent (WoB) | ❗ Yes |
| 106 | Brainpan 🧠 | Floating Continent (WoB) | ❗ Yes |
| 107 | Misfit 👻 | Floating Continent (WoB) | ❗ Yes |
| 108 | Apocrypha 📜 | Floating Continent (WoB) | ❗ Yes |
| 109 | Dragon 🐲 | Floating Continent (WoB) | ❗ Yes |
| 110 | Platinum Dragon 🐲 | Floating Continent (WoB) | ❗ Yes |
| 111 | Behemoth 😈 | Floating Continent (WoB) | ❗ Yes |
| 112 | Ninja 🥷 | Floating Continent (Monster-in-a-Box, WoB) | ❗ Yes |
💥 World of Ruin (WoR)
| Bestiary # | Monster Name | Best Location / Scenario | Missable? |
| 113 | Naude 🕊️ | Floating Continent (WoB) | 🚨 Yes (Critical) |
| 114 | Fafnir 🐲 | World Map (Solitary Island, WoR) | No (Veldt) |
| 115 | Killer Mantis 🦗 | World Map (Solitary Island, WoR) | No (Veldt) |
| 116 | Peeper 👁️ | World Map (Albrook Area, WoR) | No (Veldt) |
| 117 | Murussu 🐙 | World Map (Albrook Area, WoR) | No (Veldt) |
| 118 | Gigantoad 🐸 | World Map (Tzen Area, WoR) | No (Veldt) |
| 119 | Land Ray 🏜️ | World Map (Tzen Area, WoR) | No (Veldt) |
| 120 | Luna Wolf 🐺 | World Map (Mobliz Area, WoR) | No (Veldt) |
| 121 | Black Dragon 🐲 | World Map (Mobliz Area, WoR) | No (Veldt) |
| 122 | Rukh 🦅 | World Map (Mobliz Area, WoR) | No (Veldt) |
| 123 | Zokka 🦂 | Collapsing House (Tzen, WoR) | 🚨 Yes (Critical) |
| 124 | Nightwalker 🧟 | Collapsing House (Tzen, WoR) | 🚨 Yes (Critical) |
| 125 | Scorpion 🦂 | Collapsing House (Tzen, WoR) | 🚨 Yes (Critical) |
| 126 | Delta Beetle 🐞 | World Map (Nikeah/S. Figaro Area, WoR) | No (Veldt) |
| 127 | Vampire Thorn 🦇 | World Map (Nikeah/S. Figaro Area, WoR) | No (Veldt) |
| 128 | Lizard 🦎 | World Map (Kohlingen Area, WoR) | No (Veldt) |
| 129 | Devoahan 🦅 | World Map (Kohlingen Area, WoR) | No (Veldt) |
| 130 | Sandhorse 🐴 | World Map (Figaro Desert, WoR) | No (Veldt) |
| 131 | Cancer 🦀 | Figaro Cave (WoR) | No (Veldt) |
| 132 | Oceanus 🐢 | Figaro Cave (WoR) | No (Veldt) |
| 133 | Desert Hare 🐇 | Figaro Cave (WoR) | No (Veldt) |
| 134 | Humpty 🥚 | Darill’s Tomb (WoR) | No (Veldt) |
| 135 | Cruller 💀 | Darill’s Tomb (WoR) | No (Veldt) |
| 136 | Dropper 💧 | Darill’s Tomb (WoR) | No (Veldt) |
| 137 | Neck Hunter 🦒 | Darill’s Tomb (WoR) | No (Veldt) |
| 138 | Dante 🚶 | Mt. Zozo (WoR) | No (Veldt) |
| 139 | Bogy 👻 | Mt. Zozo (WoR) | No (Veldt) |
| 140 | Marchosias 🐺 | Mt. Zozo (WoR) | No (Veldt) |
| 141 | Deepeye 👁️ | Mt. Zozo (WoR) | No (Veldt) |
| 142 | Mousse 🍮 | World Map (Thamasa Area, WoR) | No (Veldt) |
| 143 | Borghese 👹 | World Map (Thamasa Area, WoB) | No (Veldt) |
| 144 | Malboro 🤢 | World Map (Thamasa Area, WoB) | No (Veldt) |
| 145 | Cloudwraith ☁️ | Cave on the Veldt (WoR) | No (Veldt) |
| 146 | Exoray 🌸 | Cave on the Veldt (WoR) | No (Veldt) |
| 147 | Skeletal Horror 💀 | Cave on the Veldt (WoR) | No (Veldt) |
| 148 | Mugbear 🐻 | Cave on the Veldt (WoR) | No (Veldt) |
| 149 | Devil Fist 👊 | Owzer’s Mansion (WoR) | No (Veldt) |
| 150 | Luridan 💃 | Owzer’s Mansion (WoR) | No (Veldt) |
| 151 | Punisher 😈 | Owzer’s Mansion (WoR) | No (Veldt) |
| 152 | Glasya Labolas 😈 | Owzer’s Mansion (WoR) | No (Veldt) |
| 153 | Gorgimera 🦁 | World Map (Maranda Desert, WoR) | No (Veldt) |
| 154 | Twinscythe 🦗 | World Map (Narshe Area, WoR) | No (Veldt) |
| 155 | Death Warden 👻 | Narshe (WoR) | No (Veldt) |
| 156 | Misty 👻 | Narshe (WoR) | No (Veldt) |
| 157 | Rafflesia 🌸 | Owzer’s Mansion (WoR) | 🚨 Yes (Critical) |
| 158 | Still Life 🖼️ | Owzer’s Mansion (WoR) | 🚨 Yes (Critical) |
| 159 | Coeurl Cat 🐈 | World Map (Narshe Area, WoR) | No (Veldt) |
| 160 | Crusher 👹 | World Map (Narshe Area, WoR) | No (Veldt) |
| 161 | Blade Dancer 💃 | Phoenix Cave (WoR) | No (Veldt) |
| 162 | Caladrius 🐦 | Phoenix Cave (WoR) | No (Veldt) |
| 163 | Ouroboros 🐍 | Phoenix Cave (WoR) | No (Veldt) |
| 164 | Face 💀 | Phoenix Cave (WoR) | No (Veldt) |
| 165 | Zeveak 🦅 | Phoenix Cave (WoR) | No (Veldt) |
| 166 | Seaflower 🌸 | Phoenix Cave (WoR) | No (Veldt) |
| 167 | Galypdes 🦅 | Phoenix Cave (WoR) | No (Veldt) |
| 168 | Necromancer 👻 | Phoenix Cave (WoR) | No (Veldt) |
| 169 | Clymenus 👹 | Phoenix Cave (WoR) | No (Veldt) |
| 170 | Chaos Dragon 🐲 | Phoenix Cave (WoR) | No (Veldt) |
| 171 | Brachiosaur 🦕 | Dinosaur Forest (WoR) | No |
| 172 | Tyrannosaur 🦖 | Dinosaur Forest (WoR) | No (Veldt) |
| 173 | Tumbleweed 🍂 | World Map (Maranda Desert, WoR) | No (Veldt) |
| 174 | Leap Frog 🐸 | World Map (Forest N of Veldt, WoR) | No (Veldt) |
| 175 | Slagworm 🐛 | World Map (Desert S of Maranda, WoR) | No |
| 176 | Cactuar 🌵 | World Map (Desert S of Maranda, WoR) | No |
| 177 | Crawler 🐛 | World Map (Triangle Island, WoR) | No (Veldt) |
| 178 | Sprinter 🤖 | World Map (Triangle Island, WoR) | No (Veldt) |
| 179 | Basilisk 🦎 | World Map (Triangle Island, WoR) | No (Veldt) |
| 180 | Lycaon 🐺 | World Map (Triangle Island, WoR) | No (Veldt) |
| 181 | Greater Mantis 🦗 | World Map (Narshe Area, WoR) | No (Veldt) |
| 182 | Test Rider 🤖 | Narshe (Mog’s Cave, WoR) | No (Veldt) |
| 183 | Wizard 🧙 | Narshe (Mog’s Cave, WoR) | No (Veldt) |
| 184 | Lukhavi 🦅 | World Map (WoR) | No |
| 185 | Magna Roader (Yellow) 🏎️ | Narshe (Mog’s Cave, WoR) | No (Veldt) |
| 186 | Magna Roader (Brown) 🏎️ | Narshe (Mog’s Cave, WoR) | No (Veldt) |
| 187 | Psychos 😈 | Yeti’s Cave (WoR) | No (Veldt) |
| 188 | Garm 🐺 | Yeti’s Cave (WoR) | No (Veldt) |
| 189 | Tonberry 🔪 | Yeti’s Cave (WoR) | No |
| 190 | Onion Dasher 🧅 | Yeti’s Cave (WoR) | No (Veldt) |
| 191 | Anemone 🌸 | Yeti’s Cave (WoR) | No (Veldt) |
| 192 | Illuyankas 🐲 | Yeti’s Cave (WoR) | No (Veldt) |
| 193 | Knotty 😈 | Yeti’s Cave (WoR) | No (Veldt) |
| 194 | Tzakmaqiel 👻 | Yeti’s Cave (WoR) | No (Veldt) |
| 195 | Zone Eater 🕳️ | Zone Eater’s Belly (WoR) | No |
| 196 | Vasegiatta 👹 | Zone Eater’s Belly (WoR) | No (Veldt) |
| 197 | Gloomwind ☁️ | Zone Eater’s Belly (WoR) | No (Veldt) |
| 198 | Purusa 🐘 | Zone Eater’s Belly (WoR) | No (Veldt) |
| 199 | Convert 👻 | Zone Eater’s Belly (WoR) | No (Veldt) |
| 200 | Kamui 🐺 | Zone Eater’s Belly (WoR) | No (Veldt) |
| 201 | Wartpuck 🐸 | Zone Eater’s Belly (WoR) | No (Veldt) |
| 202 | Shambling Corpse 🧟 | Zone Eater’s Belly (WoR) | No (Veldt) |
| 203 | Amduscias 😈 | Zone Eater’s Belly (WoR) | No (Veldt) |
| 204 | Baalzephon 😈 | Ancient Castle (WoR) | No (Veldt) |
| 205 | Samurai 🇯🇵 | Ancient Castle (WoR) | No (Veldt) |
| 206 | Al Jabr 💀 | Ancient Castle (WoR) | No (Veldt) |
| 207 | Suriander 🐢 | Ancient Castle (WoR) | No (Veldt) |
| 208 | Weredragon 🐲 | Cyan’s Dreamscape (WoR) | 🚨 Yes (Critical) |
| 209 | Schmidt 🤖 | Cyan’s Dreamscape (WoR) | 🚨 Yes (Critical) |
| 210 | Pluto Armor 🤖 | Cyan’s Dreamscape (WoR) | 🚨 Yes (Critical) |
| 211 | Alluring Rider 💃 | Cyan’s Dreamscape (WoR) | 🚨 Yes (Critical) |
| 212 | Pandora 📦 | Cyan’s Dreamscape (WoR) | 🚨 Yes (Critical) |
| 213 | Parasite 🐛 | Cyan’s Dreamscape (WoB) | 🚨 Yes (Critical) |
| 214 | Coco 👻 | Cyan’s Dreamscape (WoB) | 🚨 Yes (Critical) |
| 215 | Io 👻 | Cyan’s Dreamscape (WoB) | 🚨 Yes (Critical) |
| 216 | Armored Weapon 🤖 | Ebot’s Rock (WoR) | No (Veldt) |
| 217 | Lunatys 🌙 | Ebot’s Rock (WoR) | No (Veldt) |
| 218 | Figaro Lizard 🦎 | Ebot’s Rock (WoR) | No (Veldt) |
| 219 | Devil 😈 | Ebot’s Rock (WoR) | No (Veldt) |
| 220 | Enuo 😈 | Ebot’s Rock (WoR) | No (Veldt) |
| 221 | Magic Urn 🏺 | Cultists’ Tower (WoR) | No |
| 222 | Level 10 Magic 🔟 | Cultists’ Tower (WoR) | No (Veldt) |
| 223 | Level 20 Magic 2️⃣0️⃣ | Cultists’ Tower (WoR) | No (Veldt) |
| 224 | Level 30 Magic 3️⃣0️⃣ | Cultists’ Tower (WoR) | No (Veldt) |
| 225 | Level 40 Magic 4️⃣0️⃣ | Cultists’ Tower (WoR) | No (Veldt) |
| 226 | Level 50 Magic 5️⃣0️⃣ | Cultists’ Tower (WoB) | No (Veldt) |
| 227 | Level 60 Magic 6️⃣0️⃣ | Cultists’ Tower (WoB) | No (Veldt) |
| 228 | Level 70 Magic 7️⃣0️⃣ | Cultists’ Tower (WoB) | No (Veldt) |
| 229 | Level 80 Magic 8️⃣0️⃣ | Cultists’ Tower (WoB) | No (Veldt) |
| 230 | Level 90 Magic 9️⃣0️⃣ | Cultists’ Tower (WoB) | No (Veldt) |
| 231 | Landworm 🐛 | Kefka’s Tower (WoR) | No (Veldt) |
| 232 | Duelist 🤺 | Kefka’s Tower (WoR) | No (Veldt) |
| 233 | Yojimbo 🇯🇵 | Kefka’s Tower (WoR) | No (Veldt) |
| 234 | Dark Force 👻 | Kefka’s Tower (WoR) | No (Veldt) |
| 235 | Great Malboro 🤢 | Kefka’s Tower (WoR) | No (Veldt) |
| 236 | Vector Lythos 👹 | Kefka’s Tower (WoR) | No (Veldt) |
| 237 | Primeval Dragon 🐲 | Kefka’s Tower (WoR) | No (Veldt) |
| 238 | Great Behemoth 😈 | Kefka’s Tower (WoR) | No (Veldt) |
| 239 | Vector Chimera 🦁 | Kefka’s Tower (WoR) | No (Veldt) |
| 240 | Fortis 🤖 | Kefka’s Tower (WoR) | No (Veldt) |
| 241 | Demon Knight 😈 | Kefka’s Tower (WoR) | No (Veldt) |
| 242 | Mover 🌀 | Kefka’s Tower (WoR) | No |
| 243 | Fiend Dragon 🐲 | Kefka’s Tower (WoR) | No (Veldt) |
| 244 | Iron Giant 🤖 | Kefka’s Tower (WoR) | No (Veldt) |
| 245 | Behemoth King (Undead) 🧟 | Kefka’s Tower (WoR) | No (Veldt) |
| 246 | Outsider 🤺 | Kefka’s Tower (WoR) | No (Veldt) |
| 247 | Cherry 🌸 | Kefka’s Tower (WoR) | No (Veldt) |
| 248 | Golem (Monster) 🗿 | Kefka’s Tower (WoR) | No (Veldt) |
| 249 | Figure 🖼️ | Kefka’s Tower (WoR) | No (Veldt) |
| 250 | Scrapper 🤖 | Kefka’s Tower (WoR) | No (Veldt) |
| 251 | Innoc 🤖 | Kefka’s Tower (WoR) | No (Veldt) |
| 252 | Skeptic 🤖 | Kefka’s Tower (WoR) | No (Veldt) |
| 253 | Prometheus 🤖 | Kefka’s Tower (WoR) | No (Veldt) |
| 254 | Retainer 🛡️ | Kefka’s Tower (WoR) | No (Veldt) |
| 255 | Hemophyte 🩸 | Kefka’s Tower (WoR) | No (Veldt) |
| 256 | Critic 🎭 | Kefka’s Tower (WoR) | No (Veldt) |
| 257 | Madame 💃 | Kefka’s Tower (WoR) | No (Veldt) |
| 258 | Junk 🤖 | Kefka’s Tower (WoR) | No (Veldt) |
| 259 | Didalos 🤖 | Kefka’s Tower (WoR) | No (Veldt) |
| 260 | Abaddon 😈 | Kefka’s Tower (WoR) | No (Veldt) |
| 261 | Muud Suud 👹 | Kefka’s Tower (WoR) | No (Veldt) |
| 262 | Daedalus 🤖 | Kefka’s Tower (WoR) | No (Veldt) |
| 263 | Ahriman 👁️ | Kefka’s Tower (WoR) | No (Veldt) |
| 264 | Death Machine 🤖 | Kefka’s Tower (WoR) | No (Veldt) |
⚔️ Bosses and Special Encounters
| Bestiary # | Monster Name | Best Location / Scenario | Missable? |
| 265 | Guard Leader 🛡️ | Narshe Mines (WoB) | ❗ Yes |
| 266 | Magitek Armor 🤖 | Figaro Castle (WoB) | ❗ Yes |
| 267 | Ymir 🐌 | Narshe Mines (WoB) | ❗ Yes |
| 268 | Ipooh 🐻 | Mt. Kolts (WoB) | ❗ Yes |
| 269 | Vargas 💪 | Mt. Kolts (WoB) | ❗ Yes |
| 270 | Tunnel Armor 🤖 | Narshe Mines (Locke’s Scenario, WoB) | ❗ Yes |
| 271 | Leader 🎖️ | Imperial Camp (Sabin’s Scenario, WoB) | ❗ Yes |
| 272 | Phantom Train 🚂 | Phantom Train (WoB) | ❗ Yes |
| 273 | Kefka 🤡 | Doma Castle (Sabin’s Scenario, WoB) | ❗ Yes |
| 274 | Rizopas 🐙 | Baren Falls (WoB) | ❗ Yes |
| 275 | Hell’s Rider 🏇 | Narshe Battle (WoB) | ❗ Yes |
| 276 | Kefka 🤡 | Narshe Battle (WoB) | ❗ Yes |
| 277 | Dadaluma 💪 | Zozo (WoB) | ❗ Yes |
| 278 | Ultros (1) 🐙 | Opera House (WoB) | ❗ Yes |
| 279 | Ifrit 🔥 | Magitek Research Facility (WoB) | ❗ Yes |
| 280 | Shiva ❄️ | Magitek Research Facility (WoB) | ❗ Yes |
| 281 | Number 024 🤖 | Magitek Research Facility (WoB) | ❗ Yes |
| 282 | Number 128 🤖 | Magitek Research Facility (WoB) | ❗ Yes |
| 283 | Left Blade 🗡️ | Magitek Research Facility (WoB) | 🚨 Yes (Critical) |
| 284 | Right Blade 🗡️ | Magitek Research Facility (WoB) | 🚨 Yes (Critical) |
| 285 | Crane (Left) 🏗️ | Vector (WoB) | ❗ Yes |
| 286 | Crane (Right) 🏗️ | Vector (WoB) | ❗ Yes |
| 287 | Flame Eater 🔥 | Burning House (Thamasa, WoB) | ❗ Yes |
| 288 | Ultros (2) 🐙 | Esper Mountain (WoB) | ❗ Yes |
| 289 | Typhon 💨 | Esper Mountain (WoB) | No |
| 290 | Ultros (3) 🐙 | Floating Continent (WoB) | ❗ Yes |
| 291 | Air Force ✈️ | Floating Continent (WoB) | ❗ Yes |
| 292 | Laser Gun 💥 | Floating Continent (WoB) | 🚨 Yes (Critical) |
| 293 | Missile Bay 💥 | Floating Continent (WoB) | 🚨 Yes (Critical) |
| 294 | Bit 🛰️ | Floating Continent (WoB) | 🚨 Yes (Critical) |
| 295 | Gigantos 💪 | Floating Continent (Monster-in-a-Box, WoB) | ❗ Yes |
| 296 | Ultima Weapon 🤖 | Floating Continent (WoB) | ❗ Yes |
| 297 | Nelapa 😈 | Floating Continent (WoB) | ❗ Yes |
| 298 | Phunbaba (1) 💨 | Mobliz (WoR) | ❗ Yes |
| 299 | Tentacle (Top Left) 🦑 | Figaro Cave (WoR) | No |
| 300 | Tentacle (Top Right) 🦑 | Figaro Cave (WoR) | No |
| 301 | Tentacle (Bottom Left) 🦑 | Figaro Cave (WoR) | No |
| 302 | Tentacle (Bottom Right) 🦑 | Figaro Cave (WoR) | No |
| 303 | Presenter 🎁 | Darill’s Tomb (WoR) | No |
| 304 | Dullahan 👻 | Darill’s Tomb (WoR) | No |
| 305 | Storm Dragon 🐲 | Mt. Zozo (WoR) | No |
| 306 | Phunbaba (2) 💨 | Mobliz (WoR) | ❗ Yes |
| 307 | SrBehemoth 😈 | Cave on the Veldt (WoR) | No |
| 308 | Chadarnook (Demon) 🖼️ | Owzer’s Mansion (WoR) | No |
| 309 | Chadarnook (Goddess) 🖼️ | Owzer’s Mansion (WoR) | No |
| 310 | Red Dragon 🐲 | Phoenix Cave (WoR) | No |
| 311 | Humbaba 👹 | World Map (WoR) | No |
| 312 | Phunbaba (3) 💨 | World Map (WoR) | No |
| 313 | Phunbaba (4) 💨 | Mobliz (WoR) | No |
| 314 | Ice Dragon 🐲 | Narshe (WoR) | No |
| 315 | Tritoch 💎 | Narshe (WoR) | No |
| 316 | Umaro 🐻 | Narshe (Yeti’s Cave, WoR) | No |
| 317 | Laragorn 😴 | Cyan’s Dreamscape (WoR) | ❗ Yes |
| 318 | Curley 😴 | Cyan’s Dreamscape (WoR) | ❗ Yes |
| 319 | Moe 😴 | Cyan’s Dreamscape (WoR) | ❗ Yes |
| 320 | Wrexsoul 👻 | Cyan’s Dreamscape (WoR) | ❗ Yes |
| 321 | Soul Saver 👻 | Cyan’s Dreamscape (WoR) | 🚨 Yes (Critical) |
| 322 | Hidon 🧟 | Ebot’s Rock (WoR) | No |
| 323 | Hidonite (x4) 🧟 | Ebot’s Rock (WoR) | No |
| This entry number is often skipped in lists, as it refers to the multiple Hidonite enemies. | |||
| 324 | Magic Master 🧙 | Cultists’ Tower (WoR) | No |
| 325 | Blue Dragon 🐲 | Ancient Castle (WoR) | No |
| 326 | Katana Soul 🇯🇵 | Ancient Castle (Monster-in-a-Box, WoR) | No |
| 327 | Master Tonberry 🔪 | Yeti’s Cave (WoR) | No |
| 328 | Earth Dragon 🐲 | Opera House (WoR) | No |
| 329 | Doom Gaze 👁️ | World Map (WoR) | No |
| 330 | Holy Dragon 🐲 | Cultists’ Tower (WoR) | No |
| 331 | Fiend 😈 | Kefka’s Tower (WoR) | No |
| 332 | Goddess 💃 | Kefka’s Tower (WoR) | No |
| 333 | Demon 👹 | Kefka’s Tower (WoR) | No |
| 334 | Skull Dragon 🐲 | Kefka’s Tower (WoR) | No |
| 335 | Inferno 🔥 | Kefka’s Tower (WoR) | No |
| 336 | Ketu 🔥 | Kefka’s Tower (WoR) | No |
| 337 | Rahu 🔥 | Kefka’s Tower (WoR) | No |
| 338 | Guardian 🤖 | Kefka’s Tower (WoR) | No |
| 339 | Ultima Buster 🤖 | Kefka’s Tower (WoR) | No |
| 340 | Gold Dragon 🐲 | Kefka’s Tower (WoR) | No |
| 341 | Visage 😇 | Kefka’s Tower (Final Battle, WoR) | No |
| 342 | Long Arm 💪 | Kefka’s Tower (Final Battle, WoR) | No |
| 343 | Short Arm 💪 | Kefka’s Tower (Final Battle, WoR) | No |
| 344 | Hit 💥 | Kefka’s Tower (Final Battle, WoR) | No |
| 345 | Magic 🪄 | Kefka’s Tower (Final Battle, WoR) | No |
| 346 | Tiger 🐅 | Kefka’s Tower (Final Battle, WoR) | No |
| 347 | Machine 🤖 | Kefka’s Tower (Final Battle, WoR) | No |
| 348 | Power 💪 | Kefka’s Tower (Final Battle, WoR) | No |
| 349 | Lady 💃 | Kefka’s Tower (Final Battle, WoR) | No |
| 350 | Rest 😴 | Kefka’s Tower (Final Battle, WoR) | No |
| 351 | Kefka 🤡 | Kefka’s Tower (Final Battle, WoR) | No |
When facing any new enemy or boss, remember the universal “Scan” strategy:
- Use the Libra Spell or Scan Lore: This will reveal the target’s HP, MP, and elemental weaknesses.
- Exploit Weaknesses: The damage formula in Final Fantasy VI Pixel Remaster heavily rewards hitting an elemental weakness, doubling your damage. A Fira spell against an Ice-weak enemy is often more effective than a more powerful but non-elemental spell.
- Status Effects are Your Friend: Don’t underestimate the power of status effects. Slow can give you a massive advantage in the action economy. Stop can completely neutralize a dangerous foe. Berserk can shut down an enemy mage by forcing it to use weak physical attacks.
- The Vanish-Doom Trick 👻: A famous exploit in the original versions of the game involves casting the Vanish spell on an enemy, which makes them immune to physical attacks but guarantees that the next magic spell will hit. The game’s code mistakenly allows this to bypass instant-death immunity. Therefore, casting Vanish and then Doom or Banish (X-Zone) will instantly kill almost any enemy in the game, including many bosses. This exploit was fixed in later versions like the Pixel Remaster.
Hey there! 👋 This guide is 100% for the Final Fantasy VI Pixel Remaster. It’s super important to know that this version has some big changes from the old SNES and GBA versions.
To help you get that 100% completion 🏆, here are the two biggest things you must know:
- No GBA Bonus Content! 🚫 This version is all about the original game. That means no bonus dungeon (Dragon’s Den) 🐉, no extra Espers (bye, Gilgamesh! 👋), and none of those extra monsters. Any guides you see talking about that stuff are for the wrong game.
- They Fixed the Big Glitches! 🛠️ All those old game-breaking bugs? Gone. The most famous one, “Vanish/Doom” (where you’d make an enemy invisible 👻 and then use Doom for an instant kill), is completely gone. ☠️ This changes everything for tough bosses like Intangir and Magic Master. You gotta fight ’em for real now! 💪
Also, lots of old bestiary guides online won’t match up with the monster numbers or names in this version. 🧾 The in-game list has 346 monsters. This guide is your new checklist to get ’em all! 💯
🐾 Part I: The Complete Pixel Remaster Bestiary (#001-346) 🐾
This part is all about filling that 346-entry bestiary and grabbing the “Field Research – Professional” achievement! 🏆
📋 Section 1.1: Bestiary Completionist’s Master Checklist
Here’s a peek at what the full 346-monster list looks like. The most important part of this guide is the “Missable Monster” list in the next section, so pay attention! 👇
Table 1: Master Bestiary Checklist (Sample)
| Bestiary # | Monster Name | Best Location / Scenario | Missable? |
| 001 | Guard | Narshe (Prologue, WoB) | Yes ❗ |
| 002 | Silver Lobo | Narshe (Prologue, WoB) | Yes ❗ |
| 003 | Megalodoth | Narshe (Prologue, WoB) | Yes ❗ |
| 004 | Wererat | Narshe Mines (WoB) | No (Veldt 👍) |
| 005 | Spritzer | Narshe Mines (WoB) | No (Veldt 👍) |
| … | … | … | … |
| 024 | Heavy Armor | South Figaro (Locke’s Scenario, WoB) | Yes ❗ |
| 025 | Commander | South Figaro Secret Passage (WoB) | Yes ❗ |
| 026 | Vector Hound | South Figaro Secret Passage (WoB) | Yes ❗ |
| … | … | … | … |
| 036 | Captain | Imperial Camp (Sabin’s Scenario, WoB) | Yes ‼️ |
| 037 | Imperial Soldier | Imperial Camp (Sabin’s Scenario, WoB) | No (Veldt 👍) |
| 038 | Templar | Imperial Camp (Sabin’s Scenario, WoB) | No (Veldt 👍) |
| … | … | … | … |
| 066 | Stunner | Opera House Rafters (WoB) | Yes ‼️ |
| 067 | Goetia | Opera House Rafters (WoB) | Yes ‼️ |
| … | … | … | … |
| 273 | Kefka | Doma Castle (Sabin’s Scenario, WoB) | Yes ❗ |
| 274 | Dadaluma | Zozo (WoB) | Yes ❗ |
| … | … | … | … |
| 277 | Ifrit | Magitek Research Facility (WoB) | Yes ❗ |
| 278 | Shiva | Magitek Research Facility (WoB) | Yes ❗ |
| 279 | Number 024 | Magitek Research Facility (WoB) | Yes ❗ |
| 280 | Number 128 | Magitek Research Facility (WoB) | Yes ❗ |
🏃♂️ Section 1.2: The Missable Monster Field Guide (Chronological)
To get 100% in your bestiary, you just need to fight a monster once. Easy, right? Well… 😅 a ton of monsters only show up in one-time-only locations ⏳. If you miss one, your only backup is finding it on the Veldt. But some monsters don’t even show up on the Veldt! 😱 If you miss one of those, your 100% run is over for that save file. 😭
Here’s your step-by-step guide to make sure you don’t miss these crucial, permanently missable monsters.
- 🐻❄️ Narshe Prologue: The encounters Guard (#001), Silver Lobo (#002), and Megalodoth (#003) are part of the intro. While you can find them on the Veldt, it’s just good practice to fight ’em here.
- 💰 South Figaro (Locke’s Scenario): While sneaking through South Figaro as Locke, you’ve gotta find Heavy Armor (#024), Commander (#025), and Vector Hound (#026). They’re in the town and secret passages.
- 🏕️ Imperial Camp (Sabin’s Scenario): This is your first super critical checkpoint. You must encounter Captain (#036), Imperial Soldier (#037), and Templar (#038).
- ‼️ CRITICAL WARNING: The Captain (#036) monster does not show up on the Veldt. If you miss him here, you can’t ever get 100% on this playthrough. No do-overs!
- 👻 Phantom Forest / Train: Ghost (#040) and Poplium (#041) are only in the forest. The ghouls on the Phantom Train, like Oversoul (#122), are also one-time-only.
- 🎭 Opera House: This one is so easy to miss! During the part where Locke clears rats from the rafters, you’ll fight Stunner (#066) and Goetia (#067). These little pests 🐀 are only here. They aren’t on the Veldt. Miss them, and your 100% run is toast.
- 🏭 Vector (Magitek Factory Approach): After that minecart ride and the boss fight with Number 128, you’ll land near a save point.
- ‼️ CRITICAL WARNING: The monster Chaser (#???) is a regular random battle, but it only appears on this one screen right by the save point. You must run around right here until you fight one.
- ☁️ Floating Continent: This is it! The big point of no return for the first half of the game. You have to fight all the local monsters (like Brainpan, Gigantos, Misfit) before you fight AtmaWeapon and leave. Once the world goes 💥, they’re gone (though most do show up on the Veldt).
💡 Section 1.3: Tactical Monster Analysis (Select Entries)
Intangir (#097) 👻
- Location: Triangle Island (WoB).
- Analysis: This is like the first “superboss” of the WoB. It starts invisible and you can’t target it. The old Vanish/Doom trick worked on him. Not anymore!
- Behavior: Hitting him with any physical attack makes him visible, and he’ll immediately counter with $Meteor$ ☄️, which will probably wipe you out. 💀
- Pixel Remaster Strategy 1 (MP Kill): 👍 This is the safe, “real” way to win. He has a ton of MP (16,000!). Use $Rasp$ and $Osmose$ to drain it all. It takes a long time ⏳, but he’ll never attack. When he hits 0 MP, he just… dies.
- Pixel Remaster Strategy 2 (Stop-Lock): 🛑 Cast the $Stop$ spell. It’ll hit him even while he’s invisible! This makes him appear and freezes him. Unload all your damage (Drill, Aura Cannon, etc.) while he’s frozen. When $Stop$ wears off, he’ll turn invisible again. Just cast Stop again and repeat!
Cactuar (#105) 🌵
- Location: Desert south of Maranda (WoR).
- Analysis: Cactuar has super high Evasion, so normal attacks will always miss. Its “1000 Needles” attack always hits for exactly 1,000 damage. 🎯
- Pixel Remaster Strategy: You need attacks that can’t miss.
- 🔧 Edgar’s Drill or Chain Saw Tools.
- ⚔️ Sabin’s Blitz commands.
- 🥷 Shadow’s Shurikens or other Throw items.
- Note: The “Gigantuar” (Giant Cactuar) boss 🌵 and its Esper quest from the GBA version are not in this version of the game.
Slagworm (#103) 🐛
- Location: Desert south of Maranda (WoR).
- Analysis: A great monster for late-game EXP and AP grinding. It’s weak to Ice 🧊. You can beat it fast with $Blizzaga$ or Ice-elemental attacks.
Magic Urn (#216) 🏺
- Location: Cultists’ Tower (WoR). One room in this tower has a 100% chance to find ’em.
- Analysis: You’re not supposed to fight it. It absorbs all elements and blocks all status effects. It’ll even heal your party!
- Pixel Remaster Strategy: Do not attack it! 🚫 Don’t use an Elixir on it (that’s a different FF game! 😉). Just… wait. 🧘 After a few turns, it’ll run away. That’s all you need to get its bestiary entry.
- Tactical Note: If you have Gau, this is maybe the best Rage in the entire game to learn. The “Magic Urn” Rage makes Gau absorb all elements and immune to all status effects. He’s basically invincible! 🛡️
⚔️ Part II: Chronological Boss Strategy Index ⚔️
Here’s how to beat every major boss, in order! All these strategies are updated for the Final Fantasy VI Pixel Remaster (no cheap exploits! 😜).
☀️ Section 2.1: World of Balance Campaign Bosses
Boss: Whelk 🐌
- Location: Narshe Mines
- Stats: HP: 1,600; Weakness: Fire 🔥
- Abilities Analysis: This boss is basically a tutorial. It hides its head in its shell. Attacking the shell makes it counter with a powerful party-wide $Megavolt$ ⚡ attack.
- Optimal Strategy: Attack the head only. Use Terra’s TekMissile or $Fire$ spell, and have Vicks and Wedge use Fire Beams. When the head hides, stop attacking and just wait. ✋ Wait ’til it pops back out, then hit it again.
Boss: Marshal 🎖️
- Location: Narshe
- Stats: HP: 420; Weakness: Fire 🔥, Poison ☠️
- Abilities Analysis: This is just a tutorial for Mog’s Dance command.
- Optimal Strategy: Have Mog use his Dusk Requiem Dance. 💃 The battle will be over almost instantly. This fight is important for getting Marshal on the Veldt.
Boss: Magitek Armor (x2) 🤖
- Location: Narshe
- Stats: HP: 210; Weakness: Thunder ⚡, Water 💧
- Optimal Strategy: Have Edgar use his Auto Crossbow Tool 🎯, which hits both targets. Terra can help with $Thunder$ or $Fire$ magic.
Boss: Vargas 👊
- Location: Mt. Koltz
- Stats: HP: 11,600; Weakness: Poison ☠️ (with 2x Ipooh)
- Abilities Analysis: A two-phase fight. In Phase 2, Vargas uses “Doom Fist,” a timed insta-death attack. 😱
- Optimal Strategy:
- Phase 1 (Full Party): Focus all damage on the two Ipooh (bears) 🐻 and beat them first. Use Edgar’s Auto Crossbow, Locke’s Attack, and Terra’s $Fire$.
- Phase 2 (Sabin Solo): After a story moment, Sabin will face Vargas alone. Vargas will start charging “Doom Fist.” You must use Sabin’s Raging Fist Blitz (inputs: Left, Right, Left). ⬅️➡️⬅️ The Final Fantasy VI Pixel Remaster handily shows your inputs on-screen! 👍 Nailing the Blitz ends the fight.
Boss: Ultros (1st Encounter) 🐙
- Location: Lethe River
- Stats: HP: 3,000; Weakness: Fire 🔥, Thunder ⚡
- Party & Equipment Setup: Move everyone (Terra, Edgar, Sabin, Banon) to the Back Row. Their main attacks (Magic, Tools, Blitz) ignore row, but this will halve the damage from Ultros’s physical “Tentacle” attack. 💥
- Abilities Analysis: “Tentacle” (physical) and “Ink” (causes Darkness 😵). Ultros hits way harder in this version.
- Optimal Strategy: This is a survival fight. Banon must stay alive. Have Banon use his Pray command 🙏 every single turn to heal the party. Have Terra cast $Fire$, Edgar use Auto Crossbow, and Sabin use Aura Cannon. Don’t worry about the Darkness status; it won’t affect these abilities.
Boss: Tunnel Armr DRILL
- Location: South Figaro Cave (Locke’s Scenario)
- Stats: HP: 1,300; Weakness: Water 💧, Thunder ⚡
- Abilities Analysis: Uses magic ($Fire$, $Thunder$) and a strong physical “Drill” attack.
- Optimal Strategy (Intended): This fight is a tutorial for Celes’s Runic 💫 command. Have Celes use Runic every turn. This will absorb all of Tunnel Armr’s magic, give Celes MP back, and block most of its attacks. Locke should attack and use $Potions$. Celes must not be given any other command, or she’ll be vulnerable!
- Optimal Strategy (Cheese): 🧀 If you skipped the treasure chest in this cave the first time, it will have a Thunder Rod. ⚡ Using this rod as an item during the boss fight will instantly end the fight.
Boss: Ghost Train 🚂
- Location: Phantom Forest
- Stats: HP: 1,900; Weakness: Fire 🔥, Thunder ⚡, Holy ✨; Type: Undead
- Abilities Analysis: Uses “Diabolical Whistle” to inflict status ailments. 🤢
- Optimal Strategy (Cheese): 🧀 The boss is Undead. Using a Phoenix Down 🪶 or the $Raise$ spell on it will kill it instantly.
- Optimal Strategy (Standard): Use its Holy weakness. Sabin’s Aura Cannon Blitz will do huge damage. Cyan should use Flurry (SwdTech 1), and Shadow should throw Shurikens. And don’t forget to use Sabin’s Meteor Strike (Suplex) on the train at least once. It’s awesome. 🤸
Boss: Kefka (1st Encounter) 🤡
- Location: Doma Castle (Sabin’s Scenario)
- Optimal Strategy: This is a scripted, unwinnable fight. Kefka will run away after one hit. The real goal here is to make sure you fight a Captain, Imperial Soldier, and Templar for your bestiary!
Boss: Dadaluma 💪
- Location: Zozo
- Stats: HP: 3,270; Weakness: Poison ☠️; Steal: Jeweled Ring (Common), Thief’s Bracer (Rare)
- Abilities Analysis: Uses $Potions$ and casts $Safe$ on himself. When low on HP, he summons two Iron Fist 👊 enemies and starts throwing powerful “Dirk” attacks.
- Optimal Strategy: Hit him with $Poison$ right away. Use defense-ignoring attacks like Edgar’s Drill and Sabin’s Aura Cannon. When he summons the two Iron Fist adds, ignore them. 🚫 He’s vulnerable then, so focus all damage on Dadaluma to beat him before he can throw Dirks.
Boss: Ultros (2nd Encounter) 🐙
- Location: Opera House
- Stats: HP: 2,550; Weakness: Fire 🔥, Thunder ⚡
- Optimal Strategy: A straightforward fight with a full party. Just like before, he hits surprisingly hard in this version. 💢 Use $Fire$ magic, Aura Cannon, and Drill/Auto Crossbow. He’ll run away mid-fight.
Boss: Ifrit & Shiva 🔥❄️
- Location: Magitek Research Facility
- Stats (Ifrit): Weakness: Ice 🧊; Absorbs: Fire 🔥; Nullifies: Everything else
- Stats (Shiva): Weakness: Fire 🔥; Absorbs: Ice 🧊; Nullifies: Everything else
- Optimal Strategy: This is a puzzle boss. Do not use multi-target magic! 🚫
- Have Celes use Runic 💫 to absorb their powerful $Fira$ and $Blizzara$ spells.
- Focus all Ice 🧊 attacks (like $Blizzara$ or Celes’s Icebrand) on Ifrit.
- Focus all Fire 🔥 attacks (like $Fira$ or Locke’s Flametongue) on Shiva.
- Once one is down, the other is easy. The fight ends when they start talking.
Boss: Number 024 🤖
- Location: Magitek Research Facility
- Stats: HP: 4,777; Steal: Blood Sword (Common), Rune Blade (Rare)
- Abilities Analysis: Its main gimmick is “Barrier Change,” which randomly shuffles its elemental weakness and absorption, making magic a gamble. 🎲
- Optimal Strategy: This boss has high Defense. 🛡️ Bypass this by using defense-ignoring attacks. Edgar’s Drill or Chain Saw and Sabin’s Aura Cannon are your best bets. A strong party can often beat it before it even uses Barrier Change.
- Note: Some players reported a bug where this mandatory boss doesn’t register in the bestiary. 🐛 It’s a good idea to save right before this fight and check your bestiary after! 💾
Boss: Number 128 🦾
- Location: Magitek Research Facility (Minecart)
- Stats (Body): HP: 3,276; Vulnerable: Slow, Berserk; Steal: Kazekiri
- Abilities Analysis: The boss consists of a main body and two arms (“Left Blade” and “Right Blade”). If both arms are destroyed, the main body unleashes a powerful counter-attack. 💥
- Optimal Strategy: Do not destroy both arms. 🚫 Focus all damage on the Main Body. Use defense-ignoring attacks (Drill, Aura Cannon) and $Thunder$ magic. You can destroy one arm to take less damage, but leave the other one alive. Casting Slow 🕒 on all three parts helps a lot.
Boss: Left Crane & Right Crane 🏗️
- Location: Vector (Airship Escape)
- Stats: Weakness: Thunder ⚡
- Abilities Analysis: A tough fight with two bosses that mostly use magic.
- Optimal Strategy (Cheese): 🧀 Using a Thunder Rod ⚡ as an item will instantly destroy the Right Crane. A second one (or strong $Thunder$ magic) can take out the Left Crane.
- Optimal Strategy (Standard): Have Celes use Runic every turn 💫 to absorb the magic attacks. The rest of the party (Edgar’s Drill, Locke’s Attack) should focus all their damage on one Crane at a time.
Boss: Flame Eater 🔥
- Location: Thamasa (Burning House)
- Stats: Weakness: Ice 🧊
- Optimal Strategy: This boss is extremely weak to Ice. Using one or two Ice Rods as items will end the fight almost instantly.
Boss: Ultros (3rd Encounter) 🐙
- Location: Esper Caves (Thamasa)
- Optimal Strategy: This fight happens with Relm in the party. It’s a story battle, and Ultros will run away pretty fast after taking a little damage.
Boss: Ultima Weapon 💎
- Location: Floating Continent
- Stats: HP: 24,000; MP: 5,000; Steal: Ribbon (Rare) 🎀
- Abilities Analysis: This is the climactic boss of the WoB. Its deadliest attacks are $Quake$ 🌍 (party-wide Earth damage) and Mind Blast (inflicts awful status effects like Petrify 🗿, Confuse 😵💫, Sleep 😴, or Imp 🐸).
- Expert Analysis (PR Change): The Vanish/Doom or Vanish/X-Zone exploit is fixed. 🚫 You gotta win this for real.
- Optimal Strategy (Standard):
- Preparation: Equip Ribbons 🎀 or Safety Bits on everyone to nullify Mind Blast. This is the most important part.
- Opening Move: Cast Float 🕊️ on the whole party. This makes $Quake$ do 0 damage.
- Offense: Use your strongest non-elemental, defense-ignoring attacks (Edgar’s Drill, Sabin’s Phantom Rush). Terra’s Morph (Trance) ✨ will double her damage!
- Optimal Strategy (MP Kill): If you don’t have good status protection, a safer way is to drain its 5,000 MP with $Rasp$ and $Osmose$. 🌀 This tactic avoids triggering its most dangerous attacks.
💀 Section 2.2: World of Ruin Recruitment & Quest Bosses
Boss: Tentacles (x4) 🦑
- Location: Figaro Castle (Engine Room, WoR)
- Abilities Analysis: The four tentacles (two upper, two lower) mostly attack by “Seizing” or “Grabbing” party members. 🤝
- Optimal Strategy: This is a gimmick boss. The “Seize” attack only targets characters with the Slow 🕒 status.
- Solution: Equip all four party members with Hermes Sandals 👟. The permanent $Haste$ they give also makes you immune to $Slow$, making the party completely immune to the “Seize” attack!
- Once you’ve done that, beat the tentacles with multi-target attacks like Sabin’s Fire Dance Blitz or Edgar’s Chain Saw. 🔥 The bottom-left tentacle can even be hit by Chain Saw’s instant-death chance.
Boss: Dullahan 👻
- Location: Doma Castle (Cyan’s recruitment, WoR)
- Abilities Analysis: A powerful undead boss that uses Ice and Water magic (like $Absolute Zero$ 🥶) and strong physical hits.
- Optimal Strategy: This fight is made for Celes. Have Celes use Runic every turn. 💫 This will absorb its most powerful magic, making the fight super easy. The boss is weak to Fire 🔥; use $Firaga$, Sabin’s Phantom Rush, and Edgar’s Drill to finish it.
Boss: Humbaba 👹
- Location: Mobliz (WoR)
- Analysis: This is a multi-stage quest. You fight Humbaba once, and he will flee. 🏃 After you get the Falcon airship, go back to Mobliz for the final fight.
- Stats (Final): HP: 26,000
- Abilities Analysis: Uses $Thundaga$ ⚡, “Solar Plexus” (heavy physical), and “1000 Needles” (1,000 damage). 🎯
- Optimal Strategy:
- Phase 1 (Party): Keep party HP above 1,001 to survive 1000 Needles. Have Celes use Runic to absorb $Thundaga$. Attack with $Bio$ (Poison ☠️) and defense-ignoring attacks.
- Phase 2 (Terra): After taking enough damage, Humbaba will use “BabaBreath” to kick two party members out. 💨 Terra will join the battle, permanently in her Morph state. ✨ Her doubled magic power (especially $Bio$) will be more than enough to win.
Boss: Wrexsoul 😵
- Location: Cyan’s Dream (Doma Castle, WoR)
- Abilities Analysis: Wrexsoul begins the fight by possessing one of your party members, making himself untargetable. 👻 He also has two “Soul Saver” minions.
- Optimal Strategy (Cheese): 🧀 Wrexsoul is Undead.
- Method 1: Cast the X-Zone (Banish) 🌀 spell. It’ll suck up the two minions and the invisible, possessed Wrexsoul, ending the fight instantly.
- Method 2: Cast $Break$ 🗿 (Petrify) on one of your own party members. Wrexsoul will possess the statue. Then, use a $Soft$ (Gold Needle) on the petrified character. This cures them and forces Wrexsoul to appear, vulnerable, on the battlefield.
- Method 3: Use a Phoenix Down 🪶 on your whole party. This will kill the possessed ally, forcing Wrexsoul to appear, and then the Phoenix Down will also hit him, killing him instantly. Wow!
Boss: Chadarnook 🖼️
- Location: Owzer’s Mansion (Jidoor, WoR)
- Stats (Demon): HP: 56,000; Weakness: Fire 🔥, Holy ✨
- Stats (Goddess): HP: 30,000; Weakness: Fire 🔥
- Abilities Analysis: The boss is a haunted painting that switches between a “Goddess” form (heals/buffs) and a “Demon” form (attacks 👿).
- Optimal Strategy: This is a patience battle. 🧘 You can only hurt the Demon form.
- Wait for the Demon form to appear.
- Unleash all your $Firaga$ and $Holy$ spells, plus Phantom Rush and Drill.
- When the boss changes back to the Goddess form, stop attacking. ✋ Use this time to heal, cure status effects (like Confuse 😵💫), and apply buffs ($Haste$, $Shell$).
- Repeat this cycle ’til the Demon is defeated.
✨ Section 2.3: Legendary Encounters & Optional Superbosses
Boss: Zone Eater 😮
- Location: Triangle Island (WoR)
- Analysis: This enemy isn’t a boss you’re supposed to beat; it’s a gateway to the secret character, Gogo! 🧑🎤
- Optimal Strategy: Enter the battle and do not attack. 🚫 Allow the Zone Eater to use its “Inhale” (Engulf) ability on your whole party, one by one. Once all four party members have been inhaled, you’ll be warped to the “Zone Eater’s Belly” secret dungeon. Go through it to find Gogo!
Boss Gauntlet: The Eight Legendary Dragons 🐲
Defeating all eight of these optional bosses (two are in the final dungeon) will reward you with the Crusader Esper. ⚔️
- A. Earth Dragon 🌍
- Location: Opera House (WoR). On the stage, flip the far-right switch.
- Strategy: Weak to Wind 💨 and Water 💧. Cast Float 🕊️ on the entire party (or equip Gaia Gear) to negate all Earth damage. The dragon is also vulnerable to Sleep 😴.
- B. Storm Dragon 🌪️
- Location: Mt. Zozo (WoR). Press the switch in the room with the Save Point.
- Strategy: Weak to Lightning ⚡. This is a very hard fight. 😥 Equip Thunder Shields to resist its Wind attacks. Do not equip Ice Shields, ‘cuz they have a Wind weakness.
- C. Ice Dragon 🧊
- Location: Narshe (WoR). In the snowy field where the game began.
- Strategy: Weak to Fire 🔥. Equip Ice Shields or Flame Shields to absorb/nullify its Ice damage. If a character gets “Freeze” 🥶 from Northern Cross, cast a $Fire$ spell on your ally to thaw them.
- D. Red Dragon ❤️🔥
- Location: Phoenix Cave (WoR).
- Strategy: Weak to Ice 🧊 and Water 💧. Equip Flame Shields or a Minerva Bustier to absorb its Fire attacks. Its main threat is Level 4 Flare. Make sure your party’s levels aren’t a multiple of 4! 🔢
- E. Blue Dragon 💧
- Location: Ancient Castle (WoR). In a hidden chamber 5 steps south of the Queen’s throne.
- Strategy: Weak to Lightning ⚡. Its signature move is “Rippler,” which swaps all buffs and debuffs between itself and your party. 🔄 Do not buff your party ($Haste$, $Regen$, etc.), ‘cuz the dragon will just steal ’em!
- F. Holy Dragon 🕊️
- Location: Cultists’ Tower (WoR).
- Strategy: This is a puzzle boss. The tower only lets you use magic. 🪄
- Solution 1: Equip all four party members with Reflect Rings. 💍 Then, cast Silence 🤫 on the Holy Dragon. It can now only use a weak physical attack, which will just bounce off.
- Solution 2: Equip Reflect Rings and cast Berserk 😡 on the dragon. This also forces it to use weak physical attacks, making it helpless.
- G. Gold Dragon ⚡
- Location: Kefka’s Tower (WoR).
- Strategy: Weak to Water 💧; Absorbs Lightning ⚡. Equip Thunder Shields to nullify its $Thundaga$ spam. Celes’s Runic 💫 is also 100% effective here.
- H. Skull Dragon 💀
- Location: Kefka’s Tower (WoR).
- Strategy: Type: Undead. Weak to Fire 🔥 and Holy ✨.
- Solution: Cast a Phoenix Down 🪶 or the Raise spell on it for an instant kill. Equip Ribbons 🎀 or Safety Bits to block all the status ailments and Doom it throws at you.
Boss: Magic Master 🧙♂️
- Location: Cultists’ Tower (WoR) (Top)
- Abilities Analysis: Uses high-level magic and “Barrier Change” to shift weaknesses.
- Expert Analysis (PR Change): This fight is totally changed. The Vanish/Doom exploit is fixed. 🚫 When the Magic Master’s HP hits 0, he counters with an un-reflectable $Ultima$ spell, which will wipe your party. 💥
- Optimal Strategy (Reraise): The only guaranteed way to live is to have the Reraise 🕊️ status (from the Phoenix Esper) active on all four party members before you land the killing blow. The party will get wiped out by $Ultima$, and Reraise will instantly pop everyone back up to win the battle.
- Optimal Strategy (MP Kill): A safe but very slow alternative. Cast $Berserk$ 😡 on the boss, then $Vanish$ 👻 on your party. Then, slowly drain his MP with $Rasp$ and $Osmose$. 🌀 When his MP hits 0, he will try to cast $Ultima$ but can’t, and dies.
🏰 Section 2.4: Final Assault: Kefka’s Tower
The final dungeon makes you split up into three balanced parties from 12 of your characters. You gotta spread your best characters, healers, and gear among all three groups, ‘cuz they will all face bosses.
Boss: Ultima Buster 💥
- Location: Kefka’s Tower
- Stats: HP: 55,000; MP: 38,000
- Optimal Strategy: This boss has a hidden “Die if MP = 0” property. 🤫 The intended, and safest, strategy is to use $Rasp$ and $Osmose$ to drain its massive MP pool, which gives you an instant, safe win.
Boss: Guardian 🛡️
- Location: Kefka’s Tower
- Stats: Weakness: Lightning ⚡
- Abilities Analysis: This boss mimics the “battle programs” of old bosses, like Ultros and Dadaluma.
- Optimal Strategy: A straightforward damage race. 🏁 Exploit its Lightning weakness with $Thundaga$ and use defense-ignoring attacks.
Boss Gauntlet: The Warring Triad 🙏
Your three parties will face the three statues, the source of all magic, one after another.
- A. Demon 😈
- Stats: HP: 58,000; Weakness: Poison ☠️
- Optimal Strategy: The easiest of the three. Exploit its weakness with the $Bio$ spell and use your strongest attacks.
- B. Fiend 👹
- Stats: HP: 63,000; Weakness: Holy ✨; Steal: Safety Bit (Rare)
- Optimal Strategy: The most difficult of the three. 😥 Its “Northern Cross” attack can Freeze 🥶 the party. Equip Ribbons. Use the $Holy$ spell and Holy-elemental weapons.
- C. Goddess 👩⚖️
- Stats: HP: 44,000; Absorbs: Lightning ⚡, Holy ✨
- Optimal Strategy: The main threat is “Cloudy Heaven,” which inflicts $Doom$ ☠️ and Zombie 🧟 on the party. Equip Safety Bits or Memento Rings to block this. Attack with non-elemental (Ultima, Flare) or non-absorbed (Firaga, Blizzaga) magic.
Final Boss: Kefka (Multi-Tiered Battle) 🤡
- The Roster System: This battle is a four-stage gauntlet. Before the fight, you have to set a battle order for all your participating characters. The first four on the list start the fight.
- The Replacement Mechanic: At the end of each “tier” (stage), anyone who is “dead” (KO’d 😵, Petrified 🗿, or a Zombie 🧟) is gone for good from the fight. The next person on your list subs in.
- Strategic Imperative: You must stack your roster.
- Slots 1-4: Your “A-Team” 🥇 (e.g., Terra, Celes, Edgar, Sabin)
- Slots 5-8: Your “B-Team” 🥈 (e.g., Locke, Relm, Strago)
- Slots 9-12: Your “C-Team” 🥉
- This makes sure any losses are replaced by another strong, well-equipped character.
- Tier 1: “Visage” (Bottom) 👇
- Strategy: A simple warm-up. Use strong physical attacks and single-target magic. Conserve MP and heal before finishing this tier.
- Tier 2: “Long Arm” & “Short Arm” 💪
- Strategy: Focus-fire one part at a time. Keep the party healed and status-free.
- Tier 3: “Face” & “Blitz” 😨
- Strategy: This is a big difficulty spike. “Face” uses powerful magic like $Trine$ and $Meltdown$. This is the time to use strong attacks ($Ultima$, Phantom Rush). Make sure the party is fully healed and buffed with $Haste$, $Shell$, and $Reraise$ before moving to this phase.
- Tier 4: Kefka 🤡
- Abilities Analysis: The final form. “Forsaken” (massive party-wide damage 💥), “Havoc Wing,” and “Heartless Angel” (drops everyone’s HP to 1! 😱).
- Optimal Strategy:
- Counter “Heartless Angel” immediately with a party-wide Curaga 💖 or a Megalixir.
- Keep Haste 👟, Shell 🛡️, and Reraise 🕊️ active at all times.
- Celes’s Runic isn’t a reliable plan here; Kefka mixes in too many attacks it can’t absorb.
- Unleash everything you have left. 💥 Spam Ultima, Morph-boosted magic, Phantom Rush, and Drill!
🏟️ Appendix: The Dragon’s Neck Colosseum 🏟️
- Location & Mechanics: Found north of Kohlingen in the World of Ruin. It’s a 1-on-1, auto-battle 🤖 arena. You bet an item; if you win, you get a prize. If you lose, your bet item is gone forever. 😭
- Optimal Colosseum Strategy (The AP-less Build): The AI just randomly picks from a character’s commands. 🎲 To make ’em predictable, you have to limit their options.
- Pixel Remaster Tactic: Go to the “Boost” menu in the settings and set AP Gain to 0x. 🚫
- Take a strong physical character (like Locke 💰 or Shadow 🥷) and level ’em up in the Dinosaur Forest (great for EXP! 🦖).
- This gives you a high-level character who knows zero magic spells. 🧠 In the Colosseum, their AI will be forced to just “Attack” (or “Throw” for Shadow), making them reliable fighters.
- Special Opponents:
- Siegfried: A recurring joke character 😆 who you can fight here.
- Typhon (Chupon): This is the “booby prize” opponent 😤 you fight for betting a low-value item. He’s not meant to be beaten; his “Snort” (Sneeze) 🤧 attack immediately kicks you out. He can only be beaten by a super high-level, speedy character (like a Level 60+ Locke with a Master’s Scroll) who can one-shot him before he gets a turn.
Table 2: Key Colosseum Wagers (Pixel Remaster)
Here are the most valuable and awesome trades you can make in the Colosseum.
| Item Bet | Opponent | Item Won | Analysis & Value |
| Scimitar | Tyrannosaur | Miracle Shoes | 👟 Highest Priority. A single Relic that grants permanent Haste, Regen, Protect, and Shell. 🤩 |
| Tintinnabulum | Dark Force | Growth Egg | 🥚 Doubles the EXP earned by the character equipping it. Essential for leveling. 📈 |
| Behemoth Suit | Outsider | Snow Muffler | 🧣 The best defensive body armor for Mog and Gau, offering massive defensive stats. 💪 |
| Megalixir | Tyrannosaur | Merit Award | 🎖️ A Relic that allows any character to equip (almost) any weapon or armor, breaking equipment rules. |
| Ragnarok (Sword) | Didalos | Lightbringer | 💡 If you chose the $Ragnarok$ sword (not the Esper), betting it here transforms it into the Lightbringer, arguably the best weapon in the game. 🌟 |
| Excalipoor | Onion Knight | Excalibur | 👑 The method for trading the joke sword (bought from the Jidoor Auction House) for the real legendary blade. |
| Impartisan | Greater Mantis | Cat Ear Hood | 🐱 Excellent helmet for Terra and Celes. Can be farmed by stealing Impartisans from Tyrannosaurs. |
Disclaimer: This is an unofficial fan work, all trademarks and copyrights for Final Fantasy VI Pixel Remaster belong to the developer Square Enix
& publisher Square Enix.
Find the game here! FINAL FANTASY PIXEL REMASTER
