
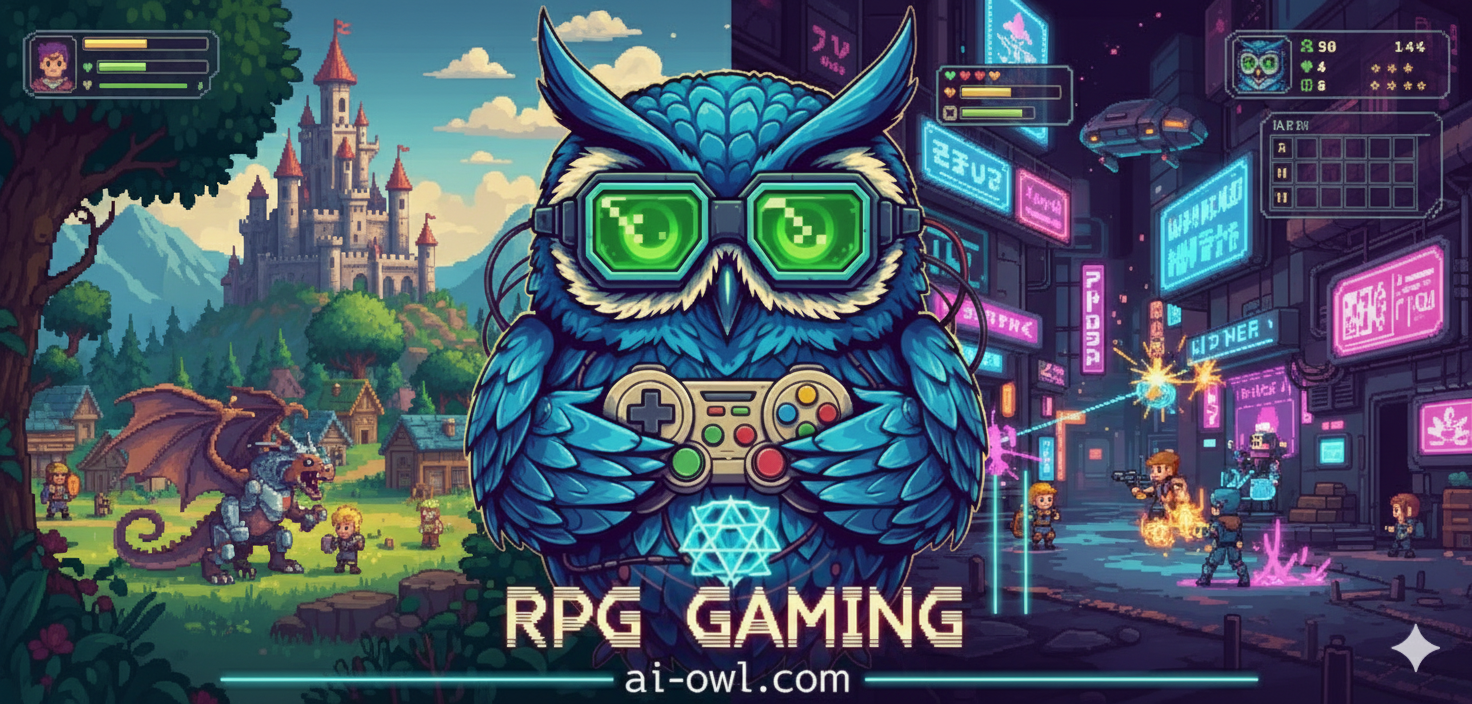
Introduction: Before You Save the World… Again 🥳
Hey there, adventurer! 🥳 Welcome to the beginning of… well, everything. Take a deep breath. Can you smell it? 👃 That’s the scent of 8-bit nostalgia 🎮, freshly baked and served up on a high-definition platter. You’re about to jump back to 1987, a simpler time when heroes were nameless, stories were straightforward, and saving the world involved a whole lot of walking in circles waiting for monsters to attack you. This is Final Fantasy Pixel Remaster, the game that, in a beautiful twist of irony, saved its creators from oblivion and launched a saga that would define a genre for decades to come.
You stand at a precipice. Before you lie four fiends 👹, four darkened crystals 💎, and a princess who has, predictably, gotten herself into a spot of bother. 🏰 But this isn’t just any trip down memory lane. This is the Final Fantasy Pixel Remaster, a version of the game that’s both a loving tribute and a significant evolution. It’s the game you remember, but viewed through glasses that correct for the astigmatism of 1980s game design. Whether you’re a grizzled veteran 🏆 who still has the original Nintendo Power strategy guide tucked away, or a fresh-faced newcomer 🌱 wondering what all the fuss is about, you’ve come to the right place.
This isn’t just a guide. It’s your bible 📖, your spellbook 📜, your ridiculously over-detailed master plan for not just surviving the world of Final Fantasy Pixel Remaster, but for utterly and completely conquering it. We won’t just tell you what to do; we’ll delve into the arcane arts of why you’re doing it. So grab your sword ⚔️, ready your spells ✨, and for the love of Bahamut, name your characters something better than “AAAA.” The journey begins now!
What is the Pixel Remaster? 🤔
So, what’s this “Pixel Remaster” you just dropped your hard-earned Gil 💰 on? Think of it as the definitive director’s cut of a classic film. 🎬 Developed by Square Enix and Tose, this series lovingly remasters the first six games in the franchise, bringing them to modern platforms (like PC, PlayStation 4, Nintendo Switch, and mobile) with a fresh coat of paint and a tune-up under the hood.
The changes are both immediately obvious and subtly brilliant:
- Visuals Reborn 🎨: The star of the show is the completely redrawn 2D pixel art. Supervised by the original game’s character artist, Kazuko Shibuya, every sprite has been painstakingly recreated. The result is a game that looks how you remember it looking through the rosy filter of nostalgia—crisp, vibrant, and full of character, but perfectly suited for modern HD displays. ✨
- A Symphonic Score 🎶: The legendary composer Nobuo Uematsu returned to supervise brand-new orchestral arrangements of his iconic soundtrack. Every dungeon crawl, every boss battle, every triumphant fanfare is now imbued with a gravitas that the original NES sound chip could only dream of. 🎺🎻 And for the purists? You can switch back to the original chiptune soundtrack at any time, just to remind yourself how far we’ve come! 📻
- Quality of Life (QoL) Overhaul 👍: This is where the Pixel Remaster truly shines and becomes the most accessible version of the game ever made. Archaic mechanics have been smoothed over. For instance, in the original, if you targeted an enemy that another party member killed before your turn, your attack would whiff into thin air. 💨 Now, your character will intelligently retarget another enemy. 🎯 An auto-save feature 💾 ensures a party wipe doesn’t send you back an hour. The UI is clean, modern, and easy to navigate. These aren’t changes that make the game “easy”; they’re changes that respect your time. ⏳
It’s crucial to understand what this version isn’t, however. 🚫 The Pixel Remaster is a faithful restoration of the original 1987 NES game. This means it does not include the extra bonus dungeons, superbosses, or additional content that were added to later remakes like Dawn of Souls on the Game Boy Advance or the PSP anniversary edition. This is the pure, unadulterated original experience, just polished to a mirror shine.
The “Boost” System Philosophy: Your Game, Your Rules 🕹️
Upon diving into the game’s configuration menu, you’ll notice a few curious options: the ability to adjust the amount of experience and Gil you gain (from 0.5x to a whopping 4x 🚀) and the power to turn off random encounters entirely. 🛑 To the uninitiated, this might look like a set of “cheat codes” baked directly into the game. This is the wrong way to think about it.
These “boosts” are not cheats; they are custom difficulty sliders. 🎚️ They are a profound acknowledgment from the developers that the concept of “fun” is not one-size-fits-all.
Think of it this way: the core challenge and joy of Final Fantasy Pixel Remaster lies in its exploration, party building, and strategic boss encounters. The “grind”—the act of repeatedly fighting weak monsters to level up—was largely a product of its time, a way to pad out the game’s length. The boost system empowers you to decide how much of that original-style grind you want to experience.
- For the Veteran 🏆: Have you beaten FF1 a dozen times? Do you know the early game like the back of your hand? Perhaps you use the 4x boost to blast through the first few levels and get right to the meaty strategic parts of the mid-game. You’re not cheating; you’re curating your own “New Game+” experience.
- For the Newcomer 🌱: Are you new to JRPGs and finding the constant random battles and slow progression intimidating? Turning off encounters lets you explore a dungeon without stress, get your bearings, and then turn them back on when you’re ready to train. A 2x EXP boost can smooth out the difficulty curve, making the experience less punishing and more enjoyable. 😊
- For the Story-Focused Player 🍿: Maybe you’re here primarily for the adventure. Turning off encounters and boosting Gil allows you to experience the world, follow the quest, and focus on the major boss battles without the constant interruption of fighting Goblins for the hundredth time.
This guide is written with a “standard” 1x multiplier in mind, but its strategic principles apply universally. The boosts don’t break the game’s core logic; they just change the pacing. Our philosophy is simple: play the game in the way that is most enjoyable for you. 💖 These tools are there to help you do just that, and there’s no shame in using them.
How to Use This Guide 🗺️
This tome is vast and divided into distinct chapters, each serving a different purpose on your quest. We highly recommend you read the first three chapters in their entirety before you even name your first character.
- Chapter 1: The Fellowship of the Bling 💍Is your pre-game briefing. It provides a deep, philosophical dive into the six character classes and the intricate mechanics of their growth.
- Chapter 2: The Four-Man Symphony 🎼Builds on that foundation, teaching you the art of party composition. Understanding these two chapters is the single most important factor in determining your success and enjoyment.
- Chapter 3: The Art of War (and Magic) 💥Is your combat codex. It breaks down the game’s mechanics, from magic to buffs to the hidden power of your own equipment.
- Chapter 4: The Road Goes Ever On 🧭Is your spoiler-free travel companion. It will guide you from location to location, pointing out every town, dungeon, and critical path without ruining the story’s (admittedly simple) surprises. When a boss is near, it will simply point you to the next chapter.
- Chapter 5: The Big Bads 👹Is your tactical war room. Here, all spoilers are off as we dissect every single boss, from the lowly Garland to the mighty Chaos himself, providing detailed, foolproof strategies.
- Chapter 6: The Gig Economy 🤑Is your guide to getting rich. We’ll show you the best places to farm for Gil at every stage of the game.
- Chapter 7: The Appendices of Light 📊Contains the raw data. Exhaustive, sortable tables of every weapon, piece of armor, and magic spell in the game for the dedicated theory-crafter. 🤓
Read the theory, follow the walkthrough, consult the boss strategies, and use the appendices to fine-tune your setup. Do this, and the Crystals will be yours. ✨
Chapter 1: The Fellowship of the Bling – Assembling Your Warriors of Light ⚔️
The Most Important Decision You’ll Ever Make 😬
Before you take a single step, before you swing a single sword, you are faced with a choice of monumental significance. You must assemble your party of four from a pool of six distinct character classes. This decision, made in the silent void of the character creation screen, will echo through every moment of your journey. It will define your playstyle, your economic struggles, your strategic options, and the very personality of your adventure.
Unlike modern RPGs where you recruit a cast of pre-written characters, these four heroes are blank slates. 🧑🤝🧑 They are defined only by their job. Will you lead with a stalwart Warrior 🛡️, a paragon of defense? Or will you embrace the high-risk, high-reward path of the Monk 🥋? Will your back line be a fortress of healing and protection 🤍, or a magical glass cannon raining down elemental destruction? 🖤
There is no single “correct” answer. The beauty of Final Fantasy Pixel Remaster lies in its flexibility. Any combination of classes can, with enough grit and strategy, see you through to the end. But a well-constructed party feels like a symphony 🎼, each member playing their part in perfect harmony. A poorly constructed one feels like a garage band where everyone is trying to play a drum solo at once. 🥁 In the following profiles, we will dissect each class, exploring not just their abilities, but their core philosophy, so that you may choose wisely. Your quest begins not in Cornelia, but right here.
Deep Dive Class Profiles 🧑🏫
Each of the six classes brings a unique flavor to the party. They all eventually undergo a “Class Change” after a sidequest, evolving into a more powerful version of themselves. We will analyze each one through its entire lifecycle, from humble beginner to legendary hero.
The Warrior (Knight) 🛡️: The Unbreakable Wall
- Philosophy: The Warrior is the foundation upon which victory is built. He is the anchor ⚓, the shield, the unshakeable mountain against which the tides of evil will break. His philosophy is one of absolute reliability. While other classes may offer more explosive damage or cunning tricks, the Warrior offers certainty. He will stand in the front, he will take the hits, and he will hit back, hard and true, every single time. Choosing a Warrior is a commitment to stability and a declaration that your party will not be easily broken.
- Progression & Power: From the very start, the Warrior stands apart. He begins with the highest HP and Strength, and his exclusive access to the heaviest armor and most powerful swords ensures he remains the premier defensive character for the entire game. This specialization comes at a cost—his equipment is consistently the most expensive in any shop, making him a significant drain on the party’s finances. 💸
- His true potential is unlocked after the Class Change, when he becomes the Knight 🌟. As a Knight, his already impressive combat stats continue to soar, and he gains the ability to use up to Level 3 White Magic. While his magical aptitude is limited, this small selection of spells is transformative. It turns him from a pure damage-dealer into a self-sufficient bulwark. He can cast basic healing spells like Cure on himself or allies, use Protect to bolster his own defense, and even cast Invis to become harder to hit. This allows your primary healer to focus on more critical tasks, making the entire party more efficient and resilient. The Knight is, without question, the most effective tank in the game. 💪
The Monk (Master) 🥋: The Ascetic Powerhouse
- Philosophy: The Monk represents a long-term investment in raw, unadulterated power. His path is one of patience and discipline. He begins as the party’s awkward underdog 😥, often missing his attacks and feeling fragile. But with each level gained, his inner power grows exponentially. 📈 The philosophy of the Monk is to trade early-game convenience for late-game dominance. He scoffs at the material trappings of swords and armor, for he knows that the greatest weapon is the self. Choosing a Monk is a bet on the future, a promise that your patience will be rewarded with a tidal wave of fists. 👊
- The Naked Truth: The most crucial thing to understand about the Monk is a paradox: he is at his strongest when he has nothing. 🤯 While you should equip him with Nunchaku and light armor for the first few levels, there will come a point (usually around level 7-9) where you must unequip his weapons. His unarmed damage scales with his level, and it will quickly outpace any weapon he can wield. A little later, you should also remove his armor. His natural defense also scales with his level, and eventually, his “Absorb” stat will be higher without armor than with it. This makes him an incredibly cheap party member 🫰, freeing up vast sums of Gil for your more gear-dependent allies.
- Upon his Class Change to Master, his power level skyrockets. He gains no new abilities, but his stat growth becomes even more ferocious. A high-level, Haste-buffed Master is arguably the single highest damage dealer in the game, capable of unleashing a blistering flurry of attacks that can tear through even the toughest bosses. 💥 He is the epitome of the “rags to riches” archetype.
The Thief (Ninja) 💨: The Late-Game Bloomer
- Philosophy: The Thief is the story of a protracted adolescence. He spends the first half of the game as a liability 😅—squishy, with weak weapon choices and mediocre damage. His only standout skill is a higher chance to run from battle, which feels more like a commentary on his own abilities than a useful party skill. The philosophy of the Thief is one of faith. You must endure his underwhelming youth in the belief that he will one day blossom into something truly special. Choosing a Thief is an act of delayed gratification, a willingness to carry a weak link in anticipation of forging a powerhouse.
- From Zero to Hero 🦸: The Thief’s transformation upon Class Change is the most dramatic in the game. He becomes the Ninja 🥷, and the change is immediate and profound. Suddenly, he can equip a vast array of powerful swords and armor, including the coveted Flame and Ice armor sets, turning him from a fragile dodger into a respectable front-line combatant.
- But the real prize is his newfound ability to cast up to Level 4 Black Magic. 🪄 This is a strategic game-changer. It means he can cast the two most important buff spells in the game: Temper (Attack Up) and Haste (doubles number of hits). In a boss fight, having a second character who can stack these essential buffs on your primary damage dealer (like a Knight or Master) is invaluable. It effectively doubles the speed at which you can ramp up your offense. The Ninja becomes a fast, hard-hitting, and magically versatile warrior, a perfect blend of offense and support that makes the long wait more than worthwhile. 😎
The White Mage (White Wizard) 🤍: The Unsung Hero
- Philosophy: The White Mage is the silent guardian 😇, the watchful protector, the reason your party is still standing. Her philosophy is one of control and preservation. It is a thankless job; no one cheers for a well-timed heal, but everyone laments its absence. A party without a White Mage is a party living on borrowed time. She is the essential backbone, the strategic core that enables every other party member to perform their role effectively. Choosing a White Mage is a choice for security, for strategy, and for sanity. 🙏
- Beyond Healing 💖: To dismiss the White Mage as a mere “Heal-bot” is a grave strategic error. While her access to the Cure and Heal lines of spells is her primary function, her utility extends far beyond that. She is a master of defense, with spells like Protera (raises party defense) and Invisira (raises party evasion) that can completely neutralize physical threats when stacked. Furthermore, she is a potent offensive force against one of the game’s most common enemy types: the undead. 💀 Her Dia line of spells can often wipe out entire screens of skeletons and zombies more efficiently than a Black Mage’s fire spell.
- When she becomes a White Wizard 🌟, she gains access to the most powerful life-saving spells in the game. Healaga provides a massive burst of healing to the entire party, Full-Life brings a fallen comrade back at full health, and Holy is a respectable offensive spell against endgame foes. She is, from start to finish, the most strategically vital member of any balanced party. 💯
The Black Mage (Black Wizard) 🖤: The Glass Cannon
- Philosophy: The Black Mage is an agent of overwhelming force. ☄️ He is a specialist, a glass cannon who has traded all semblance of physical prowess for dominion over the destructive elements of the universe. His philosophy is that the best defense is a spectacular offense. Why heal damage when you can incinerate the source before it has a chance to act? 🔥 He is the master of crowd control, the key to efficient dungeon exploration, and the secret weapon in the war against bosses.
- The Game-Breakers 🤯: The Black Mage’s value is twofold. First, his access to multi-target elemental spells (-ara and -aga tiers) allows him to end random encounters in a single turn. This is not just about speed; it’s about resource conservation. By preventing drawn-out fights, he saves the entire party from taking unnecessary damage, which in turn saves the White Mage’s precious spell charges for when they’re truly needed.
- Second, and most critically, he learns the two spells that define the endgame meta: Temper and Haste. ⚡ Stacking these buffs on a physical attacker is the single most effective strategy for defeating bosses. After his Class Change to Black Wizard 🧙, he gains access to the ultimate damage spell, Flare, and the devastatingly powerful Saber, which dramatically raises his own attack power, making him surprisingly effective with a weapon like the Cat Claws. The INT stat bug fix in the Pixel Remaster makes him far more potent than in the original NES version, ensuring his spells hit with the force they were always meant to. 📈
The Red Mage (Red Wizard) ❤️: The Swiss Army Knife
- Philosophy: The Red Mage is the master of flexibility. He is a dabbler, a polymath, a student of all disciplines but a master of none. His philosophy is that versatility is its own form of power. Why be a specialist when you can be a one-man solution to a dozen different problems? He can fight ⚔️, he can heal 🩹, he can sling offensive spells 💥, and he can wear respectable armor. He is the ultimate utility player, plugging the gaps in any party’s strategy.
- The Rebalance Reality 🧐: In the original NES version, the Red Mage was a king. 👑 A bug prevented the Intelligence (INT) stat from affecting magic damage, meaning his spells hit just as hard as a Black Mage’s, despite the Black Mage having a much higher INT score. This, combined with his superior fighting and defensive capabilities, made him an almost unequivocally better choice.
- The Pixel Remaster fixes this bug. ✅ Now, INT matters. This means a Black Mage’s Fira will hit significantly harder than a Red Mage’s Fira. This isn’t a “nerf” so much as a restoration of balance. The Red Mage is returned to his intended role: a fantastic support character, but not a replacement for a specialist. He can still learn Temper and Haste, making him a valuable buffer. He can still provide crucial off-healing with Cure spells. He can still contribute respectable damage with a sword. After his Class Change to Red Wizard 🧑🎨, his spell list expands, but he never gains access to the highest-level spells like Flare or Full-Life. He is the perfect choice for a party that needs a little bit of everything, but he can feel redundant in a party that already has both a White and Black Mage.
Stat Growth Explained: Controlled Chaos 🎲
Leveling up in Final Fantasy Pixel Remaster can feel like a roll of the dice, because in a way, it is. Unlike many modern RPGs where stat gains are fixed, FF1 uses a hybrid system of guaranteed and random increases. Understanding this system is key to managing your expectations and not losing your mind trying to get a “perfect” level-up.
The system, which is identical to the one used in the Game Boy Advance and later versions, works like this:
- Guaranteed Growth ✅: At each level-up, every class is guaranteed to get an increase in certain stats. The Warrior, for example, will almost always gain HP and Strength. The Black Mage will almost always gain HP and Intelligence. These guaranteed gains ensure that each class develops along its intended path.
- The 1-in-8 Chance 🤞: For any stat that is not guaranteed to increase at a given level, there is a 1 in 8 chance that it will increase by +1 anyway. This is where the randomness comes in. It’s why your White Mage might occasionally gain a point of Strength, or your Warrior might get a surprising boost to Intelligence. Over 99 levels, these random boosts can add up, but they are not something you can reliably plan for.
- HP “Large Boosts” 💖: In addition to the normal HP gain (which is influenced by your Vitality stat), there is also a 1 in 8 chance on any given level-up to receive a “large boost” to HP, which adds an extra 20-24 HP on top of the normal gain.
What does this mean for you? 🤔 It means you should not stress about min-maxing every single level. The practice of “save-scumming”—saving before a battle, leveling up, and reloading if you don’t like the stat gains—is technically possible but incredibly tedious 😫 and ultimately unnecessary. The game is balanced around the average gains you’ll receive from playing normally. The most important takeaway is that classes will naturally grow into their roles thanks to the guaranteed stats. The random boosts are just a little bit of extra flavor. 🌶️
Chapter 2: The Four-Man Symphony – Crafting the Perfect Party 🎼
Now that you understand the instruments, it’s time to compose your masterpiece. A party in Final Fantasy Pixel Remaster is more than the sum of its parts. It’s a delicate ecosystem where each member’s strengths cover another’s weaknesses. The choices you make here will dictate the rhythm of your entire playthrough.
The Front Line Matters: A Dissertation on Party Order 🚶♂️🚶♀️🚶♂️🚶♀️
Before we even discuss which classes to choose, we must address the single most important and often overlooked strategic element in the game: your party’s marching order. In the heat of battle, enemies don’t just attack randomly; they have a heavily weighted preference for who they target. The formula is brutally simple and profoundly impactful:
- The character in the top slot of your party will receive approximately 50% of all single-target physical attacks. 🎯
- The character in the second slot will receive approximately 25%. 🎯
- The characters in the third and fourth slots will each receive approximately 12.5%. 🎯
This isn’t a suggestion; it’s a fundamental law of physics in this world. 📜 Understanding this is the first step from being a novice to a master. It means your top slot is your designated “tank,” 🛡️ the character built to absorb punishment. For 99% of the game, this character should be your Warrior. With his ability to wear the heaviest armor and shields, he is the only one properly equipped for the job.
Placing a fragile character like a Black Mage or White Mage in the top slot is a recipe for disaster. 😵 They will be relentlessly pummeled and will spend more time on the floor than on their feet. Your back row (the bottom two slots) is a sanctuary 🙏 for these delicate but essential mages, allowing them to do their work with a greatly reduced risk of being targeted.
While the Warrior is the default tank, there are advanced strategies. A high-level Thief or Red Mage, thanks to their higher natural evasion, can temporarily occupy the front slots, but this is a high-risk maneuver best left for experienced players. For your first, and indeed most, playthroughs, the rule is simple: Warrior on top, Mages on the bottom.
The Archetypes: Recommended Party Builds 🧑🤝🧑
With the fundamental principle of party order established, let’s explore some of the most effective and popular party compositions. Each offers a unique playstyle and set of strategic advantages.
“The Classic” (Warrior 🛡️, Monk 🥋, White Mage 🤍, Black Mage 🖤)
- The Philosophy 🌟: This is the quintessential balanced breakfast 🍳 of Final Fantasy Pixel Remaster parties. It’s the setup recommended in old strategy guides for a reason: it works, and it works beautifully. You have a dedicated tank (Warrior), a scaling physical damage dealer (Monk), a dedicated healer (White Mage), and a dedicated offensive caster (Black Mage). Every strategic base is covered.
- The Playstyle: This party is a model of efficiency. The Warrior holds the line, while the Monk begins his slow but steady ascent to godhood. The Black Mage clears out groups of enemies with elemental magic, and the White Mage keeps everyone healthy and buffed. A major advantage of this build is its economic efficiency. The Monk requires almost no gear investment 🫰 past the early game, which frees up a tremendous amount of Gil 💰 to pour into the Warrior’s expensive armor and the mages’ pricey spells. In the late game, the Black Mage focuses on casting Haste and Temper on the Knight and Master, who then proceed to demolish bosses with overwhelming physical force. 💥 It’s a simple, elegant, and super-effective strategy.
“The Box Art Crew” (Warrior 🛡️, Thief 💨, White Mage 🤍, Black Mage 🖤)
- The Philosophy 🎨: This is the party featured on the original game’s box art 🖼️ and in much of its promotional material. It’s aesthetically pleasing and strategically sound, though it plays very differently from “The Classic.” It trades the Monk’s raw, scaling power for the Thief’s late-game versatility.
- The Playstyle: This party experiences a “slow burn.” The early game can feel like a struggle 😫, as the Thief contributes very little, and you’re funding an expensive Warrior and two spell-hungry mages. Patience is key. The payoff comes after the Class Change. The Warrior becomes a Knight, the White and Black Mages become Wizards, and the Thief undergoes his miraculous transformation into the Ninja. 🥷 At this point, the party’s dynamic shifts. You now have two characters (the Black Wizard and the Ninja) who can cast Haste and Temper, allowing you to buff your Knight to maximum power in half the time. The Ninja also becomes a competent secondary fighter. It’s a party that starts slow but finishes with a spectacular crescendo of synergistic power. 🚀
“The Wrecking Crew” (Warrior 🛡️, Monk 🥋, Thief 💨, Red Mage ❤️)
- The Philosophy 👊: For those who believe the best solution to any problem is to hit it very, very hard. 💥 This party composition is an all-out offensive blitz, sacrificing the dedicated support of both a White and Black Mage for a third physical powerhouse and the unparalleled versatility of a Red Mage.
- The Playstyle: This is a high-octane, aggressive party. Your front line consists of three characters dedicated to dealing physical damage. The Red Mage is the crucial lynchpin holding it all together. He acts as your primary healer 🩹, your buffer 📈, and a capable fourth attacker. In boss fights, his ability to cast Haste and Temper is essential. The strategy is to overwhelm enemies with relentless physical assaults, relying on the Red Mage’s jack-of-all-trades toolkit to handle any magical needs that arise. It’s a powerful and fun composition, but it requires a more proactive and careful approach to healing, as you lack the emergency recovery options of a dedicated White Mage. 😥
“The Speedrun Special” (Warrior 🛡️, Monk 🥋, Black Mage 🖤, Black Mage 🖤)
- The Philosophy 🏃💨: This is a highly specialized, glass-cannon build favored by speedrunners for its ability to maximize damage and minimize time spent in random battles. The theory is simple: double down on the most effective strategies for the two types of combat in the game.
- The Playstyle: For random encounters, you have two Black Mages who can unleash a torrent of -ara and -aga level spells to wipe the screen instantly. 🔥🔥 For boss fights, the strategy is ruthlessly efficient: both Black Mages spend their turns stacking Temper and Haste on the Warrior and Monk, ramping up their damage output to astronomical levels at an incredible speed. ⚡ The party has minimal healing, relying on potions and inns between dungeons. It’s a high-risk, high-reward 🎲 playstyle that is incredibly effective but can be unforgiving if things go wrong.
“The Ironclad Phalanx” (Warrior 🛡️, Warrior 🛡️, Warrior 🛡️, Red Mage ❤️)
- The Philosophy: What’s better than one unstoppable tank? Three of them. This party composition is the epitome of “slow and steady wins the race.” 🐢 It is a nearly indestructible wall of steel and hit points that grinds its way through the game with methodical certainty.
- The Playstyle: This is the most expensive party to outfit 💸, as you’ll be buying three sets of the best armor and weapons at every town. The trade-off is unparalleled survivability. ⛰️ With three Warriors soaking up damage, the party is incredibly resilient. The Red Mage serves as the dedicated support, providing all the necessary healing and buffing. After the Class Change, you have three Knights, all capable of casting low-level White Magic, and a Red Wizard. This results in a party with an enormous pool of healing magic for use between battles. While it might lack the explosive flair of other builds, its sheer brute force and staying power are undeniable. 💪
Challenge Builds & Why You’re So Daring 😉
For the veteran player who has seen it all, the game offers the freedom to attempt truly unorthodox party compositions. These are not recommended for a first playthrough, but they offer a unique and challenging way to re-experience the game.
- Four White Mages 🤍🤍🤍🤍: A test of patience. Your only offense for most of the game will be fighting undead with Dia spells and slowly bonking everything else to death with hammers. 🔨
- Four Black Mages 🖤🖤🖤🖤: A true glass cannon experience. You’ll obliterate everything in the first few rounds… until you run out of spell charges 🔋 and are left with four people who can be knocked over by a stiff breeze. 😨
- Four Monks 🥋🥋🥋🥋: An exercise in poverty and extreme scaling. The early game is a painful slog, but if you can survive to the high levels, you’ll have a party of four demigods who can punch reality itself into submission. 👊💥
These builds are a testament to the game’s underlying flexibility. They prove that with enough strategy (and perhaps a touch of inspiration), any path can lead to victory.
Chapter 3: The Art of War (and Magic) – Mastering the Combat System 💥
It’s Not Just “Attack, Attack, Heal” 🤔
At first glance, the combat in Final Fantasy Pixel Remaster seems deceptively simple. You choose an action for each of your four heroes, and then you watch them and the monsters trade blows. But beneath this simple turn-based exterior lies a system of surprising depth 🤯, governed by hidden mechanics and subtle strategies. Mastering this system is the difference between scraping by and waltzing through the game’s toughest challenges.
The flow of battle is determined by the Agility stat. At the start of each round, the game takes each combatant’s Agility score and adds a random value to it. 🎲 Turns are then ordered from highest resulting number to lowest. This means that while a higher Agility gives you a better chance to act first, it’s never a guarantee. An unlucky roll can see your speedy Thief acting after a lumbering Ogre. This element of randomness means you can’t always rely on getting a crucial heal off before the enemy attacks.
The most significant quality-of-life change in the Pixel Remaster’s combat is the removal of “ineffective” attacks. In the original NES version, if a character was set to attack an enemy that was defeated by another party member earlier in the round, the attack would simply miss. 💨 This punished players for focusing fire. Now, your characters are smart enough to redirect their attack to the next available enemy 🎯, making combat feel smoother and more logical.
The Magic System: Spell Charges, Not MP 🔋
For players accustomed to modern RPGs, Final Fantasy Pixel Remaster’s magic system can be a shock. There is no unified pool of Magic Points (MP). Instead, the game uses a “Vancian” magic system, a concept borrowed from classic tabletop RPGs like Dungeons & Dragons.
Here’s how it works:
- Magic is Purchased 🛍️: Characters do not learn spells by leveling up. You must purchase each spell scroll from a Magic Shop in one of the game’s towns.
- Spell Levels 1️⃣-8️⃣: Magic is divided into eight levels, for both White and Black schools. Higher-level spells are more powerful and are sold in towns you’ll discover later in the game.
- Limited Slots 🔒: Each magic-using character can only learn three spells per magic level. Since there are four spells available at each level, you must choose which ones to learn. This decision is permanent 😬 unless you discard a spell to make room for another, which requires you to re-purchase the discarded spell if you want it back.
- Spell Charges ⚡: This is the most critical component. Each spell level has its own separate pool of “charges” or “casts.” For example, a low-level Black Mage might have 4 charges for Level 1 spells and 2 charges for Level 2 spells. Casting Fire (a Level 1 spell) uses one Level 1 charge. Casting Blizzard (a Level 2 spell) uses one Level 2 charge. These charges are only replenished by resting at an Inn 🛌 or by using rare items like Tents and Cottages.
This system forces you to think like a resource manager. 🧠 Every spell cast is a finite resource that must be conserved during long dungeon crawls. You can’t just spam your most powerful spells on every goblin; you must save your precious high-level charges for the boss waiting at the end of the dungeon. This makes every decision to use magic a calculated, strategic choice.
The Unseen Powerhouses: Buffs & Debuffs 📈📉
New players often make the mistake of filling their spellbooks with nothing but direct-damage and healing spells. They see Fira and Cura and assume those are the most important tools. They are wrong. ❌ The true path to mastery in Final Fantasy Pixel Remaster lies in understanding and exploiting the game’s powerful but unassuming support spells. These spells don’t just win battles; they break the game’s math in your favor.
Temper & Haste: The Keys to the Kingdom 🔑
These two Level 2 and Level 4 Black Magic spells are, without exaggeration, the most powerful spells in the game. 💯 Understanding them is mandatory for high-level play.
- Temper 🔥: This spell raises a single ally’s Attack power. What’s crucial is that its effect stacks. 📈 You can cast Temper on your Warrior multiple times, and with each cast, his damage will climb higher and higher.
- Haste ⚡: This spell is even more potent. It doubles the number of hits a character performs with their physical attack. If your Knight is hitting 4 times per round, a single cast of Haste will make him hit 8 times. This effect does not stack with itself, but it does stack with Temper. 🤝
The synergy between these two spells creates an exponential growth in damage output. 🤯 The strategy for nearly every major boss in the latter half of the game is the same: have your Black Mage (and Ninja, if you have one) spend the first few rounds casting Haste and stacking Temper on your strongest physical attacker (usually a Knight or Master). The result is a character transformed into a living weapon, capable of dealing thousands of points of damage per round and ending boss fights in a fraction of the time it would otherwise take. 💥
Invisira & Protera: The Defensive Dream Team 🛡️
What Haste and Temper do for offense, this pair of White Magic spells does for defense.
- Protera (Level 6): This spell increases the Defense of the entire party. 🆙
- Invisira (Level 6): This spell increases the Evasion of the entire party. 💨
Like Temper, their effects can be stacked with repeated castings. 🔁 By spending a few turns at the start of a difficult fight casting these spells, you can dramatically reduce the amount of physical damage you take. Enemies will start missing their attacks more often, and the attacks that do land will do significantly less damage. Against a powerful physical boss like Kraken or Tiamat, this defensive bulwark can give your healer the breathing room they need to keep the party alive while your offense gets set up.
Your Gear Fights for You: The Magic of Item Casting 🎁
One of the most powerful and easily missed mechanics in Final Fantasy Pixel Remaster is the ability for certain pieces of equipment to be used as an item during combat to cast a spell for free. 🆓 This does not consume a spell charge, and it can be done by any character who can equip the item, even if they don’t have any magical ability.
This is a game-changer 😮 for resource management. It gives your non-magic users utility beyond just attacking and allows your mages to contribute without depleting their precious spell charges. Mastering item-casting is a hallmark of an expert player. Key items to look out for include:
- Heal Staff & Healing Helm 🩹: Found in the Citadel of Trials and later dungeons, these items cast Heal (a weak party-wide heal) when used. Giving one to your Black Mage or Warrior allows them to contribute to healing during random battles, saving your White Mage’s charges for bigger emergencies.
- Mage’s Staff 🔥: Found in the Sunken Shrine, this casts Fira. It’s an excellent way for your Black Mage to contribute to clearing groups of enemies without using a Level 3 spell charge.
- Gauntlets & Thor’s Hammer ⚡: These cast Thundara. The Gauntlets are found in the Citadel of Trials, making them available relatively early. Giving them to a physical attacker provides them with a free multi-target magic attack.
- Defender & White Robe 💨: The Defender sword casts Blink (self Evasion up), and the White Robe casts Invisira (party Evasion up). These are free, repeatable defensive buffs that can make your party incredibly difficult to hit.
- Giant’s Gloves 👊: This item casts Saber, a spell normally exclusive to the Black Wizard that significantly boosts the user’s Attack. Anyone can use it, making it a fantastic way to buff a physical attacker without needing a Black Wizard in the party.
Always check the description of new equipment. If it can cast a spell, consider it not just a piece of armor, but a reusable tool in your strategic arsenal. 🧰
Status Effects: More Than Just an Annoyance 😵
Throughout your journey, enemies will try to disable your party with a variety of nasty status effects. While most are temporary, some can be debilitating or even fatal if left untreated.
| Status Effect | Effect | Cure |
| Poison 🐍 | Take damage after every step on the world map/in dungeons. | Antidote, Poisona spell |
| Paralysis 🥶 | Character is unable to act for several rounds. | Wears off, Remedy |
| Sleep 😴 | Character is unable to act. Wakes up when hit or after a short time. | Wears off, Remedy |
| Silence 🤫 | Character cannot cast magic. | Echo Grass, Vox spell |
| Darkness 🕶️ | Character’s accuracy is severely reduced. | Eye Drops, Blinda spell |
| Stone 🗿 | Character is turned to stone and is effectively dead. | Gold Needle, Stona spell |
| Instant Death 💀 | Character is killed instantly. | Phoenix Down, Life/Full-Life spells |
While many enemies can inflict these, most bosses are immune to being afflicted themselves. Your primary concern is protecting your own party. The single best way to do this is by acquiring the Ribbon 🎀. This headgear, of which there are only three in the entire game, grants resistance to every single status effect and elemental attack. Equipping your three most vulnerable characters with Ribbons will make them nearly invincible to magical threats. 💖
Chapter 4: The Road Goes Ever On – A Spoiler-Free Master Walkthrough 🧭
And so, it begins. You have chosen your heroes, you understand the art of war, and you are ready to step out into the world. This chapter will be your faithful companion 🤝, guiding you from the gates of Cornelia to the doorstep of Chaos himself. The path is laid out step-by-step, with clear objectives, shopping advice, and dungeon navigation. All treasure chests will be noted, and you will be alerted when a boss is approaching, at which point you can consult the detailed strategies in Chapter 5. There will be no story spoilers here—only the road ahead. Let’s take our first steps.
Arc 1: The Beginning 🌅
- Objective: Rescue the Princess 👸 from Garland.
- The Lay of the Land: You begin just outside Cornelia 🏰, the kingdom at the heart of the world. It contains a town with basic shops and a castle. To the north lies your first objective, the ominous Chaos Shrine 👹.
- Recommended Level: 1-3
- Shopping List (Cornelia):
- Weapons: Rapier (Warrior/Thief/Red Mage), Wooden Nunchaku (Monk), Iron Hammer (White Mage), Small Dagger (Black Mage).
- Armor: Chain Armor (Warrior/Red Mage), Wooden Armor (Thief/Monk), Cloth (Mages).
- Magic: Cure (White/Red Mage), Fire (Black/Red Mage). These are absolutely essential.
- Dungeon Delving: The Chaos Shrine
- Before entering the shrine, spend some time fighting Goblins and Wolves in the fields around Cornelia. Gain at least one or two levels and earn enough Gil to buy your starting gear. Rest at the Inn (30 Gil) to heal and save. 🛌
- Once you’re at least level 2, head north to the Chaos Shrine. The path is straightforward.
- Inside, the central chamber is blocked from the top. You must loop around the sides. The paths to the right are locked by the Mystic Key, which you won’t have for a long time. 🔒
- Head to the west (left) side of the shrine. Follow the corridor to find three chests: Leather Cap, Potion, and Tent. 🏕️
- Boss Encounter: Head to the central chamber from the bottom entrance. A familiar knight awaits. Prepare for your first boss battle against Garland. (See Chapter 5 for strategy).
- Aftermath: Upon defeating Garland, you are automatically transported back to Cornelia Castle. The King, overjoyed, will build a bridge to the north, opening up the rest of the continent. 🌉 Princess Sarah will also give you the LUTE 🎶, a key item for much later in the game.
Arc 2: The High Seas ⛵
- Objective: Secure a ship 🚢 and reach the southern continent.
- The Lay of the Land: With the new bridge built, you can now explore the lands to the north and east. To the far north is a cave where a witch named Matoya lives. To the east, along the coast, is the port town of Pravoka 🏴☠️, which is currently under siege by pirates.
- Recommended Level: 5-6
- Shopping List (Pravoka):
- Weapons: Broadsword, Scimitar, Battle Axe.
- Armor: Iron Armor (Warrior), Gloves.
- Magic (Level 2): Temper and Slow (Black Magic), Invis and NulShock (White Magic) are excellent choices.
- Dungeon Delving: The Town of Pravoka
- Cross the bridge north of Cornelia and head east. The journey is long, so be prepared for several battles.
- Along the way, you can visit Matoya’s Cave to the north. There are a few potions inside, but you cannot help her yet. Just remember her location.
- Continue east to reach Pravoka. The town seems normal, but speaking to the townspeople reveals their pirate problem.
- Boss Encounter: In the northwest corner of town, you’ll find the pirate captain, Bikke. Speak to him, and you’ll be forced into a fight with his crew of 9 Pirates 🦜. (See Chapter 5 for strategy).
- Aftermath: After you defeat his crew, a terrified Bikke will surrender his SHIP to you. You now have access to the inner sea and can explore the world. 🌊 Before you set sail, be sure to purchase the new gear and Level 2 spells available in Pravoka’s shops.
Arc 3: The Elven Prince’s Plight 😴
- Objective: Find a way to wake the cursed Prince of Elfheim 🧝.
- The Lay of the Land: Your new ship allows you to explore the Aldi Sea. Your next destination is the continent to the south. Docking at the port south of Cornelia and traveling further south will lead you to the town of Elfheim and its castle.
- Recommended Level: 8-10
- Shopping List (Elfheim):
- Weapons: Mythril Sword, Iron Nunchaku, Silver Hammer. The Mythril Sword is a huge upgrade but very expensive (4000 Gil). 💸
- Armor: Copper Armlet, Iron Shield, Wooden Helmet.
- Magic (Level 3 & 4): This town sells a huge number of powerful new spells. For Black Magic, Fira and Thundara are essential for offense, and Haste is the most important spell you’ll buy for a long time. ⚡ For White Magic, Cura is a vital healing upgrade, and Diara is great for the upcoming dungeon. Spells are expensive, so you may need to farm for Gil on the open seas.
- Dungeon Delving: The Marsh Cave
- Upon arriving in Elfheim, you’ll learn the prince has been put into a deep sleep by the dark elf Astos. The healers need the CROWN 👑 from the Marsh Cave to proceed. Stock up on Potions and, most importantly, Antidotes 🐍, as the cave is filled with poisonous creatures.
- From Elfheim, travel west, then south along the coast to find the entrance to the Marsh Cave. 🍄
- 1F: The dungeon is a maze of small rooms. The exit to the next floor is south of the entrance.
- 2F: This floor is split into two sections. Explore thoroughly for chests containing a Broadsword and Dagger.
- 3F: The final floor is a large area with many locked doors (requiring the Mystic Key). Your destination is a specific room with a chest. Inside this room, you’ll find a chest containing the CROWN.
- Boss Encounter: As you open the chest to claim the Crown, you will be ambushed by a group of Piscodemons 🐟. (See Chapter 5 for strategy).
- Aftermath: With the Crown in hand, make the long journey back to Elfheim. Rest at the inn and prepare for your next task.
Arc 4: The Mystic Key 🔑
- Objective: Defeat Astos 😈 and use the Mystic Key to unlock hidden treasures.
- The Lay of the Land: You present the Crown to the king’s advisor in Elfheim Castle, only to discover he is the dark elf king, Astos, in disguise! He steals the crown and flees to his ruined castle to the northwest.
- Recommended Level: 10-12
- Shopping List: None. Ensure you are fully healed and have spell charges remaining.
- Dungeon Delving: The Western Keep 🦇
- Head northwest from Elfheim to the ruined castle known as the Western Keep.
- The keep is small. There are a few chests on the first floor, some of which are guarded by monster encounters. Be sure to grab the Power Staff, Falchion, and Steel Gloves.
- Boss Encounter: In the throne room, you will confront Astos. This can be a very difficult fight for an unprepared party. (See Chapter 5 for strategy).
- Aftermath: Defeating Astos retrieves the Crown and also earns you the CRYSTAL EYE 👁️. Your next step is to return this to its rightful owner.
- Take the Crystal Eye back to Matoya in her cave north of Cornelia. In exchange, she will give you the JOLT TONIC ☕.
- Return to Elfheim Castle and give the Jolt Tonic to the prince’s attendant. The prince will awaken and reward you with the MYSTIC KEY 🔑.
- This key opens all the locked doors you’ve seen throughout the world. It’s time to go treasure hunting! 🎁
- Cornelia Castle: The locked rooms contain Iron Armor, Nitro Powder 💥, Saber, and more. The Nitro Powder is essential for progressing the story.
- Chaos Shrine: You can now access the eastern rooms for a Werebane sword and Rune Blade.
- Marsh Cave: Return to the third floor to unlock rooms containing a Silver Armlet and Mythril Knife.
Arc 5: The First Fiend 💀
- Objective: Defeat the Fiend of Earth, Lich.
- The Lay of the Land: With the Nitro Powder 💥 in hand, travel to the Dwarf Cave at Mt. Duergar, west of Cornelia. A dwarf there will use the powder to blast a canal, allowing your ship to reach the western seas. 🌊 Your destination is the decaying town of Melmond 🏚️, located just past the new canal.
- Recommended Level: 15-17
- Shopping List (Melmond):
- Weapons: Long Sword.
- Armor: Steel Armor (Knight), Silver Armlet.
- Magic (Level 5): Curaga is a massive healing upgrade. Firaga is a powerful AoE spell. Life is your first revival spell. 💖
- Dungeon Delving: Terra Cavern 🕳️
- From Melmond, travel west and then south to a peninsula to find the Terra Cavern. The enemies here can inflict petrification 🗿, so having a few Gold Needles is wise.
- B1-B3: The cavern is a maze. Your goal is a chamber at the end of B3. Along the way, you’ll find many chests, including a Coral Sword and a lot of Gil.
- Boss Encounter: In a sealed chamber on B3, you will fight the Vampire 🧛. (See Chapter 5 for strategy).
- Aftermath & The Second Journey: Defeating the Vampire gets you the STAR RUBY ⭐. You cannot proceed further down. Exit the cavern and travel north of Melmond to Titan’s Cave. Give the ruby to the Titan, who will let you pass. Beyond him is the Sage’s Cave, where Sadda the Sage will give you the EARTH ROD 🌿.
- Return to the Terra Cavern and go back to the Vampire’s room. Use the Earth Rod on the wall behind the chest to open a new path to the lower levels.
- B4-B5: These floors are filled with powerful monsters and valuable treasures, including a Mythril Shield. Navigate your way down to the final chamber on B5.
- Boss Encounter: In the chamber containing the Earth Crystal, you will face the first of the four fiends: Lich. (See Chapter 5 for strategy).
- Aftermath: With Lich defeated, the Earth Crystal is restored. A teleporter will appear, allowing you to exit the dungeon instantly.
Arc 6: The Second Fiend 🔥
- Objective: Defeat the Fiend of Fire, Marilith 🐍.
- The Lay of the Land: Your next destination is Crescent Lake 🌙, a town far to the east. Sail your ship east from Melmond, past the continent, to reach it. The Sages there will give you the CANOE 🛶, allowing you to traverse rivers.
- Recommended Level: 19-21
- Shopping List (Crescent Lake):
- Weapons: Mythril Axe, Mythril Knife.
- Armor: Buckler, Silver Gauntlet.
- Magic (Level 6): Protera and Invisira are top-tier defensive buffs. Thundaga is a powerful offensive spell.
- Dungeon Delving: Mt. Gulg 🌋
- From Crescent Lake, use the canoe to paddle up the rivers into the volcanic region to the west. Mt. Gulg is a multi-level dungeon filled with lava floors that will damage your party with every step. 😫
- The dungeon is a sprawling maze. You’ll need to navigate carefully to find the stairs leading down. The floors are packed with treasure, including the Ice Brand and the Flame Shield.
- Boss Encounter: On the lowest level of the volcano, guarding the Fire Crystal, is the second fiend: Marilith. (See Chapter 5 for strategy).
- Aftermath: Defeating Marilith restores the Fire Crystal. Two down, two to go.
Arc 7: The Wings of Freedom ✈️
- Objective: Find the Levistone and acquire the Airship 🚀.
- The Lay of the Land: With the canoe 🛶, you can now access the Ice Cavern ❄️, located up a river system north of Crescent Lake. This is one of the trickiest dungeons in the game, filled with dangerous enemies and spike traps that force you to fall to lower levels.
- Recommended Level: 21-23
- Shopping List: None. Stock up heavily on Potions and healing items.
- Dungeon Delving: The Ice Cavern
- Navigate the rivers to reach the cavern. Inside, be careful where you step. Many treasure chests are surrounded by spike traps. 😱
- You’ll need to intentionally fall through a specific trap to proceed. Explore thoroughly to find valuable treasures like the Flame Sword and Ice Armor.
- In a room with a single chest surrounded by holes, you will find the LEVISTONE 💎.
- Boss Encounter: As you try to take the Levistone, you will be ambushed by the Evil Eye 👁️. (See Chapter 5 for strategy).
- Aftermath: With the Levistone in your possession, exit the cavern. Travel to the small desert south of Crescent Lake. Standing in the desert with the Levistone will cause the AIRSHIP to rise from the sands. You can now travel anywhere in the world! 🌎
Arc 8: The Class Change 🌟
- Objective: Prove your courage to Bahamut and upgrade your classes. 💪
- The Lay of the Land: Now that you have the Airship 🚀, you can complete one of the most important sidequests in the game. Fly to the continent in the northeast. You’ll need to find a small patch of grass to land on and then walk to the Citadel of Trials 🏛️.
- Recommended Level: 23-25
- Shopping List: None.
- Dungeon Delving: The Citadel of Trials
- To enter, you must have the Crown 👑 from the Marsh Cave quest. Inside, you must navigate a maze of teleporters on the second floor. The correct path involves taking the southern warp points when given a choice.
- The third floor is a treasure room. Make sure to grab the Heal Staff, Gauntlets, and Ice Brand.
- Boss Encounter: At the end of the trial, you’ll find a chest containing the RAT’S TAIL 🐀, guarded by Dragon Zombies 🐲. (See Chapter 5 for strategy).
- Aftermath: Take the Rat’s Tail to Bahamut, the Dragon King. He resides in the Dragon Caves on a chain of islands to the east of the Citadel. Present him with the tail, and he will bestow upon you the CLASS CHANGE 🥳, promoting all your characters to their advanced forms (Knight, Master, Ninja, etc.).
Arc 9: The Third Fiend 💧
- Objective: Defeat the Fiend of Water, Kraken 🐙.
- The Lay of the Land: Your next journey takes you to the remote towns of Gaia ⛰️ and Onrac 🌊. Fly to the northern part of the main western continent to find Onrac. Here, you’ll learn of the Sunken Shrine, but you’ll need a way to breathe underwater. First, fly to Gaia, a town hidden in the mountains on the northeastern continent.
- Recommended Level: 25-27
- Shopping List (Gaia/Onrac):
- Weapons: Cat Claws (Gaia, extremely expensive but powerful for a Black Wizard).
- Armor: Ruby Armlet (Gaia), ProRing (Gaia).
- Magic (Level 7): Purchase powerful spells like Blizzaga, Curaja, and Healaga.
- Dungeon Delving: The Sunken Shrine 🔱
- First, you need the OXYALE 🫧. Fly to the Caravan, located in a small patch of desert west of Gaia, and buy the BOTTLED FAERIE 🧚 for a hefty price. Take the faerie to the spring in Gaia to trade it for the Oxyale.
- Fly to Onrac and speak to the woman by the dock who will let you use a submarine – to enter the Sunken Shrine.
- The shrine is a massive, multi-level dungeon. The upper floors contain mermaid civilization and immense treasure, including the crucial ROSETTA STONE 📜. You must explore thoroughly to find it.
- The lower floors are where the fiend resides. Navigate the maze to reach the bottom.
- Boss Encounter: In the Water Crystal’s chamber, you will face the third fiend: Kraken. This is often considered the most difficult of the four fiends. 😥 (See Chapter 5 for strategy).
- Aftermath: Defeating Kraken restores the Water Crystal. With the Rosetta Stone in hand, your path to the final fiend is now open.
Arc 10: The Fourth Fiend 💨
- Objective: Defeat the Fiend of Wind, Tiamat 🐉.
- The Lay of the Land: The Rosetta Stone 📜 is the key to communicating with the people of Lufenia, an ancient town located on the eastern edge of the northern continent. Fly there and show the stone to a citizen to learn their language. 🗣️
- Recommended Level: 28-30
- Shopping List (Lufenia):
- Magic (Level 8): The most powerful spells in the game are sold here: Flare 🔥 and Full-Life 💖. They are incredibly expensive (60,000 Gil each) but worth every penny.
- Dungeon Delving: Tower of Mirage 🏙️ & Flying Fortress 🛰️
- The Lufenians will give you the CHIME 🔔, which is used to enter the Tower of Mirage, located in the massive desert in the south.
- Tower of Mirage: This three-story tower is straightforward. At the top, a teleporter will use your Warp Cube (obtained from the Waterfall Cavern after getting the Oxyale) to send you to the Flying Fortress. Be sure to grab the Sun Blade and Thor’s Hammer here.
- Flying Fortress: This is the final dungeon before the end of the game. It’s a five-story technological marvel. On the fourth floor, you will find the ADAMANTITE 🔩. Do not miss this item. It can be traded to the blacksmith in Mt. Duergar to forge the Excalibur 🗡️, the second-best sword in the game. This is also the only place to encounter the optional superboss, Warmech. 🤖
- Boss Encounter: On the fifth floor of the Flying Fortress, guarding the Wind Crystal, is the final fiend: Tiamat. (See Chapter 5 for strategy).
- Aftermath: With all four crystals restored, the path to the final confrontation is now clear.
Arc 11: The Final Confrontation ⏳
- Objective: Travel back in time 🌀 and defeat Chaos.
- The Lay of the Land: The four restored crystals open a time portal in the Chaos Shrine, where your journey began. This is the point of no return. 🚫 Once you enter, you cannot leave until the final boss is defeated.
- Recommended Level: 35+
- Shopping List: Stock up to 99 Potions and Ethers/Elixirs if you have them. Ensure your mages have their best spells.
- Dungeon Delving: The Temple of Chaos (Past) 🏛️
- Fly to the Chaos Shrine and interact with the central crystal. You will be transported 2000 years into the past.
- The final dungeon is a series of floors themed after the four elements. At the bottom of each themed floor, you must fight the corresponding fiend again. 🔁 These versions are stronger than your first encounters.
- Earth Floor: Boss is Lich 💀.
- Fire Floor: Boss is Marilith 🔥.
- Water Floor: Boss is Kraken 💧.
- Air Floor: Boss is Tiamat 💨. Make sure to grab the Masamune sword ⚔️ from a chest on this floor. It is the best weapon in the game and can be equipped by anyone. 💪
- Boss Encounter: After defeating all four fiends for a second time, you will reach the final chamber. Here you will face the ultimate enemy, the source of the time loop: Chaos. (See Chapter 5 for strategy).
- Aftermath: Congratulations, Warrior of Light! 🎊 You have saved the world. 🌍
Chapter 5: The Big Bads – A Tactical Guide to Every Boss 👹
Welcome to the war room. 📜 Here, we dispense with pleasantries and get down to the brass tacks of monster-slaying. This is a complete tactical breakdown of every major boss encounter in Final Fantasy Pixel Remaster. Each entry will provide you with the enemy’s vital statistics, an analysis of their threat level, and a master plan for their swift and decisive defeat.
Garland 🛡️
- Location: Chaos Shrine
- Stats (Pixel Remaster): HP: 212 | Weakness: None | Resists: None
- The Threat: Garland is your first real test, but he’s more of a quiz 📝 than a final exam. He relies solely on physical attacks that can hit for a decent amount of damage on your low-level party.
- The Master Plan: This fight is a straightforward damage race. 🏃 Have your physical attackers (Warrior, Monk, Thief) use the “Attack” command. Your Black Mage should cast Fire or Thunder every round. Your White Mage should heal 🩹 anyone whose HP drops below half, and attack when healing isn’t needed. At level 3, you should have more than enough firepower and HP to take him down before he can cause serious trouble.
Bikke’s Pirates 🏴☠️
- Location: Pravoka
- Stats (Pixel Remaster): HP: 24 (each) | Weakness: Sleep | Resists: None
- The Threat: There are nine of them, which looks intimidating. 😨 However, they are statistically identical to Goblins. Their only threat is the sheer number of attacks they can perform in a round.
- The Master Plan: This isn’t a boss fight; it’s crowd control. The easiest way to win is to have your Black Mage cast Sleep 😴. It will likely put most of the pirates to sleep, neutralizing them. Then, have your party pick them off one by one. Even without Sleep, their HP is so low that your front-line fighters can likely one-shot them.
Piscodemon 🐟
- Location: Marsh Cave
- Stats (Pixel Remaster): HP: 96 (each) | Weakness: Lightning ⚡ | Resists: Most magic
- The Threat: You fight a group of 2-4 of these. They have high defense and hit surprisingly hard with their physical attacks. 👊 They are highly resistant to most magic, making this primarily a physical challenge.
- The Master Plan: Their one vulnerability is Lightning. ⚡ Have your Black Mage cast Thunder or Thundara every round. This will be your main source of damage. Have your physical attackers focus their attacks on one Piscodemon at a time to eliminate them quickly and reduce the number of incoming attacks.
Astos 😈
- Location: Western Keep
- Stats (Pixel Remaster): HP: 420 | Weakness: None | Resists: None
- The Threat: Astos is the first major difficulty spike. 📈 He is a powerful mage who opens the fight by casting RUB, a single-target instant-death spell. 💀 While its accuracy is low, if it connects, the fight can be over before it begins. 😭 He follows this up with powerful spells like Fira and Thundara, and the debilitating Slow.
- The Master Plan: This fight can be very RNG-dependent. 🎲 If RUB hits your main healer or damage dealer, you may need to reset. The key is to end the fight as quickly as possible. 💨 Have your Black Mage cast Temper on your Warrior to boost his damage. Use your strongest elemental spells (Thundara if you have it). The White Mage should focus exclusively on healing. If Astos casts Slow on your Warrior, have your Black Mage counter it with Haste if possible. This is a pure burst-damage race.
Vampire 🧛
- Location: Terra Cavern
- Stats (Pixel Remaster): HP: 280 | Weakness: Fire 🔥, Dia ✨ | Resists: Ice, Status Effects
- The Threat: The Vampire itself is not terribly threatening. 😑 Its physical attack is decent, and it can paralyze a character with its Gaze attack. The real challenge is reaching it with enough resources left to fight.
- The Master Plan: Exploit its weaknesses. The Vampire is an undead creature, which means it takes damage from healing magic. 🤯 Have your White Mage cast Dia or Diara for massive damage. Your Black Mage should cast Fire or Fira. With both mages targeting its weaknesses, the Vampire should fall in just a few rounds.
Lich 💀
- Location: Terra Cavern
- Stats (Pixel Remaster): HP: 1200 | Weakness: Fire 🔥, Dia ✨ | Resists: Ice, Status Effects
- The Threat: The first of the Four Fiends. 😱 Lich is a powerful undead sorcerer. He hits hard with physical attacks 💥 and has access to high-level magic like Blizzara and Sleepara. If the fight drags on, he can even use Flare.
- The Master Plan: Speed is everything. 💨 Lich is weak to Fire and Dia, just like the Vampire. Your White Mage should be casting Diara every single turn. Your Black Mage should cast Fira. Have your other two characters focus on physical attacks. If you have a Red Mage, they should also be casting Fira. It’s a race 🏁 to deplete his 1200 HP before he can unleash his strongest magic. Casting NulFrost can help mitigate his ice damage, but an aggressive offensive is generally the better strategy.
Marilith 🐍
- Location: Mt. Gulg
- Stats (Pixel Remaster): HP: 1440 | Weakness: None | Resists: Fire, Ice, Lightning
- The Threat: The Fiend of Fire. 🔥 Marilith has six arms, and she uses them to deliver a flurry of powerful physical attacks. 🌪️ She also casts Fira and can inflict Darkness and Paralysis.
- The Master Plan: Marilith is a physical powerhouse with no elemental weaknesses to exploit. 😥 This fight is a test of your party’s endurance and buffing capabilities. 💪 Start by having your White Mage cast NulBlaze to halve the damage from her fire attacks. Then, have your Black Mage cast Haste ⚡ and Temper 🔥 on your strongest physical fighter (Warrior or Monk). Your White Mage will be on full-time healing duty. 🩹 This is a battle of attrition; keep your defenses up, your buffs active, and slowly chip away at her health.
Kraken 🐙
- Location: Sunken Shrine
- Stats (Pixel Remaster): HP: 1800 | Weakness: Lightning ⚡ | Resists: Fire, Ice, Earth
- The Threat: The Fiend of Water, and arguably the toughest of the four. 😥 Kraken hits like a freight train 🚂, with up to eight physical attacks per round that can easily kill a character from full health. He also uses a blinding ink attack and powerful lightning magic.
- The Master Plan: Defense is paramount. 🛡️ In the first round, have your White Mage cast Protera or Invisira. Have your Black Mage cast Thundaga 🌩️ to exploit Kraken’s weakness. From the second round onward, the Black Mage should focus on buffing your main physical attacker with Haste and Temper. The White Mage’s only job is to heal; if someone falls, use a Phoenix Down immediately. This fight is a brutal slugfest 🥊, and your ability to mitigate his immense physical damage while exploiting his lightning weakness will determine the outcome.
Tiamat 🐉
- Location: Flying Fortress
- Stats (Pixel Remaster): HP: 2400 | Weakness: None | Resists: Fire, Ice, Lightning, Earth
- The Threat: The Fiend of Wind, a multi-headed dragon. 🐲 Tiamat is a tank ⛰️ with very high defense and a barrage of elemental breath attacks like Thunder, Poison Gas, and Icestorm.
- The Master Plan: Tiamat has no elemental weaknesses and resists the primary ones. 🚫 This fight is won with buffs 📈 and non-elemental damage. Start with defensive buffs like Invisira and any “Nul-” spells that match its common attacks (like NulShock). Then, execute the classic strategy: stack Haste ⚡ and Temper 🔥 on your Knight or Master. Your Black Wizard should use Flare if they have it, and the White Wizard should use Holy. This is a long fight against a durable opponent; focus on buffing your physical damage to overcome its high defense.
The Fiends (Rematch) 🔁
- Location: Temple of Chaos (Past)
- The Threat: Before you can face Chaos, you must defeat all four fiends again. They are stronger, with more HP 😨, but their weaknesses and strategies remain the same.
- The Master Plan: You are much stronger now, with better gear and higher-level spells. 💪 Execute the same strategies you used the first time, but do so with more power. Use Diaga and Firaga on Lich, buff against Marilith, blast Kraken with Thundaga, and use Flare and buffed physical attacks on Tiamat. The main challenge here is resource management 🔋, as you must fight all four and then Chaos without a chance to rest.
Chaos 🌀
- Location: Temple of Chaos (Past)
- Stats (Pixel Remaster): HP: 4000 | Weakness: None | Resists: All elements and status effects
- The Threat: The final boss. 👑 Chaos is a monster. He has access to nearly every powerful spell in the game, including Curaja (which heals him for 9999 HP 😱), Firaga, Blizzaga, Thundaga, and the devastating physical attack Earthquake. His actions are random, making him unpredictable and dangerous.
- The Master Plan: This is the final exam. 📝 You must use every tool in your arsenal.
- Defense First 🛡️: In round one, cast NulAll with your White Wizard. This halves all incoming elemental spell damage and is absolutely essential for survival. ✅ Also cast Invisira and/or Protera.
- Buff Up 📈: Dedicate your Black Wizard and Ninja/Red Wizard to casting Haste ⚡ and stacking Temper 🔥 on your primary physical attacker (a Knight with the Masamune or Excalibur, or a Master).
- Unleash Hell 💥: Once your attacker is fully buffed, have them attack every round. Your White Wizard should be casting Healaga every single round, whether you think you need it or not. 💖 Your Black Wizard should cast Flare.
- The Cure Race 😬: Chaos may cast Curaja, completely resetting your progress. 😭 There is nothing you can do about this. 😫 If it happens, you must simply continue your assault and hope to defeat him before he can cast it again. This fight is a marathon, not a sprint. Maintain your defenses, keep your buffs active, and pour on the damage. Victory requires strategy, persistence, and a little bit of luck.
The Superboss Secret: Hunting Warmech 🤖
- Location: Flying Fortress (5F, on the long bridge leading to Tiamat’s room)
- Stats (Pixel Remaster): HP: 2000 | Weakness: None | Resists: All elements and status effects
- The Threat: Warmech is the game’s legendary secret boss. 🤫 It is a rare encounter on the final bridge of the Flying Fortress. Its signature attack is Nuke (the original name for Flare), a devastating party-wide attack that can wipe an unprepared party instantly. 💥 It also has powerful physical attacks.
- The Master Plan: Surviving Nuke is the entire battle. The strategy is almost purely defensive.
- Evasion is Everything 💨: The moment you enter the battle, have every character who can cast it use Invis or Invisira. The White Robe can be used to cast Invisira for free. Stack this buff repeatedly. 🔁 Warmech’s physical attacks have high accuracy, but enough evasion buffs can make them miss.
- Magic Defense 🛡️: Cast NulAll with your White Wizard to halve the damage from Nuke. This is non-negotiable. 🚫
- The Attack ⚔️: Once your defensive buffs are stacked high, begin the standard offensive routine: Haste ⚡ and Temper 🔥 on your strongest fighter. Because Warmech has high defense, this is the only way to deal significant damage.
- Be Prepared to Heal 🩹: Even with NulAll, Nuke will hit hard. Your White Wizard must be ready with Healaga 💖 after every blast. This is the ultimate endurance fight in the game, a battle of buffs and survival.
Chapter 6: The Gig Economy – Mastering Gil and Resources 🤑
In the world of Final Fantasy Pixel Remaster, Gil makes the world go ’round. 💰 From buying the essential Cure spell to outfitting your Knight in a full suit of ludicrously expensive armor, money is a constant concern. While the Pixel Remaster is more generous with its payouts than the original, and the optional Gil Boost can eliminate the need for grinding entirely, knowing where to efficiently farm for cash can make your journey significantly smoother.
The Boost Multiplier: To Farm or Not to Farm? 🤔
Before we dive into locations, let’s address the Chocobo in the room: the Gil multiplier. In the configuration menu, you can set Gil acquisition to 2x or 4x 🚀 the normal rate. Using this feature is a perfectly valid way to play the game. It allows you to bypass the repetitive grinding process and focus on the adventure. If you choose to use the 4x multiplier, you will likely never need to specifically stop and farm for Gil. 👍 The money you earn from simply progressing through dungeons will be more than enough to buy everything you need.
For those who prefer the traditional experience or are just a few thousand Gil short of that shiny new sword, this chapter will detail the most lucrative farming spots.
Early Game Hustle (Pre-Ship) 🏃♂️
- Around Elfheim 🧝: The forests and plains around Elfheim are your first real taste of profitable grinding. Encounters with groups of Ogres and Green Ogres provide a solid income 🪙 for this stage of the game. However, this area is also crawling with poisonous enemies like Tarantulas and Cobras. 🐍 Each poisoning will cost you an Antidote, eating into your profits. 📉 The key is to weigh the risk versus the reward.
- The Peninsula of Power 💪: South of Pravoka is a small, narrow peninsula. In the original NES version, this spot was famous 🤩 because the encounter table featured enemies from much later in the game, providing massive EXP and Gil. While the Pixel Remaster has rebalanced this, it can still be a decent spot to encounter slightly tougher, more profitable enemies like Trolls if you’re feeling brave.
Mid-Game Fortune (Post-Ship) ⛵
- The Open Seas 🌊: Once you have the ship, the ocean becomes your personal ATM. 🤑 Sailing the Aldi Sea will trigger encounters with Sahagins, Sharks, and Kyzoku (Pirates 🦜). The key advantages of sea farming are twofold: first, sea enemies often appear in large groups and offer excellent Gil returns, with Kyzoku being particularly lucrative. Second, there are no poisonous enemies at sea ✅, meaning you won’t be spending your earnings on Antidotes. The main downside is that sea creatures tend to have high evasion, so your physical attackers will miss more often. Spells like Thundara are highly effective here.
- Fixed Encounter Farming 🔁: After you get the Mystic Key, you can access locked rooms that often have chests guarded by fixed monster encounters (like Mummies and Wraiths in the Western Keep). In some versions of the game, these encounters can be respawned by walking over the trigger tile repeatedly, providing a very fast and predictable way to farm Gil 🤑 without having to walk around waiting for random battles.
Late-Game Riches (Post-Airship) 🚀
- Lufenia Outskirts 🗣️: The area around the remote town of Lufenia is home to powerful monsters like Zombie Dragons 🐲 and Giants that travel in large packs. A party with strong area-of-effect spells (like Firaga 🔥 or Diaga ✨) or spell-casting items (like the Mage’s Staff) can wipe out these groups quickly for substantial Gil and EXP gains. 💸
- The Final Dungeons 🏛️: By the time you reach the end of the game, the best place to earn Gil is simply by playing through the final dungeons. The Flying Fortress 🛰️ and the past version of the Chaos Shrine 🌀 are filled with the strongest non-boss enemies in the game, such as Purple Worms, Iron Golems, and Dragons. The Gil rewards from these encounters are enormous. 💰 Simply clearing these dungeons on your way to the final boss will likely provide you with more than enough money to buy any remaining Level 8 spells and make final preparations. A particularly good spot is the bridge on the 5th floor of the Flying Fortress 🌉, where you can grind for levels and Gil while hoping for a rare encounter with the superboss, Warmech.
Chapter 7: The Appendices of Light – Your Ultimate Resource 📊
Welcome to the library, adventurer! 📚 This is the raw data, the foundational knowledge upon which all strategy is built. Here you will find exhaustive lists of every piece of equipment and every spell in the game. Use these tables to plan your purchases, hunt for treasure, and craft the perfect loadout for your Warriors of Light. 🤓
Table 1: The Complete Armory ⚔️🛡️
This table contains every weapon and piece of armor available in Final Fantasy Pixel Remaster. Note that this version does not include items from the bonus dungeons found in later remakes.
- DEF: The Defense value of the armor.
- ATK: The Attack value of the weapon.
- ACC: The Accuracy bonus of the weapon.
- EVD%: The Evasion penalty incurred by the armor.
- Special: Any special properties, such as elemental damage, effectiveness against certain enemy types, or spells cast when used as an item.
- Equippable By: Lists the classes that can use the item. (Wa-Warrior, Mo-Monk, Th-Thief, WM-White Mage, BM-Black Mage, RM-Red Mage, Kn-Knight, Ma-Master, Ni-Ninja, WW-White Wizard, BW-Black Wizard, RW-Red Wizard).
Weapons
| Weapon | Type | ATK | ACC | Cost (Gil) | Location | Special | Equippable By |
| Knife | Dagger | 5 | 10 | 5 | Cornelia | Wa, Th, RM, BM, Kn, Ni, RW, BW | |
| Staff | Staff | 6 | 0 | 5 | Cornelia, Mt. Gulg, Terra Cavern | All Classes | |
| Broadsword | Sword | 7 | 10 | 175 | Pravoka, Elfheim, Marsh Cave | Wa, Th, RM, BM, Kn, Ni, RW, BW | |
| Hammer | Hammer | 9 | 0 | 10 | Cornelia, Pravoka | Wa, WM, Kn, Ni, WW | |
| Rapier | Sword | 9 | 5 | 10 | Cornelia | Wa, Th, RM, Kn, Ni, RW | |
| Scimitar | Sword | 10 | 10 | 200 | Pravoka | Wa, Th, RM, Kn, Ni, RW | |
| Mythril Knife | Dagger | 10 | 15 | 800 | Crescent Lake, Cornelia Castle, Marsh Cave | Wa, Th, RM, BM, Kn, Ni, RW, BW | |
| Nunchaku | Nunchaku | 12 | 0 | 10 | Cornelia | Mo, Ma, Ni | |
| Mage’s Staff | Staff | 12 | 10 | – | Sunken Shrine | Casts Fira | BM, Ni, BW |
| Power Staff | Staff | 12 | 0 | – | Western Keep | All Classes | |
| Mythril Hammer | Hammer | 12 | 5 | 2500 | Crescent Lake, Elven Castle | Wa, WM, Kn, Ni, WW | |
| Saber | Sword | 13 | 5 | 450 | Elfheim, Melmond, Cornelia | Strong vs. Mages | Wa, Th, RM, Kn, Ni, RW |
| Crosier | Staff | 14 | 0 | 200 | Elfheim, Melmond, Cornelia Castle | Wa, Mo, Kn, Ma, Ni | |
| Dagger | Dagger | 15 | 10 | 550 | Elfheim, Marsh Cave | Wa, RM, Kn, Ni, RW | |
| Falchion | Sword | 15 | 10 | 450 | Melmond, Western Keep | Wa, Th, RM, Kn, Ni, RW | |
| Spellbinder | Staff | 15 | 15 | – | Waterfall Cavern | Casts Confuse | BW |
| Iron Nunchaku | Nunchaku | 16 | 0 | 200 | Elfheim | Mo, Ma, Ni | |
| Battle Axe | Axe | 16 | 5 | 550 | Pravoka | Wa, Kn, Ni | |
| Rune Blade | Sword | 18 | 15 | – | Temple of Chaos | Wa, Th, RM, Kn, Ni, RW | |
| Werebane | Sword | 18 | 15 | – | Temple of Chaos | Strong vs. Were | Wa, RM, Kn, Ni, RW |
| Thor’s Hammer | Hammer | 18 | 15 | – | Tower of Mirage | Casts Thundara | Wa, WM, Kn, Ni, WW |
| Wyrmkiller | Sword | 19 | 15 | – | Mt. Duergar | Strong vs. Dragons | Wa, Th, RM, Kn, Ni, RW |
| Coral Sword | Sword | 19 | 15 | – | Terra Cavern | Strong vs. Water | Wa, Th, RM, Kn, Ni, RW |
| Claymore | Sword | 21 | 20 | – | Mt. Gulg | Strong vs. Giants | Wa, RM, Kn, Ni, RW |
| Great Axe | Axe | 22 | 5 | – | Titan’s Cave | Wa, Kn, Ni | |
| Venom Blade | Sword | 22 | 20 | – | Flying Fortress | Casts Poison | Kn, RW, Ni |
| Cat Claws | Dagger | 22 | 35 | 65000 | Gaia | Kn, Ni, RW, BW | |
| Mythril Sword | Sword | 23 | 15 | 4000 | Elfheim, Crescent Lake | Wa, RM, Kn, Ni, RW | |
| Vorpal Sword | Sword | 24 | 25 | – | Tower of Mirage | Kn, RW, Ni | |
| Mythril Axe | Axe | 25 | 10 | 4500 | Crescent Lake, Mt. Gulg | Wa, Kn, Ni | |
| Flame Sword | Sword | 26 | 20 | – | Ice Cavern | Strong vs. Undead, Ice | Wa, RM, Kn, Ni, RW |
| Light Axe | Axe | 28 | 15 | – | Sunken Shrine | Strong vs. Undead, Casts Diara | Wa, Kn, Ni |
| Ice Brand | Sword | 29 | 25 | – | Mt. Gulg, Citadel of Trials | Strong vs. Fire | Wa, RM, Kn, Ni, RW |
| Long Sword | Sword | 29 | 10 | 1500 | Melmond | Wa, RM, Kn, Ni, RW | |
| Defender | Sword | 30 | 35 | – | Waterfall Cavern | Casts Blink | Kn, Ni, RW |
| Sunblade | Sword | 32 | 30 | – | Tower of Mirage | Strong vs. Undead | Wa, RM, Kn, Ni, RW |
| Sasuke’s Katana | Katana | 33 | 35 | – | Flying Fortress, Temple of Chaos | Ni | |
| Excalibur | Sword | 45 | 35 | – | Mt. Duergar (Trade Adamantite) | Strong vs. All | Kn |
| Masamune | Katana | 56 | 50 | – | Temple of Chaos | All Classes |
Armor
| Armor | Type | DEF | EVD% | Cost (Gil) | Location | Resistance | Special | Equippable By |
| Cloth | Body | 1 | -2 | 10 | Cornelia | All Classes | ||
| Ribbon | Helm | 1 | -1 | – | Sunken Shrine, Waterfall, Flying Fortress | All Elements | All Status | All Classes |
| Cap | Helm | 1 | -1 | 80 | Cornelia | All Classes | ||
| Gloves | Gloves | 1 | -1 | 60 | Pravoka | All Classes | ||
| Buckler | Shield | 2 | 0 | 2500 | Crescent Lake | Wa, Th, RM, Kn, Ni, RW | ||
| Copper Gauntlet | Gloves | 2 | -3 | 200 | Elfheim | Wa, Kn, Ni | ||
| Wooden Shield | Shield | 2 | 0 | 15 | Pravoka | Wa, Kn, Ni | ||
| Wooden Helmet | Helm | 3 | -3 | 100 | Elfheim | Wa, Kn, Ni | ||
| Wooden Armor | Body | 4 | -8 | 50 | Cornelia | Wa, Th, Mo, RM, Kn, Ni, Ma, RW | ||
| Copper Armlet | Body | 4 | -1 | 1000 | Elfheim, Marsh Cave | All Classes | ||
| Iron Shield | Shield | 4 | 0 | 100 | Elfheim | Wa, Kn, Ni | ||
| Iron Gauntlet | Gloves | 4 | -5 | 750 | Melmond | Wa, Kn, Ni | ||
| Iron Helmet | Helm | 5 | -5 | 450 | Melmond | Wa, Kn, Ni | ||
| Silver Helmet | Helm | 6 | -3 | 2500 | Crescent Lake | Wa, Kn, Ni | ||
| Heal Helmet | Helm | 6 | -3 | – | Mirage Tower, Flying Fortress | Casts Heal | Kn, Ni | |
| Silver Gauntlet | Gloves | 6 | -3 | 2500 | Crescent Lake | Wa, Kn, Ni, RW | ||
| Zeus Gauntlet | Gloves | 6 | -3 | – | Citadel of Trials | Casts Thundara | Kn, Ni, RW | |
| Power Gauntlet | Gloves | 6 | -3 | – | Sunken Shrine | Casts Saber | Wa, Kn, Ni, RW | |
| Silver Shield | Shield | 8 | 0 | 2500 | Melmond | Wa, Kn, Ni | ||
| ProCape | Shield | 8 | -2 | – | Flying Fortress, Temple of Chaos | All Classes | ||
| ProRing | Gloves | 8 | -1 | 20000 | Gaia | Death | All Classes | |
| Opal Helmet | Helm | 8 | -3 | – | Sunken Shrine | Kn | ||
| Opal Gauntlet | Gloves | 8 | -3 | – | Sunken Shrine | Kn | ||
| Flame Shield | Shield | 12 | 0 | – | Mt. Gulg | Ice | Wa, Kn, Ni | |
| Ice Shield | Shield | 12 | 0 | – | Ice Cavern | Fire | Wa, Kn, Ni | |
| Chain Mail | Body | 15 | -15 | 80 | Cornelia, Pravoca | Wa, RM, Kn, Ni, RW | ||
| Silver Armlet | Body | 15 | -1 | 5000 | Melmond, Marsh Cave | All Classes | ||
| Opal Shield | Shield | 16 | 0 | – | Sunken Shrine | Lightning | Kn | |
| Aegis Shield | Shield | 16 | 0 | – | Mirage Tower | Poison | Kn | |
| Mythril Mail | Body | 18 | -8 | 7500 | Crescent Lake, Mt. Duergar | Wa, RM, Kn, Ni, RW | ||
| Iron Armor | Body | 24 | -23 | 800 | Pravoka, Elfheim, Marsh Cave, Cornelia Castle | Wa, Kn, Ni | ||
| Gold Armlet | Body | 24 | -1 | 50000 | Citadel of Trials | All Classes | ||
| White Robe | Body | 24 | -2 | – | Flying Fortress | Death, Fire | Casts Invisira | WW |
| Black Robe | Body | 24 | -2 | – | Flying Fortress | Time, Ice | Casts Blizzara | BW |
| Steel Plate | Body | 34 | -33 | 45000 | Melmond | Wa, Kn | ||
| Flame Mail | Body | 34 | -10 | – | Mt. Gulg | Ice | Wa, Kn, Ni | |
| Ice Armor | Body | 34 | -10 | – | Ice Cavern | Fire | Wa, Kn, Ni | |
| Opal Armlet | Body | 34 | -1 | – | Sunken Shrine | All Classes | ||
| Opal Armor | Body | 42 | -10 | – | Sunken Shrine | Lightning | Kn | |
| Dragon Mail | Body | 42 | -10 | – | Tower of Mirage | Fire, Ice, Lightning | Kn |
Table 2: The Grand Grimoire 📖✨
This table contains every White and Black magic spell. Each character can only learn three spells per level. Choose wisely.
- Level: The spell’s magic level (1-8).
- Effect: A description of what the spell does.
- Target: Who the spell affects.
- Cost (Gil): The price to purchase the spell scroll.
- Location: The town where the spell is sold.
- Learnable By: Lists the classes that can learn the spell.
- Strat. Value: A 1-5 star rating (⭐) of the spell’s overall strategic importance.
White Magic 🤍
| Spell | Lvl | Effect | Target | Cost (Gil) | Location | Learnable By | Strat. Value |
| Cure | 1 | Heals a small amount of HP. | Single Ally | 100 | Cornelia | WM, RM, Kn, WW, RW | ★★★★★ |
| Dia | 1 | Deals light damage to all undead foes. | All Foes | 100 | Cornelia | WM, WW, RM, RW, Kn | ★★★☆☆ |
| Protect | 1 | Slightly raises one ally’s Defense. | Single Ally | 100 | Cornelia | WM, RM, Kn, WW, RW | ★★☆☆☆ |
| Blink | 1 | Significantly raises caster’s Evasion. | Caster | 100 | Cornelia | WM, WW, RM, RW, Kn | ★★★☆☆ |
| Blinda | 2 | Cures Darkness status. | Single Ally | 400 | Pravoka | WM, RM, Kn, WW, RW | ★☆☆☆☆ |
| Invis | 2 | Raises one ally’s Evasion. | Single Ally | 400 | Pravoka | WM, RM, Kn, WW, RW | ★★★☆☆ |
| NulShock | 2 | Halves Thunder damage for the party. | All Allies | 400 | Pravoka | WM, RM, Kn, WW, RW | ★★☆☆☆ |
| Silence | 2 | Prevents one foe from casting spells. | Single Foe | 400 | Pravoka | WM, RM, Kn, WW, RW | ★★☆☆☆ |
| Cura | 3 | Heals a moderate amount of HP. | Single Ally | 1500 | Elfheim | WM, RM, Kn, WW, RW | ★★★★☆ |
| Diara | 3 | Deals moderate damage to all undead foes. | All Foes | 1500 | Elfheim | WM, WW | ★★★★☆ |
| Heal | 3 | Heals a small amount of HP for the party. | All Allies | 1500 | Elfheim | WM, WW | ★★★☆☆ |
| NulBlaze | 3 | Halves Fire damage for the party. | All Allies | 1500 | Elfheim | WM, RM, Kn, WW, RW | ★★★☆☆ |
| Poisona | 4 | Cures Poison status. | Single Ally | 4000 | Elfheim | WM, RM, WW, RW | ★★☆☆☆ |
| Fear | 4 | Causes all foes to flee. | All Foes | 4000 | Elfheim | WM, WW | ★☆☆☆☆ |
| NulFrost | 4 | Halves Ice damage for the party. | All Allies | 4000 | Elfheim | WM, RM, WW, RW, Kn | ★★★☆☆ |
| Vox | 4 | Cures Silence status. | Single Ally | 4000 | Elfheim | WM, RM, WW, RW | ★☆☆☆☆ |
| Curaga | 5 | Heals a large amount of HP. | Single Ally | 8000 | Melmond | WM, RM, WW, RW | ★★★★★ |
| Healara | 5 | Heals a moderate amount of HP for the party. | All Allies | 8000 | Melmond | WM, WW | ★★★★☆ |
| Diaga | 5 | Deals heavy damage to all undead foes. | All Foes | 8000 | Melmond | WM, WW | ★★★★☆ |
| Life | 5 | Resurrects a fallen ally with 1 HP. | Single Ally | 8000 | Melmond | WM, WW, RW | ★★★★★ |
| Stona | 6 | Cures Stone status. | Single Ally | 20000 | Crescent Lake | WM, WW | ★★☆☆☆ |
| Invisira | 6 | Raises Evasion for the entire party. | All Allies | 20000 | Crescent Lake | WM, WW, RW | ★★★★★ |
| Protera | 6 | Raises Defense for the entire party. | All Allies | 20000 | Crescent Lake | WM, WW, RW | ★★★★☆ |
| Exit | 6 | Warps the party out of a dungeon. | All Allies | 20000 | Crescent Lake | WW, RW | ★★★☆☆ |
| Curaja | 7 | Fully restores one ally’s HP. | Single Ally | 45000 | Gaia | WW | ★★★★☆ |
| Diaja | 7 | Deals massive damage to all undead foes. | All Foes | 45000 | Gaia | WW | ★★★★☆ |
| NulDeath | 7 | Protects the party from instant death. | All Allies | 45000 | Onrac | WM, WW, RW | ★★☆☆☆ |
| Healaga | 7 | Heals a large amount of HP for the party. | All Allies | 45000 | Onrac | WW | ★★★★★ |
| Holy | 8 | Deals massive holy damage to all foes. | All Foes | 60000 | Gaia | WW | ★★★★☆ |
| NulAll | 8 | Halves all elemental damage for the party. | All Allies | 60000 | Gaia | WW | ★★★★★ |
| Dispel | 8 | Removes buffs from one foe. | Single Foe | 60000 | Gaia | WW | ★★☆☆☆ |
| Full-Life | 8 | Resurrects a fallen ally with full HP. | Single Ally | 60000 | Lufenia | WW | ★★★★★ |
Black Magic 🖤
| Spell | Lvl | Effect | Target | Cost (Gil) | Location | Learnable By | Strat. Value |
| Fire | 1 | Deals light Fire damage. | Single Foe | 100 | Cornelia | BM, RM, Ni, BW, RW | ★★★☆☆ |
| Sleep | 1 | Puts all foes to sleep. | All Foes | 100 | Cornelia | BM, RM, Ni, BW, RW | ★★★☆☆ |
| Focus | 1 | Lowers one foe’s Evasion. | Single Foe | 100 | Cornelia | BM, RM, Ni, BW, RW | ★☆☆☆☆ |
| Thunder | 1 | Deals light Thunder damage. | Single Foe | 100 | Cornelia | BM, RM, Ni, BW, RW | ★★★☆☆ |
| Blizzard | 2 | Deals light Ice damage. | Single Foe | 400 | Pravoka | BM, RM, Ni, BW, RW | ★★★☆☆ |
| Dark | 2 | Inflicts Darkness on all foes. | All Foes | 400 | Pravoka | BM, RM, Ni, BW, RW | ★★☆☆☆ |
| Temper | 2 | Raises one ally’s Attack. Stacks. | Single Ally | 400 | Pravoka | BM, RM, Ni, BW, RW | ★★★★★ |
| Slow | 2 | Reduces the number of hits for all foes. | All Foes | 400 | Pravoka | BM, RM, Ni, BW, RW | ★★★☆☆ |
| Fira | 3 | Deals moderate Fire damage to all foes. | All Foes | 1500 | Elfheim | BM, RM, Ni, BW, RW | ★★★★☆ |
| Hold | 3 | Paralyzes one foe. | Single Foe | 1500 | Elfheim | BM, RM, Ni, BW, RW | ★★☆☆☆ |
| Thundara | 3 | Deals moderate Thunder damage to all foes. | All Foes | 1500 | Elfheim | BM, RM, Ni, BW, RW | ★★★★☆ |
| Focara | 3 | Lowers Evasion for all foes. | All Foes | 1500 | Elfheim | BM, RM, Ni, BW, RW | ★★☆☆☆ |
| Sleepara | 4 | Puts one foe to sleep. | Single Foe | 4000 | Elfheim | BM, RM, Ni, BW, RW | ★★☆☆☆ |
| Haste | 4 | Doubles the number of hits for one ally. | Single Ally | 4000 | Elfheim | BM, RM, Ni, BW, RW | ★★★★★ |
| Confuse | 4 | Causes foes to attack each other. | All Foes | 4000 | Elfheim | BM, RM, Ni, BW, RW | ★★☆☆☆ |
| Blizzara | 4 | Deals moderate Ice damage to all foes. | All Foes | 4000 | Elfheim | BM, RM, Ni, BW, RW | ★★★★☆ |
| Firaga | 5 | Deals heavy Fire damage to all foes. | All Foes | 8000 | Melmond | BM, RM, BW, RW | ★★★★★ |
| Scourge | 5 | Attempts to instantly kill all foes. | All Foes | 8000 | Melmond | BM, BW, RW | ★★★☆☆ |
| Teleport | 5 | Warps the party to the previous dungeon floor. | All Allies | 8000 | Melmond | BW, RW | ★★☆☆☆ |
| Slowga | 5 | Greatly reduces the number of hits for one foe. | Single Foe | 8000 | Melmond | BM, RM, BW, RW | ★★☆☆☆ |
| Thundaga | 6 | Deals heavy Thunder damage to all foes. | All Foes | 20000 | Crescent Lake | BM, BW, RW | ★★★★★ |
| Death | 6 | Attempts to instantly kill one foe. | Single Foe | 20000 | Crescent Lake | BM, BW | ★★★☆☆ |
| Quake | 6 | Attempts to instantly kill all earth-based foes. | All Foes | 20000 | Crescent Lake | BM, BW | ★★☆☆☆ |
| Stun | 6 | Paralyzes one foe. | Single Foe | 20000 | Crescent Lake | BM, BW | ★★☆☆☆ |
| Blizzaga | 7 | Deals heavy Ice damage to all foes. | All Foes | 45000 | Gaia | BM, BW, RW | ★★★★★ |
| Break | 7 | Attempts to turn one foe to stone. | Single Foe | 45000 | Gaia | BW | ★★★☆☆ |
| Saber | 7 | Raises caster’s own Attack and Accuracy. | Caster | 45000 | Onrac | BW | ★★★★☆ |
| Blind | 7 | Inflicts Darkness on one foe. | Single Foe | 45000 | Onrac | BM, BW | ★☆☆☆☆ |
| Stop | 8 | Paralyzes all foes. | All Foes | 60000 | Gaia | BW | ★★★★☆ |
| Banish | 8 | Attempts to send all foes to another dimension. | All Foes | 60000 | Gaia | BW | ★★★☆☆ |
| Kill | 8 | Attempts to instantly kill one foe with high success. | Single Foe | 60000 | Gaia | BW | ★★★☆☆ |
| Flare | 8 | Deals massive non-elemental damage to all foes. | All Foes | 60000 | Lufenia | BW | ★★★★★ |
Conclusion 🎊
The journey of the Warriors of Light is a foundational text 📜 in the grand library of role-playing games. It is a tale of archetypes, of fundamental struggles between light 💡 and dark 🌑, and of the simple, satisfying loop of growing stronger to overcome ever-greater challenges. The Final Fantasy Pixel Remaster presents this classic tale in its most polished and accessible form ✨, sanding off the rough edges of its 8-bit origins while preserving the core of its challenging and rewarding design.
Success in this world is not merely a matter of leveling up. 📈 It is a matter of understanding systems. 🧠 It requires a thoughtful approach to party construction, a shrewd management of finite magical resources 🔋, and a mastery of the subtle yet powerful art of buffing and debuffing. The player who understands that Haste ⚡ is more valuable than Firaga, that party order is as important as armor class, and that a free spell cast from a staff 🎁 is worth more than a charge from their spellbook, is the player who will triumph. 🏆 This guide has laid bare these systems, transforming opaque mechanics into clear, actionable strategies. The path is now clear. The fiends await.
Go forth and bring back the light! ☀️💖
Disclaimer: This is an unofficial fan work, all trademarks and copyrights for Final Fantasy Pixel Remaster belong to the developer Square Enix
& publisher Square Enix.
Find the game here! FINAL FANTASY PIXEL REMASTER
