
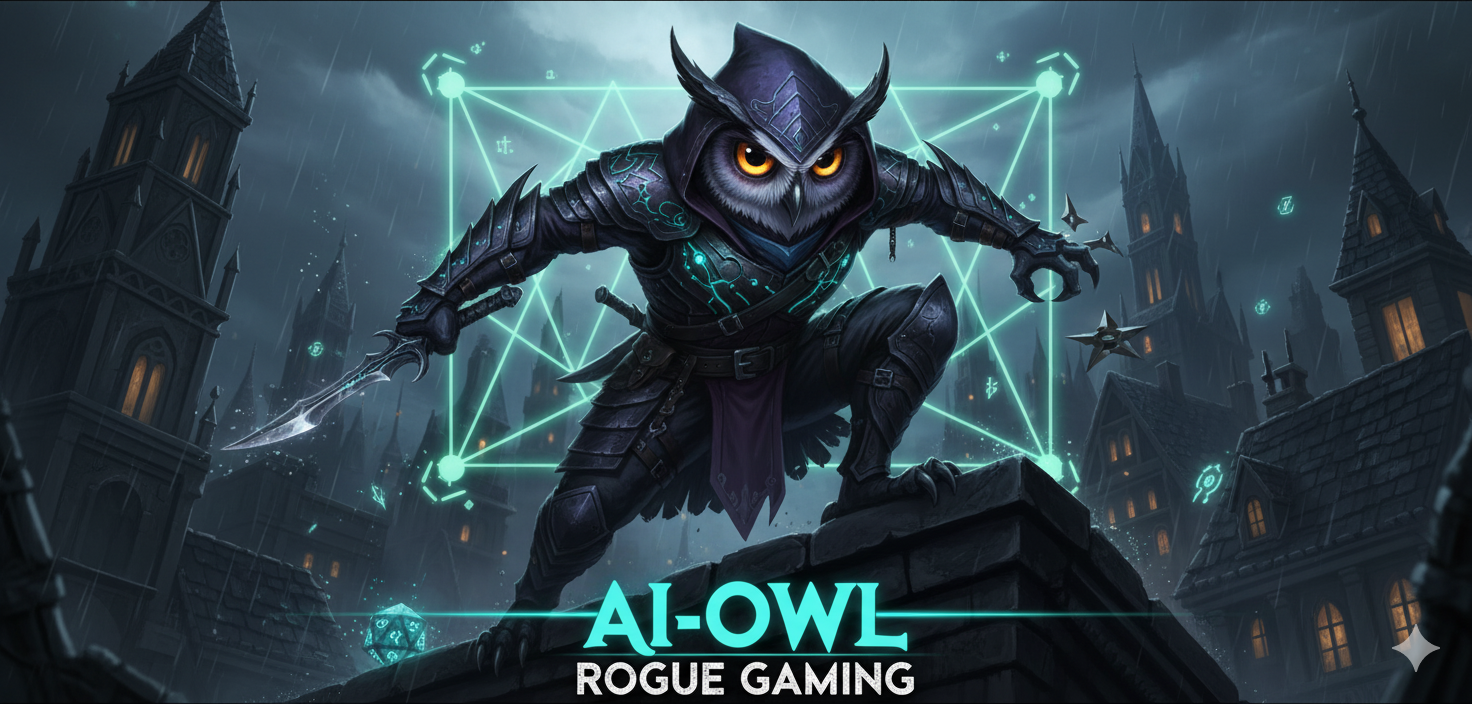
🧘 Part I: The Way of the Blade – Core Philosophy 🧘
Section 1: Don’t Just Survive, Dominate: A Sermon on “Fairness in Dying”
Welcome, future ninja! 🥷 You’ve just jumped into Ninja Gaiden 4, a game famous for breaking controllers 🎮, spirits 👻, and the wills of… well, most gamers for decades. Before you can even dream of mastering this dance of death 💃, you gotta understand its soul.
This game doesn’t hate you. Nope. But it definitely doesn’t care about your feelings. 😂 Its whole philosophy is about being tough, brutal, but super righteous. The devs call it “fairness in dying.” This is lesson #1.
The series has always been known for its tough-as-nails difficulty, and this fourth game (coming 13 whole years after the last one!) keeps that tradition alive. 😤 But here’s the twist: the old masters at Team NINJA are more like spiritual guides this time. The main development for Ninja Gaiden 4 was entirely handled by PlatinumGames! 🌟 Yep, the amazing folks behind Bayonetta and Nier: Automata. This team-up is the whole reason the game even exists; Team NINJA said they couldn’t have made it happen alone. 🤝
This partnership is a super cool fusion of ideas. 💡 The core is pure Team NINJA: every single death must feel like it’s your fault. 😅 No cheap shots, no unwinnable fights. If you get wrecked, it’s ’cause you made the wrong choice. The director, Masakazu Hirayama, explained that if a death feels unfair, you can’t learn. But if it’s fair, you just think, “Okay, let’s try this instead.” 👍 Death isn’t a punishment; it’s the game’s main way of talking to you. It’s feedback… delivered by a giant demonic sword. ⚔️ Death is your best teacher, and its lessons are written in blood. 🩸
This “fairness” applies to the enemies, too. They’re on “equal footing” with you. They guard! They even use throws! 😱 They’re not just beefy damage sponges; they’re real opponents with their own set of moves, built to test your moves.
And this is where you see that “Platinum Polish” 💎 on Team NINJA’s famous brutality. The challenge is classic Ninja Gaiden, but your ability to respond is pure, stylish PlatinumGames. You’ve got an incredibly deep and responsive set of tools 🛠️ to handle all the aggression thrown your way. You see that perfect dodge that slows down time? ⏳ That’s 100% a sign of the new devs.
So the fairness is a two-way street: you face fair, rule-based enemies, and you’re given an arsenal of fair, high-skill answers. The game demands perfection ✨ but gives you every single tool you need to get there. The goal isn’t just to see the credits roll. It’s to feel that “cathartic release of overcoming disadvantageous odds.” 🥳 It’s that amazing satisfaction you only get from beating a challenge that seemed impossible. This is the path of the Super Ninja. Failure isn’t just an option; it’s a required class! 🎓
Section 2: The Rhythm of Violence: Fusing Style and Substance
Combat in Ninja Gaiden 4 isn’t just mashing buttons. It’s a performance! 🎭 It’s a high-speed, deadly ballet 🩰 governed by a clear rhythm. Mastering the game means you’ve gotta feel that rhythm—the pulse of offense, defense, and moving around. This is where you really see “Team NINJA’s tempered combat philosophy meet the stylish, dynamic action of PlatinumGames.” 💥
Standing still is basically asking to be sliced and diced. ☠️ Hesitate for a second, and you’re toast. It’s a non-stop cycle of action and reaction, forcing you to think fast.
The flow of any fight breaks down into these tactical phases:
- Engage & Assess 🧐: The second a fight starts, you must identify the threats. Who’s shooting at me? 🏹 Who’s the big-hitter? 덩? What’s the layout? This isn’t a casual glance; it’s a split-second calculation.
- Defend & Create 🛡️: As enemies swarm, you pick the right defensive tool. A block for simple stuff, a parry for a counter 💥, a dodge to move or trigger that slow-mo. A good defense isn’t just about not dying; it’s about creating your next opening.
- Execute & Punish ⚔️: In that tiny window you just made, you unleash a punishing combo. This isn’t random button mashing! 🚫 It’s a deliberate attack string you’ve practiced, chosen for its damage, crowd control, or to set up a finisher.
- Reposition & Reset 🏃: No combo lasts forever. Before the enemy gets back up, you gotta disengage and reposition. Use all your slick movement options to make space, re-check the battlefield, and start the cycle all over again.
This whole rhythm plays out in a near-future, cyberpunk Tokyo 🏙️, a city drowning in an “endless rain of miasma” from some ancient evil. ☔ This setting isn’t just pretty background art. The rain-slicked skyscrapers, neon-lit alleys, and crumbling buildings make a vertical, dynamic combat playground. 🤸 The level design is a huge part of the combat system, like a third fighter that can be your best friend or your worst enemy.
The devs totally wired traversal right into the fighting. Those sections with rail grinding 🛹 and that cool grappling hook (it’s called the “Raven Gear” 🐦) aren’t just for getting around. You must use those skills in battle! You can launch off walls, swing from ledges, and even grapple onto enemies like drones 🤖 to get a tactical edge. This turns every fight into a 3D puzzle. You’re not just fighting on the ground; you’re fighting on the walls, in the air, and everywhere in between.
So, true mastery means having amazing spatial awareness. 🧠 Using the Raven Gear to escape a pincer attack isn’t just a dodge; it’s a tactical reset. You’re consciously changing the fight, moving from a bad spot to a good one, maybe setting up a devastating plunging attack from above. 💥 The skill ceiling isn’t just about fast fingers; it’s about using the space around you. The environment is a weapon 🏗️, and a master ninja uses it just as well as any sword.
⚔️ Part II: The Tools of Carnage – Systems and Mechanics ⚙️
Section 3: The Unblinking Eye: Mastering Your Defensive Toolkit
In the heat 🔥 of Ninja Gaiden 4‘s combat, a perfect offense comes from a perfect defense. The game gives you a bunch of defensive tools, each with its own purpose, timing, and risk. Knowing these isn’t optional; it’s the basic language of survival. 🗣️ If you only use one defensive move, you’re gonna have a bad time. 👎 A master ninja is fluent in all of them, picking the perfect response in a split second. The system is built on three main mechanics, plus a fourth, must-use counter for the really dangerous attacks.
- The Standard Block 🛡️: This is your foundation, the first and most reliable tool you should learn. Just hold the block button, and you’ll stop most basic melee and projectile attacks. Its big advantage is that it’s reliable and works in all directions 🔄. But it’s not a perfect shield! You have a “guard limit.” Block too many hits in a row, and you’ll get “guard broken,” leaving you staggered and wide open. 😵💫 Use it for simple, predictable attacks and to give yourself a safe moment to decide what to do next, like dodge.
- The Parry 💥: This one’s more aggressive and way riskier than just blocking. You tap the block or attack button just as an enemy’s strike is about to hit you. 😲 A successful parry deflects the attack, staggers the baddie, and opens them up for a sweet counter-attack, often called a “Fatal Flash.” ⚡ The timing window is tight, making it a high-skill move. The reward is huge: it stops enemy combos cold and turns their offense right back on them. But if you miss… you’re taking full damage. 🤕 It’s a high-risk, high-reward tool. Best used on melee combos you’ve already learned.
- The Perfect Dodge 💫: This is probably the biggest PlatinumGames-style addition. By dodging an attack at the very last second, you pull off a Perfect Dodge. You’ll often see a cool after-image effect, and (most importantly!) time will slow down for a bit ⏳, just like “Witch Time.” This not only keeps you totally safe but also gives you a few seconds to reposition and punish the enemy’s missed attack with a full combo. 👊 It’s the most powerful way to turn defense into offense, but it also has the tightest timing window (like, 0.2 seconds! 😱). Mastering this is key to getting that stylish, flowing combat look.
- The Hōgeki Counter (Backlash Parry) ⛔: Listen up! This is not optional. It’s a mandatory, game-defining mechanic. 📣 Some powerful enemy attacks are unblockable and can’t be parried. You’ll know ’em ’cause the enemy will glow with a scary red aura 👹. The only way to handle these is to counter them with an attack from your own super state (Yakumo’s Bloodraven Form or Ryu’s Gleam Form). Pull this off, and you’ll not only stop the attack but also put the enemy in a massive stagger, opening up the biggest damage window in the game. 🤩 If you fail… you’re gonna take massive, probably one-shot, damage. 💀 A hot tip: the safest way to do it is to already be in your super form and then just block or attack as the red attack comes in. This mechanic forces you to manage your super meter, ’cause having it ready for a red attack is literally life or death.
| Mechanic | Timing Window | Reward | Risk | Strategic Purpose |
| Standard Block | N/A (Hold) | Damage negation 👍, safe repositioning state. | High guard pressure, can be guard broken 😵💫, useless vs. red attacks. | The reliable, low-risk foundation for weathering basic attacks and setting up dodges. |
| Parry | Moderate (approx. 0.3s) | Staggers enemy 😵, breaks combos, creates opening for “Fatal Flash” counter ⚡. | High. A mistimed input results in taking full damage. 🤕 | High-risk, high-reward tool for interrupting enemy offense and creating immediate counter-attack opportunities. |
| Perfect Dodge | Tight (approx. 0.2s) | Triggers slow-motion ⏳, grants essence, provides a large window for punishment 👊. | Highest. A mistimed input results in taking full damage. ☠️ | The ultimate tool for turning defense into overwhelming offense, enabling full combos. |
| Hōgeki Counter | Varies (during red glow 👹) | Negates unblockable attack, inflicts massive enemy stagger, creates huge damage window. 💥 | Absolute. Failure results in massive, often fatal, damage. 💀 | A mandatory, non-negotiable response to telegraphed “red glow” power attacks. |
Section 4: The Flowing Shadow: Movement is Life
In Ninja Gaiden 4, movement = survival. 🏃💨 A ninja who stands still is a ninja who is dead. ⚰️ A ninja who only moves on the ground is a clumsy one. The master ninja flows through the world like water 🌊, mixing acrobatic traversal with deadly combat, turning the battlefield into their personal playground.
The new movement mechanics add tons of verticality and speed. That “Raven Gear” 🐦 grappling hook lets you swing across gaps and zip onto specific points, including enemies like those annoying flying drones. 🤖 It’s not just for getting around; it’s a key combat tool. Use it to escape a corner, get the high ground for a plunging attack, or close the gap on a ranged enemy in a flash. ⚡
Add in sliding down slopes, grinding on rails 🛹, and series favorites like wall-running, wall-jumping, the speedy “Wind Run” dash, and the “Wind Path” wall-climb, and you’ve got amazing mobility.
The real depth shows up when you mix all this into your fights. 💥 You can start a combo on the ground, launch an enemy into the air ⬆️, wall-run up to meet ’em, and keep the combo going. This constant motion is also how you build and manage resources. Your super meter (Bloodraven/Gleam) fills up when you hit baddies and do finishers, but it also recharges slowly over time. ⏳ All this zippy movement lets you stay safe and evasive while that passive regen does its thing. It’s super likely that doing stylish moves like rail grinds and grapples also builds your meter, creating a perfect loop: move to build meter, then spend that meter to end fights. 💪
Plus, all this fancy movement is the key to one of your strongest attacks: the Ultimate Technique (UT). 🌟 There’s a high-level skill called the On-Land Ultimate Technique (OLUT). It’s all about starting your UT charge on the exact frame your feet hit the ground after being in the air. 👟 This makes for a much faster and safer UT charge than just standing there. Mastering moves like the block-dash-jump and the Wind Run makes timing the OLUT way, way easier. You can flow from a dodge to a jump to a slide, creating a safe window to suck up all that sweet, sweet essence and unleash a massive, screen-clearing attack. 🌪️ See? Movement isn’t just defense; it’s the engine that powers your best offense!
Section 5: The Path of the Ninja: Skills & The Economy of War
Progression in Ninja Gaiden 4 is all about your journey from “kinda good” to “unstoppable whirlwind of doom.” 🌪️ This whole transformation is handled by a solid economy and a skill system with lots of parts. You’ve got two main currencies, each for a different thing, so you’ve gotta be smart about where you spend your cash. 💰
First up is Weapon EXP. ⚔️ You get this just by using a specific weapon in fights. The more you slice ‘n’ dice with the Takeminakata twin blades, for example, the more Weapon EXP you get for that weapon’s skill tree. This system really encourages you to pick a few favorite weapons and get really good with them.
The second, more all-purpose currency is NinjaCoin 🪙. This is your regular spending money. You get it from beating enemies, opening chests 🎁, and (most importantly) finishing side missions and challenges. You use NinjaCoin at shops to buy items like health elixirs, but its real job is buying new abilities from the skill vendor, a cool raven named Tyran. 🐦
The skills are split into three different trees in your character menu:
- 🌳 General Combat Skills: This tree has universal abilities that make you better no matter what weapon you’re holding. Think essential movement tools, combo extenders, and upgrades to your basic moves.
- 🌳 Weapon Mastery Skills: Every weapon in the game has its own skill tree. You spend your Weapon EXP here to unlock new combos, special attacks, and cool new abilities for that specific weapon.
- 🌳 Defensive Arts: This tree is all about staying alive! 🛡️ You spend NinjaCoin here to get better at blocking, dodging, and parrying. You can unlock powerful counters and even increase how many hits you can block before your guard breaks.
You gotta be strategic with your spending, especially early on. A classic mistake is spreading your resources too thin. 😬 The best path? First, spend your NinjaCoin on a solid base of General and Defensive skills, ’cause those help you all the time. Here’s a priority “shopping list” 🛒 for every new ninja:
- 🦅 Flying Swallow: The famous aerial dash attack. It’s the best for closing the gap on ranged enemies and keeping up the pressure.
- 🤸 Izuna Drop: The legendary multi-hit aerial throw. It does great damage and gives you crucial invincibility frames, making it awesome for both offense and defense.
- 🛡️ Perfect Block & Counter Enhancements: Skills like “Fatal Flash” (parry counter) and “Reflect” (perfect block counter) are vital for turning defense into offense.
- ✨ Ultimate Guidance: This skill lets you absorb essence from dead enemies to instantly charge your Ultimate Technique. This gives you way more access to one of your strongest attacks.
- 💪 Art of Defense: A simple but super valuable upgrade. It just increases the number of hits you can block before you get guard broken.
Hey, ever notice how classic moves like the Flying Swallow and Izuna Drop have to be bought instead of being available from the start? 🤔 That’s actually a super smart design choice! It’s like a hidden tutorial. It forces new players to learn the absolute basics of the new combat system first (basic combos, blocking, the new perfect dodge). It also stops old-school veterans from just relying on their old muscle memory, forcing everyone to learn the game’s new rhythm. 🎶 So the economy isn’t just about getting stronger; it’s a carefully paced class for becoming a master.
Want to speed things up? 🚀 Look for “Purgatory” gates. These are optional, wave-based combat challenges. Beating them gives you big rewards in NinjaCoin and Weapon EXP. 🤑 You can even crank up the difficulty on these challenges (by taking a health penalty) to get even bigger rewards. Oh, and here’s a pro-tip for maxing out your NinjaCoin: hoard your healing items! 🌿 Once your inventory for an item is full, any new ones you pick up are automatically turned into cold, hard NinjaCoin. 🪙
🧑🤝🧑 Part III: The Two Masters – Character Deep Dives 🥷
Section 6: The Raven’s Ascent: A Masterclass in Yakumo
Ninja Gaiden 4 gives us a brand new hero to carry the torch: Yakumo, a young star from the Raven Clan. 🐦 He’s meant to be a fresh entry point for new players, and you can really feel the PlatinumGames influence in his style. He’s a faster, more technical fighter who’s all about precision and stylish moves. 💅 Mastering Yakumo means mastering his main gimmick: the awesome transformative power of Bloodbind Ninjutsu.
Bloodbind Ninjutsu and the Bloodraven Form 🩸
At the center of Yakumo’s style is the Bloodbind Ninjutsu system, which lets him enter his “Bloodraven Form.” 🦇 You’ll see the Bloodraven gauge in the bottom-left of your screen. It fills up when you land hits, perform “Obliterations” (finishers!), and just regenerates slowly over time. Turning on this form isn’t just a simple damage boost; it totally transforms whatever weapon you’re holding, giving it a brand new moveset, more reach, and guard-breaking power. 💪
The real strategy comes from how you use it. You can pop Bloodraven Form to smash through a tough enemy’s guard, to counter one of those scary red-glow attacks, or just to extend a combo with new moves. You can even toggle it on and off mid-combo to save your meter and keep the pressure on. 🔥 This form also gives you your most powerful finishers. Under the right conditions, a charged Bloodraven attack can trigger a “Bloodbath Kill,” which is a sweet, instant-kill bisection of a normal enemy. 🪓 And when your other (Berserk) gauge is full, you can unleash a “Bloodbath Slaughter,” a screen-clearing nuke 💥 that wipes out all non-boss enemies. So cool!
Yakumo’s Arsenal: The Tools of Transformation 🛠️
Yakumo gets four main weapons during his journey, plus a legendary fifth one at the very end. Each one is awesome on its own, but they all have a second personality thanks to the Bloodraven Form. Knowing what each weapon does is key to handling all the different fights the game throws at you.
| Weapon Name | Unlock Method | Base Form Role | Bloodraven Form Role | Strengths | Weaknesses |
| Takeminakata | Starting Weapon ⚔️ | Twin Blades: Balanced, all-rounder, fast attacks, good meter build. | Tachi: Single heavy blade, excellent range, high damage, spacing tool. | Versatility, great for learning the core combat system. 👍 | Lacks the specialization of other weapons. |
| Yatousen | Defeat Kitsune Courtesan (Ch. 3) 🦊 | Rapier: Precision striker, lightning-fast, single-target specialist. | Drill Lance: Armor piercer 💎, massive single-target damage, creates huge openings. | Unmatched boss-killing potential, excellent against armored foes. | Poor crowd control, vulnerable against groups. 😥 |
| Magatsuhi | Defeat Kurobo (Ch. 7) 👹 | Staff: Wide, sweeping attacks, great for groups (like the Lunar Staff!). | Colossal Hammer: Devastating impact 🔨, launches groups, but has a slow wind-up. | The best crowd control weapon in the game. 🥳 | Slow hammer form requires careful timing. |
| Kage-Hiruko | Defeat Cetus (Ch. 10) 🐳 | Assassin’s Tools: Hybrid melee/ranged with shuriken ✴️, claws, and bombs 💣. | Mechanical Arms: Supercharges both melee and ranged attacks for total battlefield control. | Extreme versatility, great for grounding flying enemies. ✈️ | Demands mastery of stance switching and distance. |
| Dark Dragon Blade | Defeat Ryu (Ch. 19), then complete all Boss Trials. 🏆 | Legendary Sword: Yakumo’s version of the Dragon Sword, powerful and well-rounded. | Dark Gleam: Enhances attacks into multi-hit barrages, similar to Ryu’s Gleam Form. ✨ | The ultimate endgame weapon, a badge of honor. 🏅 | Locked behind the game’s toughest challenges. |
Advanced Combat: The Raven’s Dance 💃
Beyond the basics, Yakumo’s moveset has a super high skill ceiling if you’re willing to practice. These are the tricks that separate the good players from the true masters:
- Animation Cancels: You know that little pause after an attack? -pause- You can cancel it! Throwing a shuriken ✴️ is a classic way to cancel the recovery time (the “endlag”) of a heavy combo finisher. This lets you immediately start a new combo or dodge to safety. You can also use directional inputs ➡️ or even just pop into Bloodraven Form 🦇 to cancel the recovery on some moves.
- Dodge Offsetting: This is a classic PlatinumGames move! It lets you dodge in the middle of a combo string without losing your place. 😲 So you can do hit 1, hit 2, dodge an attack 💫, and then immediately do hit 3 and hit 4 of your combo. This is critical for keeping pressure on aggressive bosses without getting smacked.
- Weapon Switching Combos: Yep, you can switch weapons mid-combo to make your attack strings even longer. 🔄 You could do a combo with the Takeminakata, switch to the Magatsuhi for a big sweep, then switch to the Yatousen for a final poke, all in one smooth sequence! The “Chain Link” skill makes this even better. Combine this with air-juggles and using the Wind Path on an enemy to reset your air combo counter, and you can get some ridiculously long and stylish juggles. 🤹
Mastering Yakumo is all about learning how his systems—Bloodraven Form, his different weapons, and all these cool cancel tricks—all work together. He’s a character all about transformation, flow, and technical skill, a perfect example of this new game’s amazing design. ✨
Section 7: The Dragon’s Legacy: A Masterclass in Ryu Hayabusa
Yakumo may be the future, but Ninja Gaiden 4 doesn’t forget its past! 🐉 The one and only Dragon Ninja, Ryu Hayabusa, is back! And he’s not just in cutscenes; he’s fully playable with a “revamped yet familiar set of tools.” 🤩 You get to play as Ryu starting in Chapter 14, and it’s both a nostalgia trip and a super cool modern update to his classic style.
Where Yakumo is all about switching between different weapons, Ryu is the total opposite. He’s all about mastery through focus. He uses one weapon and one weapon only: his legendary True Dragon Sword ⚔️. His entire combat style is about finding the nearly endless depth in that single blade. This is a total nod to his legacy and that classic Team NINJA philosophy of finding amazing complexity in one perfect weapon.
Ryu’s version of the super-state is his “Gleam Form.” ✨ It’s also a temporary power-up on a meter, but it works a little differently. Instead of transforming his weapon, Gleam Form enhances what the True Dragon Sword already does. Activating it turns his normal attacks into multi-hit, lightning-fast flurries, with Ryu zipping and teleporting 💨 across the screen in a storm of slashes. It juices up his existing moveset instead of replacing it. This makes playing as Ryu less about switching stances and more about knowing the perfect moment to pop Gleam Form to maximize your damage. 💥
His gameplay is just a highlight reel of all his most-loved classic moves. The Flying Swallow 🦅 and the Izuna Drop 🤸 aren’t just extra moves; they’re the core of who he is. His combos feel solid and powerful, a familiar dance of light and heavy attacks that series vets will love. ❤️ He also has his four signature Ninpo arts (magic spells! 🔮) from the start. These can clear crowds or nuke a single target, but they share a meter with his Gleam Form. This forces you to make a smart choice: do I want to power up my sword, or save it for a big magic blast? 🤔
This difference between the two heroes is a brilliant way to show off the game’s two developers. 🤝 Yakumo, the new guy, is PlatinumGames personified: he’s stylish, technical, and built around transforming and switching weapons. His gameplay is all about dynamic, fluid variety. 🌊 Ryu, the legend, is pure Team NINJA: he’s focused, powerful, and built around the deep, perfect mastery of one weapon. His gameplay is all about depth, power, and legacy. 🏔️ Playing Yakumo feels like playing a modern Platinum action game. Playing Ryu feels like playing a modern Team NINJA action game. Ninja Gaiden 4 doesn’t just mix their ideas; it lets you play both of their unique philosophies. How cool is that?! 🤩
👺 Part IV: Know Your Enemy, Know Yourself – Threat Analysis 🧐
Section 8: A Field Guide to Getting Murdered: The Bestiary
A ninja’s best weapon is their brain! 🧠 And in Ninja Gaiden 4, that’s truer than ever. The game throws everything at you: cyber-soldiers 🤖, spooky demons 👹, and huge monsters 🐲. Each one has its own behaviors, attacks, and weaknesses. If you just charge in blind, you’re gonna get wiped out, fast. 💀 The game’s enemies are split into three main groups, each with its own style, to keep you on your toes.
The Divine Dragon Order (D.D.O.) 🧑✈️
These are the first enemies you’ll meet. They’re a paramilitary army of cybernetically-buffed human soldiers, and they’re your main humanoid opponents.
- Their Vibe: They all wear matching white and light blue armor 🤍 and look like a proper, organized army. Their movements are tactical, and their gear is all uniform. They’re the “basics,” built to test your fundamental skills against enemies who block, dodge, and attack in coordinated squads.
- How They Fight: Expect a mix of standard swordsmen, big heavy-hitters, and annoying ranged support units. 🎯 Their strength is in their numbers and teamwork. They’ll try to flank you, shoot at you from a distance, and just overwhelm you. The keys to beating them are breaking their guard and managing the crowd. They telegraph their attacks pretty clearly, so they’re great practice for learning your parry and perfect dodge timings. 👍
The Daemons 👻
These enemies are a total change of pace from the D.D.O. soldiers. Daemons are supernatural beings based on Japanese yōkai (spirits/demons), and they’re designed to “mix things up” and test how well you can adapt.
- Their Vibe: Daemons are visually… weird. 😵 They often have a “deceptively spiritual or charming look that hides their ruthless, sneaky attacks.” Their designs are a bizarre mix of biological and non-biological parts, making them feel unsettling and unpredictable. They’re supposed to feel alien, with movements and attacks that don’t follow the normal rules.
- How They Fight: Daemons are tricksters. 🃏 Their attack patterns are often odd and very specific, built to confuse you the first time you see them. Expect weird movements, surprise projectiles, and attacks with strange timing. The key here is patience and observation. 🧘♀️ Don’t rush in! Watch their patterns, find the opening, and then strike. They’re less about a head-on fight and more about solving a combat puzzle. 🧩
The Fiends 🐲
The Fiends are just the raw, primal anger of the Ninja Gaiden universe. This group is made up of the classic, giant monsters that series veterans know and fear. 😨
- Their Vibe: While Daemons are tricky, Fiends are aggressive. 😤 Their designs are meant to look powerful and memorable, emphasizing their animal-like ferocity with stuff like scales, horns, and claws. 🦖 They’re built to feel overwhelmingly strong and to make you panic a little when they show up.
- How They Fight: Fiends are all about relentless aggression and huge damage. They’re not gonna try to outsmart you; they’re gonna charge right at you, unleashing devastating combos and big area-of-effect (AoE) attacks. 💥 Surviving a Fiend fight comes down to flawless defense and expert positioning. You must master your defensive toolkit to ride out the storm and hit them back in the tiny windows after their attacks. These guys are a pure test of your button skills and your nerve. 😬
Returning Annoyances (Ugh!) 🐟
PlatinumGames, in a move that’s both a loving tribute and a little mean, brought back one of Ninja Gaiden 2’s most hated enemies: the Ghost Fish. 😱 They’re called “Eltus” now, but they’re still ghostly piranhas that attack in swarms and latch onto you. However, they’ve been changed to be less frustrating. Phew! 🙏 While they still do chip damage when they’re on you, they no longer interrupt your combos. This changes them from a game-ruining roadblock into more of a persistent pest. It’s like a little nod to long-time fans—a shared trauma that’s now a manageable (but still annoying) challenge. 😂
Section 9: The Gauntlet: Spoiler-Free Boss Dissection
The boss fights in Ninja Gaiden 4 are your final exams. 🎓 Each one is a perfectly designed duel meant to test one part of your skills. They’re not just big enemies with more health; they’re puzzles you have to solve with precision, timing, and smarts. 🧠 Here’s a spoiler-free guide to their game plans, focusing on the why of the fight, not just the what. (Bosses are listed by name and the chapter where you first meet ’em).
D.D.O. Commander (Chapter 1) 🧑✈️
- The Test: This is your tutorial boss. He’s a basic check to see if you were paying attention to the defensive system.
- Key Moves: Slow, easy-to-read three-hit sword combos; a big red-glow power slash with a loooong wind-up.
- Game Plan: This whole fight is just practice for parrying and (most importantly) using the Hōgeki Counter. Use his basic combos to practice your parry timing. When he sheathes his sword and glows red 👹, your job is to pop Bloodraven Form and counter him. The long wind-up is on purpose, to give you a big window to learn this must-know mechanic.
D.D.O. Proto-Goliath (Chapter 2) 🦾
- The Test: Can you prioritize the right target? Are you aware of your surroundings?
- Key Moves: He brings friends! 🤖 He’s got multiple flying and ground drones with him. He himself does slow, powerful hammer slams that leave damaging electric puddles ⚡ on the ground.
- Game Plan: The drones are the real problem. Ignore the big guy at first. Use your Raven Gear and air attacks to take out all the annoying drones first. They shoot at you constantly and limit your space. While you’re dealing with them, just keep moving to avoid the Goliath’s slow hammer slams and do not stand in the electric pools. 🚫 Once all the little guys are gone, the fight is easy. Just bait out his hammer slam and punish him while he’s recovering.
Kitsune Courtesan (Chapter 3 & 16) 🦊
- The Test: Recognizing a rhythm and dealing with ranged attacks.
- Key Moves: Rhythmic combos with her umbrella 🌂; spinning attacks; and a “bullet-hell” style wave of projectiles that she telegraphs with a red glow.
- Game Plan: This boss moves almost like she’s dancing 💃. The key is to learn the beat of her combos to time your parries. The first time you fight her, just be aggressive. When you have your rematch, she’s tougher. Your biggest damage window comes from using a Bloodraven attack (like the Yatousen’s drill) to counter her red-glow projectile attack. This will smash through her guard and leave her wide open for a beatdown.
Kagachi (Chapter 13) ⚔️
- The Test: A pure, 1v1 duel. This is a test of your patience and your defensive skills.
- Key Moves: Super fast attacks. He also has a very defensive stance that blocks almost everything you throw at him. And watch out for his lightning-fast red-glow counters.
- Game Plan: This fight is a test of your willpower. Do not be aggressive. 🚫 Rushing in is a death sentence. You have to bait him into attacking you, perfectly parry his string to make a tiny opening, get in a few hits, and then immediately back off. If you get greedy, he will punish you. ☠️ The Yatousen’s drill form is a huge help here for piercing his tough defense during those brief parry-staggers.
Ryu Hayabusa (Chapter 19) 🐉
- The Test: This is it. The final exam. 📝 A complete test of every single skill you’ve learned.
- Key Moves: The full, unleashed moveset of the Dragon Ninja. We’re talking his signature Flying Swallow 🦅, the Izuna Drop 🤸, and a powered-up Gleam Form. ✨
- Game Plan: There’s no simple trick here. You just have to play perfectly. You have to perfect dodge his Flying Swallow, parry his normal combos, and just survive his Gleam Form. Your main damage will come from successfully landing Hōgeki Counters on his charged attacks. This isn’t a fight you ‘win’ easily; it’s a fight you survive, one perfect reaction at a time. Good luck. 🤞
Dark Dragon (Chapter 19 – Final Boss) 🐲
- The Test: Endurance. Can you apply everything you know while under extreme pressure?
- Key Moves: Huge, massive area-of-effect (AoE) attacks; environmental hazards all over the place; and a super-fast “Phantom Form” in its second phase.
- Game Plan: Phase one is all about survival. 🏃 Keep moving, use the environment for cover, and learn the telegraphs for his massive AoE blasts. Phase two is when you get aggressive. You have to use the power of the Dark Dragon Blade to attack the exposed core on the Dragon’s chest. You’ll need perfect Hōgeki counters and dodges to survive its new speed and power in Phantom Form. This is the ultimate climax of every challenge you’ve faced. Go get ’em! 🏆
🧘 Part V: Beyond Death – Advanced Concepts & The Future 🚀
Section 10: The Art of the Infinite: Advanced Tech and Combo Theory
So, you beat the story? 🥳 Memorized every boss pattern? You feel the rhythm of combat in your bones? Awesome. Now a new path opens up. Welcome to the world of advanced tech! 🤓 These are the high-skill moves that turn your gameplay from “attack, dodge, attack” into one long, beautiful, unbroken flow of pure ownage. This is the stuff that separates the Master Ninjas from everyone else.
The Theory of the Cancel 🚫
At the highest level of play, “finishing your move” is a bad idea. Every attack has a recovery animation, that little moment of “cool-down” where you’re vulnerable. 😬 Advanced play is all about deleting those windows by using animation cancels.
- Shuriken Cancels: The most basic and useful cancel. Throwing a shuriken ✴️ is super fast, and you can do it during the recovery frames of most other moves (especially heavy combo finishers). This lets you instantly go from a big attack into a block, a dodge, or even a new attack. Poof! Vulnerability gone.
- Directional Input Cancels: This one’s more technical. Some big attacks (especially in Bloodraven Form) can have their recovery time shortened or just plain canceled by flicking the stick (back, forward, or a 360 🔄) at just the right time.
- Form Cancels: Even the act of popping into Yakumo’s Bloodraven Form 🦇 can cancel the recovery of his normal attacks. This is a super slick way to keep the pressure on while powering up.
Essence and the Ultimate Technique Loop 🌀
The Ultimate Technique (UT) is one of your strongest moves, but charging it up is risky ’cause you’re just standing there. 🧍 Advanced players get around this by mastering essence and the On-Land Ultimate Technique (OLUT).
- Essence Management: You know those colorful orbs 🔴🟡🔵 that dead enemies drop? That’s essence. If you hold the charge button, you’ll suck ’em in to charge your UT way faster. The trick is to kill an enemy, leave their essence on the ground, kill another enemy with a normal combo, and then start charging. You’ll absorb all the essence on the field at once for a near-instant UT. ⚡
- OLUT Mastery: Like we talked about, the OLUT means starting your UT charge on the exact frame you land from a jump 👟. When you combine this with good essence management, you get a wicked-powerful loop. You can kill enemy A, use an OLUT to absorb their essence and unleash a UT on enemy B, then use their essence to fuel your next OLUT. 💥 A true master can clear whole rooms of enemies this way without ever being vulnerable.
The “Infinite” Air Combo 🤹
In Ninja Gaiden 4, the sky is your canvas. 🎨 The game’s systems let you pull off incredibly long, stylish air combos that can keep a single enemy locked up forever. The whole theory is based on “resetting” your resources.
- Weapon Switch Extension: You can do a full air combo with one weapon, switch to another weapon in the air 🔄, do its full combo, and so on. This alone can keep you in the air for a long time.
- Wind Path Reset: But here’s the real secret sauce. Using the Wind Path move on an enemy you’re currently juggling resets your in-air combo counter. 😲 This means you can do a full air combo, use Wind Path on the enemy, and then… do the exact same combo again. By cycling through your weapons and using Wind Path resets, you can theoretically keep an enemy in the air until they’re totally defeated. It’s the ultimate show of skill. 🤩
Section 11: Sharpening the Blade for “The Two Masters”
Beating the main story isn’t the end, friend! 🥳 Team Ninja and PlatinumGames have already announced a major DLC expansion called “The Two Masters,” coming in early 2026. 🗓️ This DLC promises to continue the story, exploring what happens with Ryu and Yakumo. But more importantly, it’s adding new weapons, new challenges, and a ton of new endgame stuff. 📈 For the ninja who’s mastered the base game, this DLC is your next big mountain to climb. 🏔️
The main event of “The Two Masters” is a new signature weapon for both Ryu and Yakumo, and they sound awesome.
- Ryu’s Dual Pincer-like Gauntlets 👊: The Dragon Ninja gets a pair of close-range gauntlets! They’re all about “close-range ferocity with fluid motion.” This sounds like a total change from the Dragon Sword, pushing Ryu into a faster, more aggressive brawler-style of combat. 🥊
- Yakumo’s Massive Scythe 💀: The Raven hero gets a massive scythe. It’s described as a “slower but devastating weapon that rewards precision and timing.” This weapon seems like the exact opposite of his fast starting blades, probably focusing on big, wide, sweeping attacks that you have to time just right. ⏳
And these aren’t just new skins! They’ll fully plug into the Bloodbind Ninjutsu and Gleam systems, with new transformations and combos. 💥 What’s really interesting is that this seems to flip the script on the characters’ whole design! 🔄 In the main game, Ryu = focused Team NINJA style, and Yakumo = flashy PlatinumGames style. This DLC turns that upside down! 🤯 Ryu gets fast, stylish gauntlets (a classic Platinum-style weapon). Yakumo gets a giant, heavy-hitting scythe (a weapon with a long history in Team NINJA games like Nioh).
This is such a smart idea! 💡 The DLC is gonna force everyone out of their comfort zones. It’s gonna make Ryu players learn to be aggressive and flashy 💅 and make Yakumo players learn to be patient and precise 💪. It’s the ultimate team-up, testing how adaptable you really are.
On top of the new weapons and story, “The Two Masters” will also add a bunch of new endgame challenges, totally separate from the Ninja Trials in the base game. 📈 All this new content means that the most dedicated ninjas will have plenty of reasons to keep their skills (and their blades) sharp, continuing their endless journey to become a true Super Ninja. 🥷✨
Disclaimer: This is an unofficial fan work, all trademarks and copyrights for Ninja Gaiden 4 belong to the developer PlatinumGames Inc. / Team NINJA / KOEI TECMO GAMES CO., LTD. & publisher Xbox Game Studios.
Find the game here! https://store.steampowered.com/app/2627260/NINJA_GAIDEN_4/
